在开发小程序的时候,需要用到发布文章这个功能,于是就需要使用富文本编辑器。而微信小程序则正好有editor这个组件,不过editor组件的功能,还需要我们自己去调用富文本编辑器的api去自定义。富文本在wxml中可使用<rich-text nodes="{{ value }}"></<rich-text>标签展示。想直接用的可以跳到二、(4)。如果你也向我一样从0开始搭建,那真的是钛裤辣!
一、准备工作
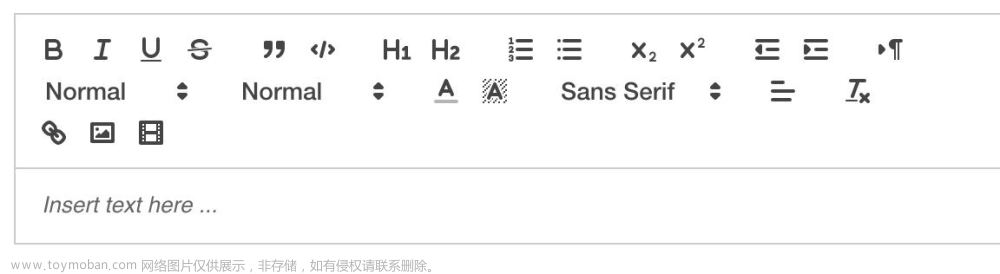
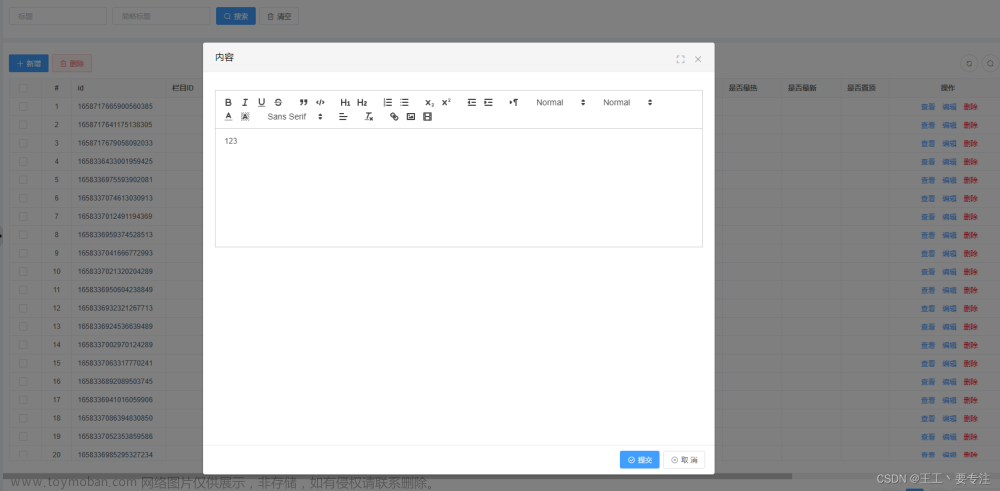
先看看效果图,然后我们再进一步进行搭建。

我们先看官方文档,搭建上面的这种编辑器需要用到bindready(初始化实例编辑器)、bindfocus(光标聚焦)、bindblur(光标失焦)、bindinput(输入内容时触发)、bindstatuschange(工具栏状态发生变化时触发)这几个属性。

点击相关 api:EditorContext可以看到这样一些方法,在调用这些方法之前需要创建一个实例,只有通过这个实例才能够调用以下的这些方法。创建实例需要用到 wx.createSelectorQuery ,相关创建的代码放到下文。创建完实例后,我们将会用到以下几个方法:
1、EditorContext.format(string name, string value)(修改样式,name和value需要在wxml进行绑定)
2、EditorContext.insertDivider()(插入分割线,需要绑定事件)
3、EditorContext.insertImage(Object object)(插入图片,需要绑定事件)
4、EditorContext.blur()(键盘失焦时收起键盘)
EditorContexthttps://developers.weixin.qq.com/miniprogram/dev/api/media/editor/EditorContext.html

二、开始创建
1、wxml如下代码
在editor中绑定bindready(初始化实例编辑器)、bindfocus(光标聚焦)、bindblur(光标失焦)、bindinput(输入内容时触发)、bindstatuschange(工具栏状态发生变化时触发)这几个属性。在toolBar中绑定catchtouchend(点击工具栏时获取状态)。我们现在只需要管这几个事件、其他的class和style样式可以忽略。
<!--pages/oneEditor/oneEditor.wxml-->
  <view>
    <editor id="editor"  bindready="onEditorReady" bindinput="onInput" bindblur="onBlur" bindstatuschange="onStatusChange">
    </editor>
  </view>
  <view class="toolBar" catchtouchend="format">
    <i></i>
    <i></i>
    <i></i>
    <i></i>
    <i></i>
    <i></i>
    <i></i>
    <i></i>
    <i></i>
    <i></i>
    <i></i>
    <i></i>
    <i></i>
    <i></i>
    <i></i>
  </view>
2、JS代码如下,我们按照函数调用的顺序进行讲解
(1)在初始化编辑器时需要用到<editor>中的id="editor" bindready="onEditorReady",这里用到的上面讲的wx.createSelectorQuery()。oneEditor就是我们生成的实例,随便你取啥名,到时候调用方法的时候使用,例如this.oneEditor.format()。
 onEditorReady(){
    var that=this
    // 初始化一个实例
    wx.createSelectorQuery().select('#editor').context(res=>{
      that.oneEditor=res.context
      console.log(res.context)
    }).exec()
  },
(2) 初始化完成后(因为class和style还没有添加,所以你们显示的效果图和我的不一样),可以用到<editor>中的οninput="onInput"了,输入1111111可以看到输出的html。
onInput(e){
    console.log(e.detail.delta.ops)
    console.log("html",e.detail.html)
  },
(3)<editor>中的 bindblur="onBlur" ,这里就用到上面的实例了,调用这个方法可以在失焦的时候收起键盘。
  onBlur(e){
    console.log(e)
    this.oneEditor.blur()
  },
(4)<editor>中的bindstatuschange="onStatusChange"就需要我们在部署完class后讲解了,因为这里涉及到工具栏状态的变化,而我们工具栏还没有部署。下面开始部署工具栏的样式,回到组件那个页面,因为我们需要用到官方的样式和图标,所以得去官网找样式代码。


(5) 这个代码片段其实就是一个编辑器了,但是我们从0开始搭建真的是钛裤辣!(体验的就是一个过程的乐趣)。然后我们把common移到我们自己的项目中去,需要和你的编辑器同层级(方便应用),把assets移到你的编辑器里面,就行了。


然后我们的class就可以全部加上啦(再加上上面的wxml怕你们忘了)wxml代码如下:
<!--pages/oneEditor/oneEditor.wxml-->
  <view class="editor_container" style="height:{{editorHeight}}rpx">
    <editor id="editor" class="editor" placeholder="{{placeholder}}"    bindready="onEditorReady" bindinput="onInput" bindblur="onBlur" bindstatuschange="onStatusChange">
    </editor>
  </view>
  <view class="toolBar" catchtouchend="format" style="bottom:{{keyboardHeight}}px">
    <i class="iconfont icon-charutupian" catchtouchend="insertImage"></i>
    <i class="iconfont icon-fengexian" catchtouchend="addDivider"></i>
    <i class="iconfont icon-format-header-1 {{formats.header===1?'active':''}}" data-name="header" data-value="1"></i>
    <i class="iconfont icon-format-header-2 {{formats.header===2?'active':''}}" data-name="header" data-value="2"></i>
    <i class="iconfont icon-format-header-3 {{formats.header===3?'active':''}}" data-name="header" data-value="3"></i>
    <i class="iconfont icon-format-header-4 {{formats.header===4?'active':''}}" data-name="header" data-value="4"></i>
    <i class="iconfont icon-zitixiahuaxian {{formats.underline?'active':''}}" data-name="underline"></i>
    <i class="iconfont icon-zitijiacu {{formats.bold?'active':''}}" data-name="bold"></i>
    <i class="iconfont icon-zitixieti {{formats.italic=='em'?'active':''}}" data-name="italic"></i>
    <i class="iconfont icon-zuoduiqi {{formats.align=='left'?'active':''}}" data-name="align" data-value="left"></i>
    <i class="iconfont icon-juzhongduiqi {{formats.align=='center'?'active':''}}" data-name="align"
      data-value="center"></i>
    <i class="iconfont icon-youduiqi {{formats.align=='right'?'active':''}}" data-name="align" data-value="right"></i>
    <i class="iconfont icon-zuoyouduiqi {{formats.align=='justify'?'active':''}}" data-name="align"
      data-value="justify"></i>
    <i class="iconfont icon-zitishanchuxian {{formats.strike=='del'?'active':''}}" data-name="strike"></i>
    <i class="iconfont icon-clearedformat" catchtouchend="clearFormat"></i>
  </view>
(6)wxss代码入下,引入官方的样式和图标,具体的图标样式还需要自己在asserts中的iconfont去寻找引用格式为class="iconfont icon+具体样式",样式有了。那么上面的{{formats}}、data-name、datavalue是咋回事捏。下面开始讲。
/* pages/oneEditor/oneEditor.wxss */
@import "../common/lib/weui.wxss";
@import "./assets/iconfont.wxss";
.tool{
  margin-left: 10rpx;
}
.iconfont {
  display: inline-block;
  width: 30px;
  height: 30px;
  cursor: pointer;
  font-size: 20px;
}
.editor_container {
  /* position: absolute;  */
  top: 0;
  left: 0;
  width: 100%;
}
.editor {
  box-sizing: border-box;
  width: 100%;
  height: 100%;
  font-size: 16px;
  line-height: 1.5;
  overflow: auto;
  padding: 10px 10px 20px 10px;
  border: 1px solid #ECECEC;
}
.active{
  color: #409EFF;
}
.toolBar{
  box-sizing: border-box;
  padding: 0 10px;
  height: 50px;
  width: 100%;
  position: fixed;
  left: 0;
  right: 100%;
  bottom: 0;
  display: flex;
  align-items: center;
  justify-content: space-between;
  border: 1px solid #ECECEC;
  border-left: none;
  border-right: none;
}
(7)怕看岔了,于是把上面wxml再粘贴下来了,这里讲bindstatuschange="onStatusChange"和catchtouchend="format"这俩是一块的。
<!--pages/oneEditor/oneEditor.wxml-->
  <view class="editor_container" style="height:{{editorHeight}}rpx">
    <editor id="editor" class="editor" placeholder="{{placeholder}}"    bindready="onEditorReady" bindinput="onInput" bindblur="onBlur" bindstatuschange="onStatusChange">
    </editor>
  </view>
  <view class="toolBar" catchtouchend="format" style="bottom:{{keyboardHeight}}px">
    <i class="iconfont icon-charutupian" catchtouchend="insertImage"></i>
    <i class="iconfont icon-fengexian" catchtouchend="addDivider"></i>
    <i class="iconfont icon-format-header-1 {{formats.header===1?'active':''}}" data-name="header" data-value="1"></i>
    <i class="iconfont icon-format-header-2 {{formats.header===2?'active':''}}" data-name="header" data-value="2"></i>
    <i class="iconfont icon-format-header-3 {{formats.header===3?'active':''}}" data-name="header" data-value="3"></i>
    <i class="iconfont icon-format-header-4 {{formats.header===4?'active':''}}" data-name="header" data-value="4"></i>
    <i class="iconfont icon-zitixiahuaxian {{formats.underline?'active':''}}" data-name="underline"></i>
    <i class="iconfont icon-zitijiacu {{formats.bold?'active':''}}" data-name="bold"></i>
    <i class="iconfont icon-zitixieti {{formats.italic=='em'?'active':''}}" data-name="italic"></i>
    <i class="iconfont icon-zuoduiqi {{formats.align=='left'?'active':''}}" data-name="align" data-value="left"></i>
    <i class="iconfont icon-juzhongduiqi {{formats.align=='center'?'active':''}}" data-name="align"
      data-value="center"></i>
    <i class="iconfont icon-youduiqi {{formats.align=='right'?'active':''}}" data-name="align" data-value="right"></i>
    <i class="iconfont icon-zuoyouduiqi {{formats.align=='justify'?'active':''}}" data-name="align"
      data-value="justify"></i>
    <i class="iconfont icon-zitishanchuxian {{formats.strike=='del'?'active':''}}" data-name="strike"></i>
    <i class="iconfont icon-clearedformat" catchtouchend="clearFormat"></i>
</view>(8)onStatusChange,先在<i>中绑定data-name,name的名字参考官方文档,我点击了斜体(看52行),然后这个函数就把工具栏的开启状态记录下来了,于是我们只需根据formats的值来判断是否开启了工具栏的某个功能,改变class中的触发样式,比如我把active设置成了蓝色。

(9) format是用来保存当前样式的,比如我点击H1,会记录一个name:header标识这个是标题,而value:1标识这是一个一级标题,其他的类似。

3、通过实例调用api
只需要在wxml绑定函数,并在函数里面调用api就可以了,例如插入下划线,我在wxml用catchtouchend="addDivider"绑定了一个事件:
  addDivider(){
    this.oneEditor.insertDivider(res=>{
      console.log(res)
    })
  },
文章来源:https://www.toymoban.com/news/detail-488088.html
还有一些调整键盘高度和上传图片这里就不讲了吧,直接上代码。文章来源地址https://www.toymoban.com/news/detail-488088.html
onLoad: function (options) {
//获取键盘高度
wx.onKeyboardHeightChange((res) => {
console.log("KeyboardHeight",res.height)
this.oneEditor.scrollIntoView()
this.setData({
keyboradHight:res.height
})
})
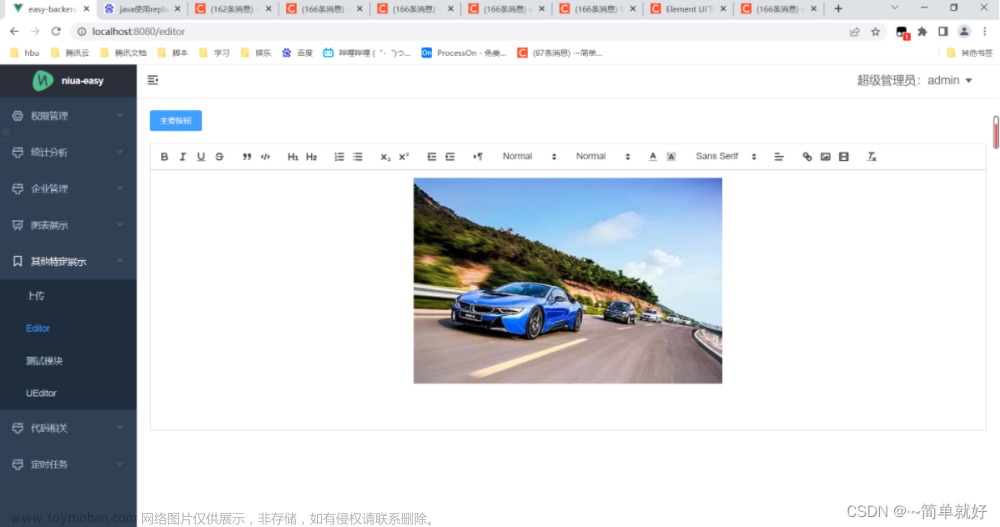
},insertImage(){
var that=this
wx.chooseMedia({
count:1,
mediaType:['image'],
sourceType:['album', 'camera'],
success(res){
console.log(res)
let url=res.tempFiles[0].tempFilePath
that.oneEditor.insertImage({
src:url,
extClass:"image",
alt:"图片加载错误",
width:"100%",
height:"300rpx"
})
}
})
},到了这里,关于微信小程序editor富文本编辑器的文章就介绍完了。如果您还想了解更多内容,请在右上角搜索TOY模板网以前的文章或继续浏览下面的相关文章,希望大家以后多多支持TOY模板网!