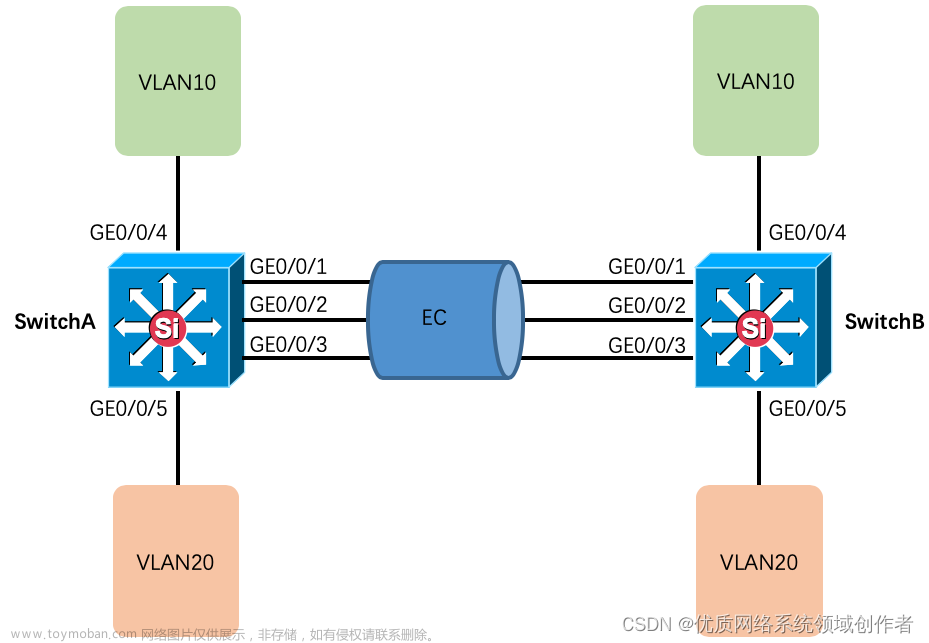
CE系列交换机堆叠配置:
第一台交换机配置:
system-view immediately
#不用每次都输入 commit提交了
sysname sw1
stack
stack member 1 priority 105
stack member 1 domain 10
quit
inter stack-port 1/1
port member-group inter 10GE 1/0/1
dis stack config
save
每二台交换机配置:
system-view immediately
#不用每次都输入 commit提交了
sysname sw2
stack
stack member 1 domain 10
stack member 1 renumber 2 inherit-config
quit
inter stack-port 1/1
port member-group inter 10GE 1/0/1
dis stack config
save
s系列交换机堆叠配置:
专用堆叠卡:
组网需求
在一个新建的企业网络中,要求接入设备具有充足的端口数目,并且希望网络结构简单,易于配置和管理。
如图1所示,根据用户需求,SwitchA、SwitchB和SwitchC三台接入交换机采用环形堆叠组网,并通过跨设备Eth-Trunk连接上层设备SwitchD。其中,SwitchA、SwitchB和SwitchC的角色分别为主、备、从,堆叠ID分别为0、1、2,优先级分别为200、100、100。由于组成堆叠的成员交换机在逻辑上是一个整体,所以整个网络在扩展了端口数量的同时也方便了用户对网络的管理和维护。
现网设备以S5720-C-EI交换机为例,S5720-C-EI交换机支持通过堆叠卡连接方式组建堆叠。
配置思路
采用如下的思路配置:
设备先下电,安装ES5D21VST000堆叠插卡后,再将设备上电。
为方便用户管理,配置成员交换机的堆叠ID和优先级。
SwitchA、SwitchB、SwitchC下电。按照图1所示,使用QSFP+线缆连接各堆叠端口并上电。
堆叠连接时一台交换机的STACK 1端口只能与另一台交换机的STACK 2端口相连接。
如果SwitchA、SwitchB、SwitchC设备款型不完全一致,也必须使用可以混堆的设备款型。设备是否可以混堆,请参见堆叠配置注意事项中的描述。
组建堆叠时,最终生效的软件版本是竞争为主交换机的设备使用的软件版本。备交换机和从交换机会自动同步主交换机的软件版本。
操作步骤
安装ES5D21VST000堆叠插卡
为SwitchA、SwitchB、SwitchC安装ES5D21VST000堆叠插卡,详细安装说明可参见安装堆叠卡。
为了便于识别设备,分别设置设备名称为SwitchA,SwitchB,SwitchC。以SwitchA设备为例。
system-view
[HUAWEI] sysname SwitchA
配置堆叠ID和堆叠优先级
配置SwitchA的堆叠优先级为200。
[SwitchA] stack slot 0 priority 200
Warning:Do not frequently modify the Priority because it will make the stack split. Continue? [Y/N]:y
配置SwitchB的堆叠ID为1。
[SwitchB] stack slot 0 renumber 1
Warning: All the configurations related to the slot ID will be lost after the slot ID is modified.
Do not frequently modify the slot ID because it will make the stack split. Continue? [Y/N]:y
Info: Stack configuration has been changed, and the device needs to restart to make the configuration effective.
配置SwitchC的堆叠ID为2。
[SwitchC] stack slot 0 renumber 2
Warning: All the configurations related to the slot ID will be lost after the slot ID is modified.
Do not frequently modify the slot ID because it will make the stack split. Continue? [Y/N]:y
Info: Stack configuration has been changed, and the device needs to restart to make the configuration effective.
SwitchA、SwitchB、SwitchC下电,使用QSFP+线缆连接各堆叠端口并上电。
下电前,建议通过命令save保存配置。
一台交换机的STACK 1端口只能与另一台交换机的STACK 2端口相连接,否则堆叠组建不成功。
为保证堆叠组建成功,建议按照以下顺序进行连线上电(如果用户希望某台交换机为主交换机可以先为其上电。例如,按以下顺序连线上电后,SwitchA为主交换机):
为SwitchA~SwitchC下电;
连接SwitchA与SwitchB之间的堆叠线缆;
先为SwitchA上电,SwitchA启动后,再为SwitchB上电;
检查SwitchA与SwitchB的堆叠组建是否成功,详细检查方法可参见检查堆叠组建是否成功;
与上一步类似:连接SwitchC与SwitchB和SwitchA之间的堆叠线缆,再为SwitchC上电;
检查SwitchA、SwitchB、SwitchC的堆叠组建是否成功,详细检查方法可参见检查堆叠组建是否成功。
配置跨设备Eth-Trunk
在堆叠系统上行链路上配置跨设备Eth-Trunk,具体配置过程请参见配置堆叠Eth-Trunk示例。
验证配置结果
查看堆叠系统的基本信息。
display stack
业务口普通线缆堆叠:
组网需求
在一个新建的企业网络中,要求接入设备具有充足的端口数目,并且希望网络结构简单,易于配置和管理。
如图1所示,根据用户需求,SwitchA、SwitchB和SwitchC三台接入交换机采用环形堆叠组网,并通过跨设备Eth-Trunk连接上层设备SwitchD。其中,SwitchA、SwitchB和SwitchC的角色分别为主、备、从,堆叠ID分别为0、1、2,优先级分别为200、100、100。由于组成堆叠的成员交换机在逻辑上是一个整体,所以整个网络在扩展了端口数量的同时也方便了用户对网络的管理和维护。
现网设备以S5700-LI交换机为例,S5700-LI交换机支持通过业务口连接方式组建堆叠。
配置思路
采用如下的思路配置:
为了能够在堆叠的成员交换机之间转发数据报文,需要配置逻辑堆叠端口,并添加物理成员端口。
为方便用户管理,配置成员交换机的堆叠ID和优先级。
SwitchA、SwitchB、SwitchC下电。按照图1所示,使用SFP+堆叠电缆连接各物理成员端口后再上电。
为提高可靠性、增加上行链路带宽,配置跨设备Eth-Trunk。
本端设备逻辑堆叠端口stack-port n/1里的物理成员端口只能与对端设备逻辑堆叠端口stack-port m/2里的物理成员端口相连。
如果SwitchA、SwitchB、SwitchC设备款型不完全一致,也必须使用可以混堆的设备款型。设备是否可以混堆,请参见堆叠配置注意事项中的描述。
组建堆叠时,最终生效的软件版本是竞争为主交换机的设备使用的软件版本。备交换机和从交换机会自动同步主交换机的软件版本。
操作步骤
配置逻辑堆叠端口并加入物理成员端口
配置SwitchA的业务口GigabitEthernet0/0/27、GigabitEthernet0/0/28为物理成员端口,并加入到相应的逻辑堆叠端口。
system-view
[HUAWEI] sysname SwitchA
[SwitchA] interface stack-port 0/1
[SwitchA-stack-port0/1] port interface gigabitethernet 0/0/27 enable
Warning: Enabling stack function may cause configuration loss on the interface. Continue? [Y/N]:y
Info: This operation may take a few seconds. Please wait.
[SwitchA-stack-port0/1] quit
[SwitchA] interface stack-port 0/2
[SwitchA-stack-port0/2] port interface gigabitethernet 0/0/28 enable
Warning: Enabling stack function may cause configuration loss on the interface. Continue? [Y/N]:y
Info: This operation may take a few seconds. Please wait.
[SwitchA-stack-port0/2] quit
配置SwitchB的业务口GigabitEthernet0/0/27、GigabitEthernet0/0/28为物理成员端口,并加入到相应的逻辑堆叠端口。
system-view
[HUAWEI] sysname SwitchB
[SwitchB] interface stack-port 0/1
[SwitchB-stack-port0/1] port interface gigabitethernet 0/0/27 enable
Warning: Enabling stack function may cause configuration loss on the interface. Continue? [Y/N]:y
Info: This operation may take a few seconds. Please wait.
[SwitchB-stack-port0/1] quit
[SwitchB] interface stack-port 0/2
[SwitchB-stack-port0/2] port interface gigabitethernet 0/0/28 enable
Warning: Enabling stack function may cause configuration loss on the interface. Continue? [Y/N]:y
Info: This operation may take a few seconds. Please wait.
[SwitchB-stack-port0/2] quit
配置SwitchC的业务口GigabitEthernet0/0/27、GigabitEthernet0/0/28为物理成员端口,并加入到相应的逻辑堆叠端口。
system-view
[HUAWEI] sysname SwitchC
[SwitchC] interface stack-port 0/1
[SwitchC-stack-port0/1] port interface gigabitethernet 0/0/27 enable
Warning: Enabling stack function may cause configuration loss on the interface. Continue? [Y/N]:y
Info: This operation may take a few seconds. Please wait.
[SwitchC-stack-port0/1] quit
[SwitchC] interface stack-port 0/2
[SwitchC-stack-port0/2] port interface gigabitethernet 0/0/28 enable
Warning: Enabling stack function may cause configuration loss on the interface. Continue? [Y/N]:y
Info: This operation may take a few seconds. Please wait.
[SwitchC-stack-port0/2] quit
配置堆叠ID和堆叠优先级
配置SwitchA的堆叠优先级为200。
[SwitchA] stack slot 0 priority 200
Warning: Do not frequently modify the Priority because it will make the stack split. Continue? [Y/N]:y
配置SwitchB的堆叠ID为1。
[SwitchB] stack slot 0 renumber 1
Warning: All the configurations related to the slot ID will be lost after the slot ID is modified.
Do not frequently modify the slot ID because it will make the stack split. Continue? [Y/N]:y
Info: Stack configuration has been changed, and the device needs to restart to make the configuration effective.
配置SwitchC的堆叠ID为2。
[SwitchC] stack slot 0 renumber 2
Warning: All the configurations related to the slot ID will be lost after the slot ID is modified.
Do not frequently modify the slot ID because it will make the stack split. Continue? [Y/N]:y
Info: Stack configuration has been changed, and the device needs to restart to make the configuration effective.
SwitchA、SwitchB、SwitchC下电,使用SFP+电缆连接后再上电。
下电前,建议通过命令save保存配置。
本设备的stack-port 0/1必须连接邻设备的stack-port 0/2,否则堆叠组建不成功。
为保证堆叠组建成功,建议按照以下顺序进行连线上电(如果用户希望某台交换机为主交换机可以先为其上电。例如,按以下顺序连线上电后,SwitchA为主交换机):
为SwitchA~SwitchC下电;
连接SwitchA与SwitchB之间的堆叠线缆;
先为SwitchA上电,SwitchA启动后,再为SwitchB上电;
检查SwitchA与SwitchB的堆叠组建是否成功,详细检查方法可参见检查堆叠组建是否成功;
与上一步类似:连接SwitchC与SwitchB和SwitchA之间的堆叠线缆,再为SwitchC上电;
检查SwitchA、SwitchB、SwitchC的堆叠组建是否成功,详细检查方法可参见检查堆叠组建是否成功。
配置跨设备Eth-Trunk
在堆叠系统上行链路上配置跨设备Eth-Trunk,具体配置过程请参见配置堆叠Eth-Trunk示例。
验证配置结果
查看堆叠系统的基本信息。
[SwitchA] display stack
业务口专用线缆堆叠(不用配置,只要保存就可以):
安装前准备
安装部件准备:专用堆叠线缆。
工具准备:防静电腕带或防静电手套。
操作注意事项
安装前需做好防静电准备。
布放线缆时,注意不要与其它线缆发生缠绕。
拔出线缆时,先向内轻推线缆连接器,再向外拉拉环,直到取出线缆。
连线规则
堆叠成员设备之间,本端设备的逻辑堆叠端口1必须与对端设备的逻辑堆叠端口2相连。交换机已经对物理端口预设了逻辑堆叠端口号,如表3-49所示,也可以执行命令display stack port auto-cable-info查看。
如图3-37所示,按照交换机从上到下的顺序依次连线。
连线时注意线缆的主备端,确保:最上面交换机的所有端口连接的都是线缆主端,最下面交换机的所有端口连接的都是线缆备端,中间交换机的2个逻辑端口分别连接主端和备端。
连接后系统自动组建堆叠,自动分配堆叠的ID和堆叠的角色。
如果不是环形组网或者连线时没有区分线缆的主备两端,只要确保本端设备的逻辑堆叠端口1是与对端设备的逻辑堆叠端口2相连,也可组建堆叠,但堆叠系统的主和备、设备的堆叠ID都是随机生成。
如果是已有配置的交换机进行堆叠扩容场景:
插入专用堆叠线缆的接口上不能有业务配置。
连线时无需关注堆叠线缆的主备端,只需确保本端的逻辑堆叠端口1是与对端的逻辑堆叠端口2相连。
堆叠ID无冲突时使用交换机原堆叠ID,有冲突时会自动分配新的堆叠ID。
业务口堆叠的连接拓扑包括链形连接和环形连接。以3台S5720-28X-LI-AC交换机进行环形连接和链形连接举例,交换机的前两个10GE光口为逻辑堆叠端口1,后两个10GE光口为逻辑堆叠端口2,线缆连接方式如图3-37和图3-38所示。这里逻辑堆叠端口使用两个物理成员口相连进行堆叠,也可以使用一个物理成员口相连进行堆叠,为了保证可靠性,建议逻辑堆叠端口使用两个或多个物理成员口相连进行堆叠。
在连接专用堆叠线缆之前,为了保证操作安全,建议先将所有交换机下电。
专用堆叠线缆的两端区分主和备,带有Master标签的一端为主端,不带有标签的一端为备端。
在交换机运行过程中对接口插拔专用堆叠线缆时,为避免短时间内多次插拔出现震荡,接口在60秒后才会进行业务口和堆叠口的切换。即接口插入专用堆叠线缆60秒后才会切换为堆叠口,接口拔出专用堆叠线缆60秒后才会切换为业务口。若专用堆叠线缆拔出前保存了堆叠配置,则堆叠口不会再自动切换为业务口。
接口插入专用堆叠线缆后,如果不能自动切换为堆叠口,会上报告警信息:1.3.6.1.4.1.2011.5.25.183.1.22.64 hwStackAutoConfigFailed,请根据告警中的可能原因和处理步骤进行处理。
连接堆叠线缆前,如果交换机已下电,建议按照顺序对交换机进行连线上电。如果用户希望某台交换机为主交换机可以先为其上电,启动完成后再给其它交换机上电。(以SwitchA、SwitchB、SwitchC 3台链形组网为例,按照如下顺序对交换机上电后,SwitchA为主交换机):
先为SwitchA上电,SwitchA启动后,再为SwitchB上电。
检查SwitchA、SwitchB的堆叠组建是否成功,详细检查方法可参见检查堆叠组建是否成功。
再为SwitchC上电。
检查SwitchA、SwitchB、SwitchC的堆叠组建是否成功,详细检查方法可参见检查堆叠组建是否成功。
连接堆叠线缆前,如果交换机没有下电,堆叠系统的角色和ID会进行随机分配。

检查堆叠组建成功后,将专用堆叠线缆自动生成的配置写入Flash。
[Stack] save stack configuration 或save
防断裂mad直连式检测
组网需求
如图1所示,SwitchA和SwitchB组成堆叠系统,SwitchA的堆叠ID为0,SwitchB的堆叠ID为1。
为防止堆叠分裂时,网络中存在两个配置冲突的堆叠系统,用户可以启用多主检测功能,减少堆叠分裂给网络带来的影响。
配置思路
采用如下的思路配置MAD功能:
配置指定接口采用直连方式多主检测功能。
操作步骤
配置接口采用直连方式多主检测功能
配置接口GigabitEthernet0/0/5采用直连方式多主检测功能。
system-view
[HUAWEI] interface gigabitethernet 0/0/5
[HUAWEI-GigabitEthernet0/0/5] mad detect mode direct
Warning: This command will block the port, and no other configuration running on
this port is recommended. Continue?[Y/N]:y
[HUAWEI-GigabitEthernet0/0/5] quit
[HUAWEI] quit
配置接口GigabitEthernet1/0/5采用直连方式多主检测功能。
system-view
[HUAWEI] interface gigabitethernet 1/0/5
[HUAWEI-GigabitEthernet1/0/5] mad detect mode direct
Warning: This command will block the port, and no other configuration running on
this port is recommended. Continue?[Y/N]:y
[HUAWEI-GigabitEthernet1/0/5] quit
[HUAWEI] quit
也可用多主检测方法:
interface eth-trunk trunk-id
mad detect mode relay
代理检测方法,当代理为一台交换机时,在指定的代理设备上:
interface eth-trunk trunk-id
mad relay
堆叠主备倒换:
slave switchover
堆叠系统mac地址切换时间:
stack timer mac-address switch-delay delay-time
清除堆叠配置
reset stack configutation
查看堆叠系统多主检测详细配置信息。
display mad verbose
Current MAD domain: 0
Current MAD status: Detect
Mad direct detect interfaces configured:
GigabitEthernet0/0/5
GigabitEthernet1/0/5
Mad relay detect interfaces configured:
Excluded ports(configurable):
Excluded ports(can not be configured):
GigabitEthernet0/0/27
GigabitEthernet1/0/27
查看堆叠成员交换机的数目。
通过display device命令,查看到成员交换机的数目两台。
盒式堆叠配置案例:


两台虚拟化(集群配置 ):

 文章来源:https://www.toymoban.com/news/detail-490871.html

 文章来源地址https://www.toymoban.com/news/detail-490871.html
到了这里,关于华为CE系列和S系列交换机堆叠配置及mad检测的文章就介绍完了。如果您还想了解更多内容,请在右上角搜索TOY模板网以前的文章或继续浏览下面的相关文章,希望大家以后多多支持TOY模板网!


