Java数据流传输响应
前提
在折腾ChatGpt集成在SpringBoot项目时,发现了ChatGpt api返回数据时有两种返回方式,一种是使用流传输,另一种是直接返回全部的数据。如果使用流传输,响应的速度很快,不需要获取全部答案的内容后再开始响应返回,可以达到服务端返回数据时像打字机一样的效果返回答案;而直接返回全部数据的话,需要在服务端接收完ChatGpt的全部结果后再一次性把全部的数据响应返回给客户端进行展示,这个缺点就是很慢,一个结果最快也需要10秒钟。所以本文尝试模仿ChatGpt使用流数据的方式返回数据给客户端。
Springboot文字流响应
首先再服务端测试使用流响应固定的文本字符串数据
主要方法是使用HttpServletResponse响应流,需要设置响应头如下:
res.setHeader("Content-Type", "text/event-stream");
res.setContentType("text/event-stream");
res.setCharacterEncoding("UTF-8");
res.setHeader("Pragma", "no-cache");
测试接口如下:
// 测试响应流
    @GetMapping("/api/test/sss")
    @AnonymousAccess
    public void test(String prompt, HttpServletResponse res) throws IOException, InterruptedException {
        log.info("【prompt内容】:{}", prompt);
        String str = "       什么是爱而不得? \n" +
                "东边日出西边雨,道是无晴却有晴。\n" +
                "他朝若是同淋雪,此生也算共白头。\n" +
                "我本将心向明月,奈何明月照沟渠。\n" +
                "此时相望不相闻,愿逐月华流照君。\n" +
                "衣带渐宽终不悔,为伊消得人憔悴。\n" +
                "此情可待成追忆,只是当时已惘然。\n" +
                "人生若只如初见,何事西风悲画扇。\n" +
                "曾经沧海难为水,除却巫山不是云。\n" +
                "何当共剪西窗烛,却话巴山夜雨时。\n" +
                "天长地久有时尽,此恨绵绵无绝期。\n" +
                "\n";
        // 响应流
        res.setHeader("Content-Type", "text/event-stream");
        res.setContentType("text/event-stream");
        res.setCharacterEncoding("UTF-8");
        res.setHeader("Pragma", "no-cache");
        ServletOutputStream out = null;
        try {
            out = res.getOutputStream();
            for (int i = 0; i < str.length(); i++) {
                out.write(String.valueOf(str.charAt(i)).getBytes());
                // 更新数据流
                out.flush();
                Thread.sleep(100);
            }
        } catch (IOException e) {
            e.printStackTrace();
        } finally {
            try {
                if (out != null) out.close();
            } catch (IOException e) {
                e.printStackTrace();
            }
        }
    }
使用该接口,返回的数据就需要使用流来接受处理
如果直接再浏览器中请求该接口,效果如下:
Web端接收流数据并显示
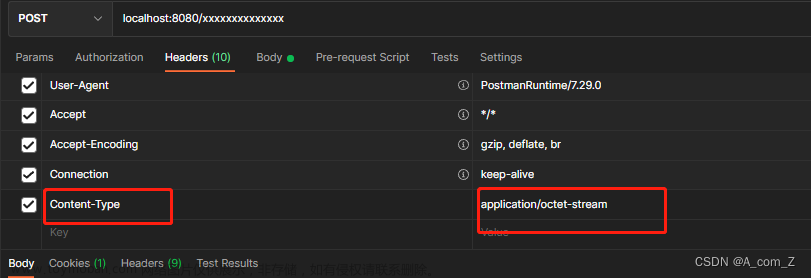
在js中接收该文字流数据需要设置响应类型为:xhr.setRequestHeader("Content-Type", "text/event-stream");
具体实现数据接收代码如下:
        // 创建 XMLHttpRequest 对象
        const xhr = new XMLHttpRequest();
        // 设置请求的 URL
        xhr.open(
            "GET",
            `http://localhost:8080/api/test/sss`
        );
        // 设置响应类型为 text/event-stream
        xhr.setRequestHeader("Content-Type", "text/event-stream");
        // 监听 readyStateChange 事件
        xhr.onreadystatechange = () => {
            // 如果 readyState 是 3,表示正在接收数据
            if (xhr.readyState === 3) {
                // 将数据添加到文本框中
                console.log('xhr.responseText :>> ', xhr.responseText);
                reply("images/touxiang.png", xhr.responseText, randomStr)
                var height = $("#message").height();
                $("html").scrollTop(height)
            }
        };
        // 发送请求
        xhr.send();
效果如下:

这种效果就实现了ChatGpt的那种流传输的效果。
SpingBoot集成ChatGPT使用流响应结果
具体集成ChatGPT SDK的教程可以查看官方文档:https://gitcode.net/mirrors/grt1228/chatgpt-java
导入pom依赖:
<dependency>
    <groupId>com.unfbx</groupId>
    <artifactId>chatgpt-java</artifactId>
    <version>1.0.13</version>
</dependency>
使用ChatGpt流传输的demo示例可以查看:https://gitcode.net/mirrors/grt1228/chatgpt-java/blob/main/src/test/java/com/unfbx/chatgpt/OpenAiStreamClientTest.java
官方Demo SDK连接ChatGPT的教程很详细,具体教程看上面的demo文档就好了,这里主要讲一下拿到数据的细节和怎么把拿到的流数据响应给客户端。
下面是SDK调用的示例方法
 public static void ChatGptSendV1(String prompt, ChatSocketVo chatSocketVo) throws IOException {
        OpenAiConfig openAiConfig = new OpenAiConfig();
        OpenAiStreamClient openAiClient = OpenAiStreamClient.builder()
                .apiKey(Collections.singletonList(openAiConfig.getTkoen()))
                //自己做了代理就传代理地址,没有可不不传
                .apiHost(openAiConfig.getDomain())
                .build();
        //聊天模型:gpt-3.5
        ConsoleEventSourceListener eventSourceListener = new ConsoleEventSourceListener();
        Message message = Message.builder().role(Message.Role.USER).content(prompt).build();
        ChatCompletion chatCompletion = ChatCompletion
                .builder()
                .model(ChatCompletion.Model.GPT_3_5_TURBO.getName())
                .temperature(0.2)
                .maxTokens(2048)
                .messages(Arrays.asList(message))
                .stream(true)
                .build();

        openAiClient.streamChatCompletion(chatCompletion, eventSourceListener);
        CountDownLatch countDownLatch = new CountDownLatch(1);
        try {
            countDownLatch.await();
        } catch (InterruptedException e) {
            e.printStackTrace();
        }
    }
在代码中消息的回调处理方法是:ConsoleEventSourceListener eventSourceListener = new ConsoleEventSourceListener();.
在openAiClient.streamChatCompletion(chatCompletion, eventSourceListener);调用流传输的方法中,传入了一个SSE的EventSourceListener。其中的代码如下:
package com.unfbx.chatgpt.sse;

import java.util.Objects;
import okhttp3.Response;
import okhttp3.ResponseBody;
import okhttp3.sse.EventSource;
import okhttp3.sse.EventSourceListener;
import org.slf4j.Logger;
import org.slf4j.LoggerFactory;

public class ConsoleEventSourceListener extends EventSourceListener {
    private static final Logger log = LoggerFactory.getLogger(ConsoleEventSourceListener.class);

    public ConsoleEventSourceListener() {
    }

    public void onOpen(EventSource eventSource, Response response) {
        log.info("OpenAI建立sse连接...");
    }

    public void onEvent(EventSource eventSource, String id, String type, String data) {
        log.info("OpenAI返回数据:{}", data);
        if (data.equals("[DONE]")) {
            log.info("OpenAI返回数据结束了");
        }
    }

    public void onClosed(EventSource eventSource) {
        log.info("OpenAI关闭sse连接...");
    }

    public void onFailure(EventSource eventSource, Throwable t, Response response) {
        try {
            if (Objects.isNull(response)) {
                log.error("OpenAI  sse连接异常:{}", t);
                eventSource.cancel();
            } else {
                ResponseBody body = response.body();
                if (Objects.nonNull(body)) {
                    log.error("OpenAI  sse连接异常data:{},异常:{}", body.string(), t);
                } else {
                    log.error("OpenAI  sse连接异常data:{},异常:{}", response, t);
                }

                eventSource.cancel();
            }
        } catch (Throwable var5) {
            throw var5;
        }
    }
}
很容易看出OpenAI回调流消息的处理方式是建立了sse连接,然而这个sse连接和WebSocket的使用很相似,在onEvent方法中data就是ai回答的消息内容。只是该默认的消息输出只做了日志的输出。
所以我们可以这样处理:
- 自己新建一个类集成EventSourceListener,模仿上面的ConsoleEventSourceListener,重写对应的结果建立连接,返回数据,关闭连接等方法。
- 在EventSourceListener类的构造函数中可以传入你需要的场景值等,比如websocket的session,然后每次接收到消息时,立马使用websoket将消息发送到客户端。
- 注意全局参数的多线程安全问题,由于建立的是长连接,构造参数传进的场景值必然需要当作全局变量进行定义,但是如果在多人同时使用改接口时,场景值就会错乱出现线程安全问题。解决方法可以在定义全局变量时加上@Autowired注解,原理可以参考其他教程。
自定义EventSourceListener代码示例如下(加入了一些消息记录的处理逻辑):
package com.team.modules.system.Utils;

import java.util.Date;
import java.util.Objects;

import com.fasterxml.jackson.databind.ObjectMapper;
import com.team.modules.system.domain.ChatgptInfo;
import com.team.modules.system.domain.vo.ChatSocketVo;
import com.team.modules.system.domain.vo.IpDataVo;
import com.team.modules.websocket.WebSocketChatServe;
import com.team.utils.CDKeyUtil;
import com.unfbx.chatgpt.entity.chat.ChatCompletionResponse;
import lombok.SneakyThrows;
import okhttp3.Response;
import okhttp3.ResponseBody;
import okhttp3.sse.EventSource;
import okhttp3.sse.EventSourceListener;
import org.slf4j.Logger;
import org.slf4j.LoggerFactory;
import org.springframework.beans.factory.annotation.Autowired;

/**
 * Created by tao.
 * Date: 2023/6/8 15:51
 * 描述:
 */
public class ChatEventSourceListener extends EventSourceListener {
    private static final Logger log = LoggerFactory.getLogger(com.unfbx.chatgpt.sse.ConsoleEventSourceListener.class);
    private static WebSocketChatServe webSocketChatServe = new WebSocketChatServe();
    @Autowired
    private String resContent;
    @Autowired
    private ChatSocketVo chatSocketVo;


    public ChatEventSourceListener(ChatSocketVo socketVo) {
        chatSocketVo = socketVo;
        resContent = CDKeyUtil.getSequence() + ":::";
    }

    public void onOpen(EventSource eventSource, Response response) {
        log.info("OpenAI建立sse连接...");
    }

    int i = 0;

    @SneakyThrows
    public void onEvent(EventSource eventSource, String id, String type, String data) {
        // OpenAI处理数据
//        log.info(i + "---------OpenAI返回数据:{}", data);
//        i++;
        if (!data.equals("[DONE]")) {
            ObjectMapper mapper = new ObjectMapper();
            ChatCompletionResponse completionResponse = mapper.readValue(data, ChatCompletionResponse.class); // 读取Json
            String content = mapper.writeValueAsString(completionResponse.getChoices().get(0).getDelta());
            resContent = resContent + content;
            // 使用ws进行数据传输
            webSocketChatServe.sendMessageByKey(resContent, chatSocketVo.getKey());
        } else {
            log.info("OpenAI返回数据结束了");
            String[] split = resContent.split(":::");
            resContent = CDKeyUtil.getSequence() + ":::";
            // 记录内容和ip信息等
            String ip = chatSocketVo.getIpAddr();
            String ua = chatSocketVo.getUa();
            // 获取相关信息
            IpDataVo ipData = chatSocketVo.getIpDataVo();
            String address = ipData.getCountry() + " " + ipData.getProvince() + " " + ipData.getCity() + " " + ipData.getDistrict();
//            String address = "";
            ChatgptInfo chatgptInfo = new ChatgptInfo(chatSocketVo.getPrompt(), split[1], ip, address, ua, new Date(), ipData.getLocation());
            chatSocketVo.getChatgptService().save(chatgptInfo);
        }
    }

    public void onClosed(EventSource eventSource) {
        log.info("OpenAI关闭sse连接...");
    }

    @SneakyThrows
    public void onFailure(EventSource eventSource, Throwable t, Response response) {
        try {
            if (Objects.isNull(response)) {
                log.error("OpenAI  sse连接异常:{}", t);
                eventSource.cancel();
            } else {
                ResponseBody body = response.body();
                if (Objects.nonNull(body)) {
                    log.error("OpenAI  sse连接异常data:{},异常:{}", body.string(), t);
                } else {
                    log.error("OpenAI  sse连接异常data:{},异常:{}", response, t);
                }
                eventSource.cancel();
            }
        } catch (Throwable var5) {
            throw var5;
        }
    }
}
效果如下: 文章来源:https://www.toymoban.com/news/detail-492478.html
当然响应返回数据的方式也可以使用文章开头介绍的使用响应流进行,缺点是还是得去规避线程安全问题,可以加一个@Async注解;然后尝试过在本地用该方法没发现有什么问题,但是部署在服务器发现该方法就行不通了,会等所有数据全部返回才将数据返回。文章来源地址https://www.toymoban.com/news/detail-492478.html
到了这里,关于SpringBoot仿GPT数据流传输的文章就介绍完了。如果您还想了解更多内容,请在右上角搜索TOY模板网以前的文章或继续浏览下面的相关文章,希望大家以后多多支持TOY模板网!


