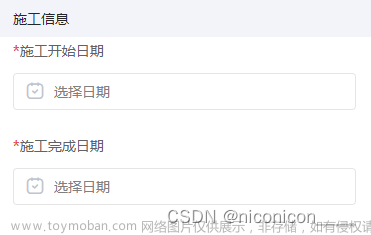
1、v-model封装picker组件
(1)封装组件myPicker.vue
<template>
	<view class="my-picker">
		<picker @change="handleChange" :range="options" :range-key="rangeKey" :value="index">
			{{ currentValue || placeholoder }}
		</picker>
	</view>
</template>

<script>
	export default {
		name: "myPicker",
		props: {
			value: String | Number,
			options: Array,
			rangeKey: {
				type: String,
				default: "label"
			},
			rangeValue: {
				type: String,
				default: "value"
			},
			placeholoder: {
				type: String,
				default: "请选择",
			}
		},
		data() {
			return {
				index: -1
			}
		},
		computed: {
			currentValue() {
				return this.index == -1 ? "" : this.options[this.index][this.rangeKey]
			}
		},
		watch: {
			value(val) {
				this.index = this.options.findIndex(item => item[this.rangeValue] == val);
			}
		},
		methods: {
			handleChange(e) {
				this.index = e.detail.value;
				let currentValue = this.index == -1 ? "" : this.options[this.index][this.rangeValue];
				this.$emit("input", currentValue);
                this.$emit("change", currentValue);
			}
		}
	}
</script>
(2)组件调用
<template>
	<view class="container">
        <MyPicker v-model="reason" :options="reasonOptions" range-key="name"></MyPicker>
    </view>
</template>

<script>
	import MyPicker from './components/myPicker.vue'
	export default {
		name: 'order',
		data() {
			return {
				reason: "",
				reasonOptions: [
                    { name: "办公", value: "1" },
                    { name: "洽谈", value: "2" },
                    { name: "会议", value: "3" }
                ]
			}
		},
		components: {
			MyPicker
		}
	}
</script>
(3)属性说明
| 属性名 | 类型 | 默认值 | 说明 |
|---|---|---|---|
| options | Object | 数据选项,默认[{ name: "办公", value: "1" }]格式 | |
| rangeKey | String | label | 数据选项的属性名 |
| rangeValue | String | value | 数据选项的属性值 |
| placeholoder | String | 请选择 | 未选择数据时的默认提示语 |
| @change | EventHandle | value 改变时触发 change 事件 |
2、自定义picker样式
小程序里面的picker组件是是没法修改样式的,如果想要自定义样式需要使用picker-view,如下面所示,封装一个自定义样式的picker组件。
(1)封装组件myPickerView.vue
<template>
	<view class="my-picker-view" v-show="value">
		<uni-transition mode-class="slide-bottom" :show="value"
			:styles="{'width':'100%','height':'100vh','position':'fixed','bottom':'0'}">
			<view class="empty-box" @click="handleCancel"></view>
			<view class="picker-box">
				<view class="picker-top">
					<view class="cancel" @click="handleCancel">取消</view>
					<view class="title">{{ title }}</view>
					<view class="submit" @click="handleSubmit">确定</view>
				</view>
				<picker-view :value="pickerValue" indicator-class="indicator" @change="handleChange"
					@pickstart="pickstart" @pickend="pickend" :immediate-change="true">
					<picker-view-column class="picker-content">
						<view class="picker-item" v-for="(item, index) in options" :key="index">{{ item[rangeKey] }}</view>
					</picker-view-column>
				</picker-view>
			</view>
		</uni-transition>
	</view>
</template>

<script>
	export default {
		name: "myPickerView",
		data() {
			return {
				pickerValue: [0],
				isScroll: false
			}
		},
		props: {
			value: Boolean,
			options: Array,
			title: {
				type: String,
				default: ""
			},
			rangeKey: {
				type: String,
				default: "label"
			}
		},
		methods: {
			// 确定
			handleSubmit() {
				if(!this.isScroll) {
					this.$emit('input', false);
					this.$emit("change", this.options[this.pickerValue[0]]);
				}
			},
			// 取消
			handleCancel() {
				this.isScroll = false;
				this.$emit('input', false);
			},
			handleChange(e) {
				this.pickerValue = e.detail.value;
			},
			pickstart(e) {
				this.isScroll = true;
			},
			pickend(e) {
				this.isScroll = false;
			}
		}
	}
</script>

<style scoped lang='less'>
	.my-picker-view {
		width: 100%;
		height: 100%;
		position: fixed;
		z-index: 100;
		bottom: 0;
		background-color: rgba(0,0,0,0.5);
		.empty-box {
			width: 100%;
			height: 50%;
			position: absolute;
			top: 0;
			left: 0;
		}
		.picker-box {
			width: 100%;
			height: 50%;
			position: absolute;
			bottom: 0;
			.picker-top {
				height: 120rpx;
				width: 100%;
				display: flex;
				justify-content: space-between;
				align-items: center;
				background-color: #FFFFFF;
				border-radius: 40rpx 40rpx 0 0;
				.cancel, .submit {
					width: 132rpx;
					font-size: 28rpx;
					color: #040405;
					text-align: center;
				}
				.submit {
					color: #3973B5;
				}
				.title {
					width: calc(~"100% - 300rpx");
					text-align: center;
					color: #040405;
					font-weight: bold;
					font-size: 36rpx;
					white-space: nowrap;
					overflow: hidden;
					text-overflow: ellipsis;
				}
			}
			/deep/ picker-view {
				background-color: #FFFFFF;
				height: calc(~"100% - 120rpx");
				.picker-item  {
					height: 96rpx !important;
					line-height: 96rpx !important;
					text-align: center;
				}
				.indicator {
					height: 96rpx;
				}
			}
		}
	}
</style>
(2)组件调用文章来源:https://www.toymoban.com/news/detail-493166.html
<template>
	<view class="container">
        <view class="required-item">
			<view class="lt">
				<text class="icon">*</text>作业园区
			</view>
			<view class="rt">
				<view class="rt-text" @click="isShowPark = true">{{ form.parkLabel || '请选择' }}</view>
			    <uni-icons type="right"></uni-icons>
			</view>
		</view>
        <MyPickerView v-model="isShowPark" :options="cityOptions" range-key="name" title="籍贯" @change="handleChangePark"></MyPickerView>
    </view>
</template>

<script>
	import MyPickerView from './components/myPickerView.vue'
	export default {
		name: 'vehicleAppoint',
		data() {
			return {
				form: {
				    parkLabel: "",
				    parkValue: ""
                },
				cityOptions: [
					{ name: '北京', value: "beijing" },
					{ name: '上海', value: "shanghai" },
					{ name: '广州', value: "guangzhou" },
					{ name: '深圳', value: "shenzhen" },
					{ name: '成都', value: "chengdu" },
					{ name: '武汉', value: "wuhan" },
					{ name: '重庆', value: "chongqing" },
					{ name: '贵州', value: "guizhou" },
                ],
				isShowPark: false
			}
		},
		components: {
			MyPickerView
		},
        methods: {
			handleChangePark(data) {
				this.form.parkLabel = data.name;
				this.form.parkValue = data.value;
			}
        }
	}
</script>(3)属性说明文章来源地址https://www.toymoban.com/news/detail-493166.html
| 属性名 | 类型 | 默认值 | 说明 |
|---|---|---|---|
| options | Object | 数据选项,默认[{ name: "办公", value: "1" }]格式 | |
| rangeKey | String | label | 数据选项的属性名 |
| title | String | 标题 | |
| @change | EventHandle | value 改变时触发 change 事件 |
到了这里,关于uni-app 使用v-model封装picker组件和自定义样式的文章就介绍完了。如果您还想了解更多内容,请在右上角搜索TOY模板网以前的文章或继续浏览下面的相关文章,希望大家以后多多支持TOY模板网!


