首先下载depot_tools
按官方教程来
https://commondatastorage.googleapis.com/chrome-infra-docs/flat/depot_tools/docs/html/depot_tools_tutorial.html#_setting_up
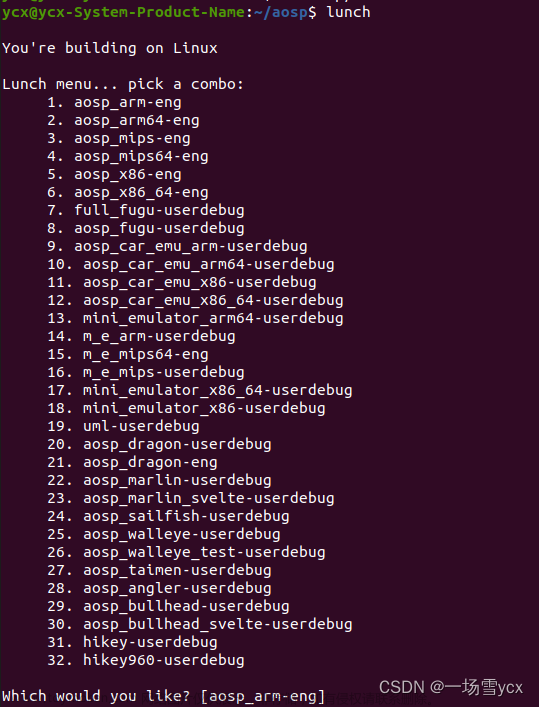
$ git clone https://chromium.googlesource.com/chromium/tools/depot_tools.git$ export PATH=/path/to/depot_tools:$PATH设置depot 的环境变量然后走 fetch webrtc_android的脚本 看官方链接https://webrtc.googlesource.com/src/+/main/docs/native-code/android/
$ fetch --nohooks webrtc_android
$ gclient sync
这步骤操作完后会产生这两个目录
.gclient   # A configuration file for you source checkout
src/       # Top-level Chromium source checkout.
Compiling
首先运行下一些相关依赖
./build/install-build-deps.sh --android- Generate projects using GN.
Make sure your current working directory is src/ of your workspace. Then run:
$ gn gen out/Debug --args='target_os="android" target_cpu="arm64"'You can specify a directory of your own choice instead of out/Debug, to enable managing multiple configurations in parallel.
- To build for ARM64: use
target_cpu="arm64" - To build for 32-bit x86: use
target_cpu="x86" - To build for 64-bit x64: use
target_cpu="x64"
- Compile using:
$ autoninja -C out/Debug弄完后生成能导入android studio的gradle依赖 用官方推荐的有个坑加上--canary会出错 去掉了这个参数
./build/android/gradle/generate_gradle.py --output-directory $PWD/out/Debug --target "//examples:AppRTCMobile" --use-gradle-process-resources --split-projects
然后编一个debug版的包
首先在
./build/toolchain/android/BUILD.gn 里注释这几行
...
template("android_clang_toolchain") {
  ...
  _prefix = rebase_path("$clang_base_path/bin", root_build_dir)
  cc = "$_prefix/clang"
  cxx = "$_prefix/clang++"
  ar = "$_prefix/llvm-ar"
  ld = cxx
  readelf = _tool_prefix + "readelf"
  nm = _tool_prefix + "nm"
  # 注释掉下面两行配置,即可实现 unstrip
  # strip = rebase_path("//buildtools/third_party/eu-strip/bin/eu-strip",
  #                     root_build_dir)
  # use_unstripped_as_runtime_outputs = android_unstripped_runtime_outputs
  ...
}
...
然后编译脚本加两个参数
gn gen out/Debug --args='target_os="android" target_cpu="arm64" is_debug=true symbol_level=2 android_full_debug=true'
然后 autoninja -C out/Debug
android studio应用的时候同步更改
...
android {
  ...
  buildTypes {
    ...
    debug {
      ...
      debuggable true     // 必须设置为 true
      jniDebuggable true  // 必须设置为 true
      minifyEnabled false // 必须设置为 false
    }
  }

  ...
  packagingOptions {
    ...
    // 如果不设置 doNotStrip,编译出来的安装包还是会丢失调试信息;
    // 因为我们只编译了 arm64-v8a 架构的包,所以只需要配置这一行即可
    doNotStrip "*/arm64-v8a/*.so"
  }
}
...
debug llvm的路径还得配置下
参考链接代码片段_webRTC Android源码拉取与编译 https://webrtc.mthli.com/basic/webrtc-breakpoint/
webrtc android studio 断点调试 so debug configuration 选上so的地址 到jnilibs目录下 然后
在java层打一个断点 走到nativeXX方法的时候切到lldb debug 点这里暂停
/home/denghg/sourceCode/android_webrtc/dhg_AppRTCMobile/rtc_framework/src/main/jniLibs
 到上面为止可以打上lldb命令行的debug了 然后还需要在android studio里直接图形化打c++的断点需要设置两个点 一个是symbol directories 到jni的目录
令一个是映射下源码路径 (我这是直接copy源码到rtc_framework路径下的也可以直接映射源码
下次试)
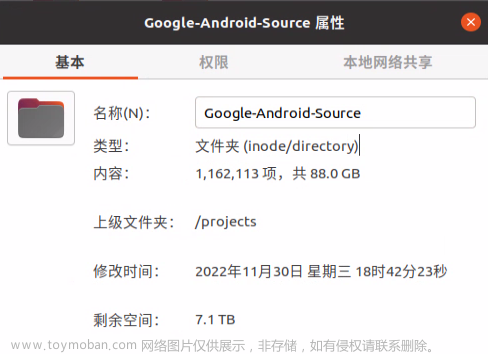
把webrtc的源码拷贝到rtc_framework/src/main 下面大概5G方便打c++的断点 [项目结构如图]

settings set target.source-map ./ /home/denghg/sourceCode/android_webrtc/dhg_AppRTCMobile/rtc_framework/src/main/src
 文章来源:https://www.toymoban.com/news/detail-494397.html
附一张断点图 文章来源地址https://www.toymoban.com/news/detail-494397.html
到了这里,关于Webrtc android的编译步骤的文章就介绍完了。如果您还想了解更多内容,请在右上角搜索TOY模板网以前的文章或继续浏览下面的相关文章,希望大家以后多多支持TOY模板网!