一、引言
- 描述:关于六月十二日发表的博客【Android开发基础】SQLite开发复刻通讯录、记事本、计算机,有粉丝向我问最后面的计算器作业有没有逻辑层的代码,这里我会给出具体代码。
- 难度:初级
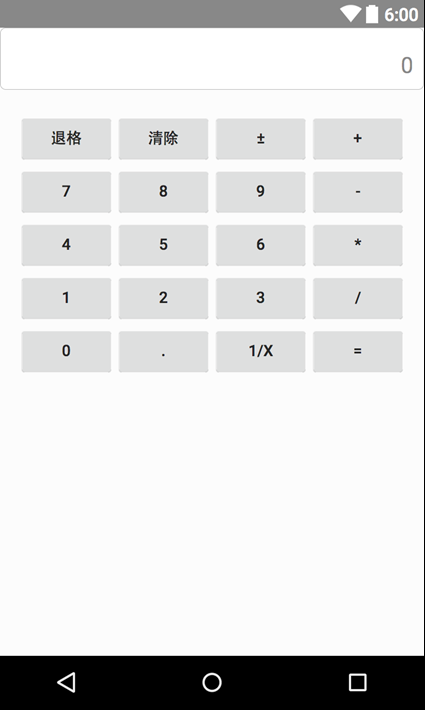
- 效果

二、设计
1、案例
对于初学者或算法不好的朋友,我觉得有必要先要看一下这样的一个计算方法。
好像是叫函数嵌套方法(专业名词忘了,如果有知道的可以在评论区告诉大家)
	public static void main(String[] args) {
		System.out.print("输入一个数,计算1~n的数和:");
		Scanner input = new Scanner(System.in);
		int max = input.nextInt();
		System.out.print("结果:" + add(0, 1, max));
	}

	private static int add(int S, int min, int max) {
		if(min <= max) {
			S += min;
			return add(S, ++min, max);
		}
		return S;
	}

2、算法设计
public class alg {

    public static double parse(String formula) {

        int temp = formula.indexOf("+");
        if (temp != -1) {
            return parse(formula.substring(0, temp)) + parse(formula.substring(temp + 1));
        }

        temp = formula.lastIndexOf("-");
        if (temp != -1) {
            return parse(formula.substring(0, temp)) - parse(formula.substring(temp + 1));
        }

        temp = formula.indexOf("*");
        if (temp != -1) {
            return parse(formula.substring(0, temp)) * parse(formula.substring(temp + 1));
        }

        temp = formula.lastIndexOf("/");
        if (temp != -1) {
            return parse(formula.substring(0, temp)) / parse(formula.substring(temp + 1));
        }

        return Double.parseDouble(formula);
    }

}
三、编码
1、UI界面设计
一个优雅的计算界面可能是功能相似的按钮使用的UI样式是一样的

(1)按钮样式设计
- 计算符号
比如,基本的 加减乘除(+、-、*、/)和等于(=)
<?xml version="1.0" encoding="utf-8"?>
<shape xmlns:android="http://schemas.android.com/apk/res/android"
    android:shape="rectangle">
    <!--设置颜色-->
    <solid android:color="#A7DD4E2E"
        />
    <!--设置圆角-->

    <corners android:radius="90dp"/>

    <size
        android:width="90dp"
        android:height="90dp"/>

</shape>
- 数字
我观察了一些计算器,还有00这种数字按钮,泰库辣
<?xml version="1.0" encoding="utf-8"?>
<shape xmlns:android="http://schemas.android.com/apk/res/android"
    android:shape="rectangle">
    <!--设置颜色-->
    <solid android:color="#A6282828"
        />
    <!--设置圆角-->

    <corners android:radius="90dp"/>

    <size
        android:width="90dp"
        android:height="90dp"/>

</shape>
- 特殊
比如,AC:清空
<?xml version="1.0" encoding="utf-8"?>
<shape xmlns:android="http://schemas.android.com/apk/res/android"
    android:shape="rectangle">
    <!--设置颜色-->
    <solid android:color="#A7989595"
        />
    <!--设置圆角-->

    <corners android:radius="90dp"/>

    <size
        android:width="90dp"
        android:height="90dp" />

</shape>
(2)主界面布局设计
关于主界面,我对其进行进一步的优化,主要参考多款手机的计算机的样式,才发现这种风格看起来对眼睛非常友好。
<?xml version="1.0" encoding="utf-8"?>
<LinearLayout xmlns:android="http://schemas.android.com/apk/res/android"
    xmlns:app="http://schemas.android.com/apk/res-auto"
    xmlns:tools="http://schemas.android.com/tools"
    android:layout_width="match_parent"
    android:layout_height="match_parent"
    tools:context=".MainActivity"
    android:orientation="vertical"
    android:background="#6F6A6A">

    <LinearLayout
        android:layout_width="match_parent"
        android:layout_height="wrap_content">

        <TextView
            android:id="@+id/jsq_text"
            android:layout_width="match_parent"
            android:layout_height="60dp"
            android:background="#FFFFFF"
            android:textSize="25dp"
            android:gravity="right"
            android:layout_marginTop="30dp"/>

    </LinearLayout>

    <LinearLayout
        android:layout_width="match_parent"
        android:layout_height="wrap_content"
        android:layout_marginTop="20dp"
        android:gravity="center">

        <Button
            android:id="@+id/ac"
            android:layout_width="wrap_content"
            android:layout_height="wrap_content"
            android:text="AC"
            android:layout_margin="5dp"
            android:textSize="25dp"
            android:background="@drawable/shape"/>

        <Button
            android:id="@+id/fang"
            android:layout_width="wrap_content"
            android:layout_height="wrap_content"
            android:text="+/-"
            android:layout_margin="5dp"
            android:textSize="25dp"
            android:background="@drawable/shape"/>

        <Button
            android:id="@+id/yu"
            android:layout_width="wrap_content"
            android:layout_height="wrap_content"
            android:text="%"
            android:layout_margin="5dp"
            android:textSize="25dp"
            android:background="@drawable/shape" />

        <Button
            android:id="@+id/chu"
            android:layout_width="wrap_content"
            android:layout_height="wrap_content"
            android:text="/"
            android:layout_margin="5dp"
            android:textSize="25dp"
            android:background="@drawable/shape_ceng"/>

    </LinearLayout>

    <LinearLayout
        android:layout_width="match_parent"
        android:layout_height="wrap_content"
        android:gravity="center">

        <Button
            android:id="@+id/one"
            android:layout_width="wrap_content"
            android:layout_height="wrap_content"
            android:text="1"
            android:layout_margin="5dp"
            android:textSize="25dp"
            android:background="@drawable/shape_hei"/>

        <Button
            android:id="@+id/two"
            android:layout_width="wrap_content"
            android:layout_height="wrap_content"
            android:text="2"
            android:layout_margin="5dp"
            android:textSize="25dp"
            android:background="@drawable/shape_hei"/>

        <Button
            android:id="@+id/there"
            android:layout_width="wrap_content"
            android:layout_height="wrap_content"
            android:text="3"
            android:layout_margin="5dp"
            android:textSize="25dp"
            android:background="@drawable/shape_hei" />

        <Button
            android:id="@+id/jia"
            android:layout_width="wrap_content"
            android:layout_height="wrap_content"
            android:text="+"
            android:layout_margin="5dp"
            android:textSize="25dp"
            android:background="@drawable/shape_ceng"/>

    </LinearLayout>

    <LinearLayout
        android:layout_width="match_parent"
        android:layout_height="wrap_content"
        android:gravity="center">

        <Button
            android:id="@+id/four"
            android:layout_width="wrap_content"
            android:layout_height="wrap_content"
            android:text="4"
            android:layout_margin="5dp"
            android:textSize="25dp"
            android:background="@drawable/shape_hei"/>

        <Button
            android:id="@+id/five"
            android:layout_width="wrap_content"
            android:layout_height="wrap_content"
            android:text="5"
            android:layout_margin="5dp"
            android:textSize="25dp"
            android:background="@drawable/shape_hei"/>

        <Button
            android:id="@+id/six"
            android:layout_width="wrap_content"
            android:layout_height="wrap_content"
            android:text="6"
            android:layout_margin="5dp"
            android:textSize="25dp"
            android:background="@drawable/shape_hei" />

        <Button
            android:id="@+id/jiang"
            android:layout_width="wrap_content"
            android:layout_height="wrap_content"
            android:text="-"
            android:layout_margin="5dp"
            android:textSize="25dp"
            android:background="@drawable/shape_ceng"/>

    </LinearLayout>

    <LinearLayout
        android:layout_width="match_parent"
        android:layout_height="wrap_content"
        android:gravity="center">

        <Button
            android:id="@+id/seven"
            android:layout_width="wrap_content"
            android:layout_height="wrap_content"
            android:text="7"
            android:layout_margin="5dp"
            android:textSize="25dp"
            android:background="@drawable/shape_hei"/>

        <Button
            android:id="@+id/event"
            android:layout_width="wrap_content"
            android:layout_height="wrap_content"
            android:text="8"
            android:layout_margin="5dp"
            android:textSize="25dp"
            android:background="@drawable/shape_hei"/>

        <Button
            android:id="@+id/nine"
            android:layout_width="wrap_content"
            android:layout_height="wrap_content"
            android:text="9"
            android:layout_margin="5dp"
            android:textSize="25dp"
            android:background="@drawable/shape_hei" />

        <Button
            android:id="@+id/cheng"
            android:layout_width="wrap_content"
            android:layout_height="wrap_content"
            android:text="*"
            android:layout_margin="5dp"
            android:textSize="25dp"
            android:background="@drawable/shape_ceng"/>

    </LinearLayout>

    <LinearLayout
        android:layout_width="match_parent"
        android:layout_height="wrap_content"
        android:gravity="center">

        <Button
            android:id="@+id/zero"
            android:layout_width="wrap_content"
            android:layout_height="wrap_content"
            android:text="0"
            android:layout_margin="10dp"
            android:textSize="25dp"
            android:background="@drawable/shape_ling"/>

        <Button
            android:id="@+id/dian"
            android:layout_width="wrap_content"
            android:layout_height="wrap_content"
            android:text="."
            android:layout_margin="5dp"
            android:textSize="25dp"
            android:background="@drawable/shape_hei" />

        <Button
            android:id="@+id/dengyu"
            android:layout_width="wrap_content"
            android:layout_height="wrap_content"
            android:text="="
            android:layout_margin="5dp"
            android:textSize="25dp"
            android:background="@drawable/shape_ceng"/>

    </LinearLayout>

</LinearLayout>
2、编码
(1)控件初始化
熟悉我的编码风格的,不用看都知道是绑定控件信息
	Button zero,one,two,there,four,five,six,seven,event,nine;
    Button jia,jiang,cheng,chu;
    Button dian,dengyu,ac;
    TextView text;

    private void init() {
        zero = findViewById(R.id.zero);
        one = findViewById(R.id.one);
        two = findViewById(R.id.two);
        there = findViewById(R.id.there);
        four = findViewById(R.id.four);
        five = findViewById(R.id.five);
        six = findViewById(R.id.six);
        seven = findViewById(R.id.seven);
        event = findViewById(R.id.event);
        nine = findViewById(R.id.nine);

        jia = findViewById(R.id.jia);
        jiang = findViewById(R.id.jiang);
        cheng = findViewById(R.id.cheng);
        chu = findViewById(R.id.chu);

        dian = findViewById(R.id.dian);
        dengyu = findViewById(R.id.dengyu);

        text = findViewById(R.id.jsq_text);
        ac = findViewById(R.id.ac);

        zero.setOnClickListener(clickListener);
        one.setOnClickListener(clickListener);
        two.setOnClickListener(clickListener);
        there.setOnClickListener(clickListener);
        four.setOnClickListener(clickListener);
        five.setOnClickListener(clickListener);
        six.setOnClickListener(clickListener);
        seven.setOnClickListener(clickListener);
        event.setOnClickListener(clickListener);
        zero.setOnClickListener(clickListener);
        nine.setOnClickListener(clickListener);
        jia.setOnClickListener(clickListener);
        jiang.setOnClickListener(clickListener);
        cheng.setOnClickListener(clickListener);
        chu.setOnClickListener(clickListener);
        dian.setOnClickListener(clickListener);
        dengyu.setOnClickListener(clickListener);
        ac.setOnClickListener(clickListener);
    }
(2)事件监听器
主要负责数据渲染和算法引用文章来源:https://www.toymoban.com/news/detail-496409.html
    public View.OnClickListener clickListener = new View.OnClickListener() {
        /**
         * Called when a view has been clicked.
         *
         * @param v The view that was clicked.
         */
        @Override
        public void onClick(View v) {
            switch (v.getId()) {
                case R.id.zero:
                    js += "0";
                    text.setText(js);
                    break;
                case R.id.one:
                    js += "1";
                    text.setText(js);
                    break;
                case R.id.two:
                    js += "2";
                    text.setText(js);
                    break;
                case R.id.there:
                    js += "3";
                    text.setText(js);
                    break;
                case R.id.four:
                    js += "4";
                    text.setText(js);
                    break;
                case R.id.five:
                    js += "5";
                    text.setText(js);
                    break;
                case R.id.six:
                    js += "6";
                    text.setText(js);
                    break;
                case R.id.seven:
                    js += "7";
                    text.setText(js);
                    break;
                case R.id.event:
                    js += "8";
                    text.setText(js);
                    break;
                case R.id.nine:
                    js += "9";
                    text.setText(js);
                    break;
                case R.id.jia:
                    js += "+";
                    text.setText(js);
                    break;
                case R.id.jiang:
                    js += "-";
                    text.setText(js);
                    break;
                case R.id.cheng:
                    js += "*";
                    text.setText(js);
                    break;
                case R.id.chu:
                    js += "/";
                    text.setText(js);
                    break;
                case R.id.dian:
                    js += ".";
                    text.setText(js);
                    break;
                case R.id.dengyu:
                    double a = alg.parse(js);
                    text.setText(String.valueOf(a));
                    break;
                case R.id.ac:
                    js = "";
                    text.setText(js);
                    break;
            }
        }
    };
四、附件
源代码:https://download.csdn.net/download/weixin_48916759/87935078文章来源地址https://www.toymoban.com/news/detail-496409.html
到了这里,关于【Android开发基础】计算器逻辑层代码补充的文章就介绍完了。如果您还想了解更多内容,请在右上角搜索TOY模板网以前的文章或继续浏览下面的相关文章,希望大家以后多多支持TOY模板网!


