开场白直接引用官方文档的吧。
为了在保证支付安全的前提下,带给商户简单、一致且易用的开发体验,我们推出了全新的微信支付 APIv3 接口。
为啥不用官方 SDK?
官方 SDK 不错,只是依赖 Apache-httpclient,可是我连 Apache-httpclient 都不想用啊,于是就自行接入。其实官方文档也很详尽,只是有点乱(否则就没有我写本文的需要啦)。官方文档如是说。
在规则说明中,你将了解到微信支付API v3的基础约定,如数据格式、参数兼容性、错误处理、UA说明等。我们还重点介绍了微信支付API v3新的认证机制(证书/密钥/签名)。你可以跟随着开发指南,使用命令行或者你熟悉的编程语言,一步一步实践签名生成、签名验证、证书和回调报文解密和敏感信息加解密。在最后的常见问题中,我们总结了商户接入过程遇到的各种问题。
准备条件
该申请的都申请,把所需的条件准备好。形成如下 Java POJO 要求的字段。
/**
 * 微信支付 商户配置
 *
 * @author Frank Cheung<sp42@qq.com>
 *
 */
public class MerchantConfig {
	/**
	 * 商户号
	 */
	private String mchId;

	/**
	 * 商户证书序列号
	 */
	private String mchSerialNo;

	/**
	 * V3 密钥
	 */
	private String apiV3Key;

	/**
	 * 商户私钥
	 */
	private String privateKey;

	public String getMchId() {
		return mchId;
	}

	public void setMchId(String mchId) {
		this.mchId = mchId;
	}

	public String getMchSerialNo() {
		return mchSerialNo;
	}

	public void setMchSerialNo(String mchSerialNo) {
		this.mchSerialNo = mchSerialNo;
	}

	public String getApiV3Key() {
		return apiV3Key;
	}

	public void setApiV3Key(String apiV3Key) {
		this.apiV3Key = apiV3Key;
	}

	public String getPrivateKey() {
		return privateKey;
	}

	public void setPrivateKey(String privateKey) {
		this.privateKey = privateKey;
	}

}
签名
访问商户平台的支付接口都要在 HTTP Head 加上签名才能访问。下图以小程序的为例子。

如何生成签名?下面按照文档指引,以获取商户平台证书为例子,生成签名。
准备私钥
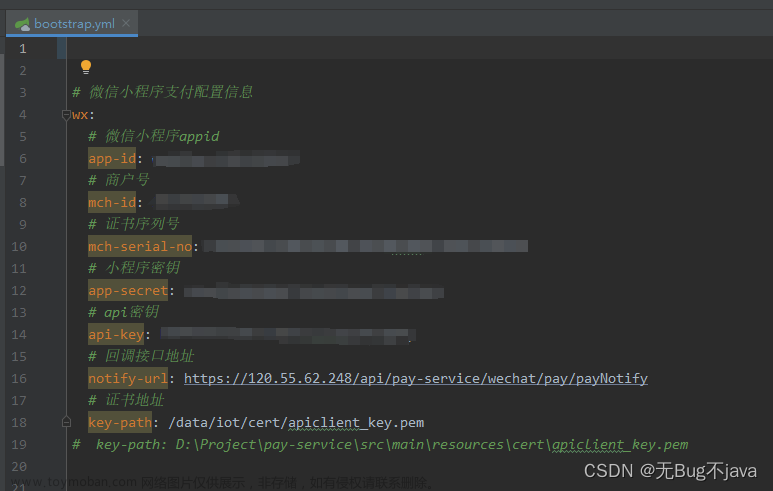
首先你要准备好商户 API 证书里面的私钥(Private Key),例如我当前读取磁盘的证书(当然这个到时要部署到服务器资源目录下)。
private String privateKey = FileHelper.openAsText("C:\\Users\\frank\\Downloads\\WXCertUtil\\cert\\1623777099_20220330_cert\\apiclient_key.pem");

@Autowired
private MerchantConfig cfg;
……
cfg.setPrivateKey(privateKey);// 保存到配置
转换为 Java 里面的 PrivateKey 对象,依靠下面的工具类 PemUtil。
public class PemUtil {
	public static PrivateKey loadPrivateKey(String privateKey) {
		privateKey = privateKey.replace("-----BEGIN PRIVATE KEY-----", "").replace("-----END PRIVATE KEY-----", "").replaceAll("\\s+", "");

		try {
			KeyFactory kf = KeyFactory.getInstance("RSA");

			return kf.generatePrivate(new PKCS8EncodedKeySpec(Base64.getDecoder().decode(privateKey)));
		} catch (NoSuchAlgorithmException e) {
			throw new RuntimeException("当前Java环境不支持RSA", e);
		} catch (InvalidKeySpecException e) {
			throw new RuntimeException("无效的密钥格式");
		}
	}
	……
}
签名生成器
签名过程参见文档,此处不再赘述。除了一般的时间戳、请求随机串(nonce_str)等等之外,签名要求内容有请求接口的 HTTP 方法、URL 和 请求报文主体,为此我们准备一个简单的 Bean。
/**
 * 请求接口的 HTTP 方法、URL 和 请求报文主体
 *
 * @author Frank Cheung<sp42@qq.com>
 *
 */
public class HttpRequestWrapper {
	public String method;
	public String url;
	public String body;
}
我们看看调用例子。
HttpRequestWrapper r = new HttpRequestWrapper();
r.method = "GET";
r.url = "/v3/certificates";
r.body = "";

SignerMaker signer = new SignerMaker(cfg);
String token = signer.getToken(r);// 得到签名
签名生成器 SignerMaker 源码如下。
import java.nio.charset.StandardCharsets;
import java.security.PrivateKey;

import com.ajaxjs.util.StrUtil;
import com.ajaxjs.util.logger.LogHelper;
import com.ajaxjs.wechat.applet.util.PemUtil;
import com.ajaxjs.wechat.applet.util.RsaCryptoUtil;

/**
 * 签名生成器
 *
 * @author Frank Cheung<sp42@qq.com>
 *
 */
public class SignerMaker {
	private static final LogHelper LOGGER = LogHelper.getLog(SignerMaker.class);

	private MerchantConfig cfg;

	protected final PrivateKey privateKey;

	/**
	 * 创建签名生成器
	 *
	 * @param cfg 商户平台的配置
	 */
	public SignerMaker(MerchantConfig cfg) {
		this.cfg = cfg;
		this.privateKey = PemUtil.loadPrivateKey(cfg.getPrivateKey());
	}

	/**
	 * 生成签名
	 *
	 * @param request
	 * @return 签名 Token
	 */
	public String getToken(HttpRequestWrapper request) {
		String nonceStr = StrUtil.getRandomString(32);
		long timestamp = System.currentTimeMillis() / 1000;

		String message = buildMessage(request, nonceStr, timestamp);
		LOGGER.debug("authorization message=[{0}]", message);

		String signature = RsaCryptoUtil.sign(privateKey, message.getBytes(StandardCharsets.UTF_8));

		// @formatter:off
        String token = "mchid=\"" + cfg.getMchId() + "\","
                + "nonce_str=\"" + nonceStr + "\","
                + "timestamp=\"" + timestamp + "\","
                + "serial_no=\"" + cfg.getMchSerialNo() + "\","
                + "signature=\"" + signature + "\"";
        // @formatter:on

		LOGGER.debug("authorization token=[{0}]", token);

		return token;
	}

	/**
	 *
	 * @param request
	 * @param nonceStr
	 * @param timestamp
	 * @return
	 */
	static String buildMessage(HttpRequestWrapper request, String nonceStr, long timestamp) {
		// @formatter:off
	    return request.method + "\n"
	        + request.url + "\n"
	        + timestamp + "\n"
	        + nonceStr + "\n"
	        + request.body + "\n";
	    // @formatter:on
	}
}
从代码量看确实比以前简单了。
对签名数据进行签名
上述 getToken() 里面会调用 RsaCryptoUtil.sign(),其源码如下。
/**
 * 对签名数据进行签名。
 *
 * 使用商户私钥对待签名串进行 SHA256 with RSA 签名,并对签名结果进行 Base64 编码得到签名值。
 *
 * @param message
 * @return 签名结果
 */
public static String sign(PrivateKey privateKey, byte[] message) {
	try {
		Signature sign = Signature.getInstance("SHA256withRSA");
		sign.initSign(privateKey);
		sign.update(message);

		return StrUtil.base64Encode(sign.sign());
	} catch (NoSuchAlgorithmException e) {
		throw new RuntimeException("当前 Java 环境不支持 SHA256withRSA", e);
	} catch (SignatureException e) {
		throw new RuntimeException("签名计算失败", e);
	} catch (InvalidKeyException e) {
		throw new RuntimeException("无效的私钥", e);
	}
}
测试
得到签名 Token 后就可以放在请求头里面测试了,如下获取证书,这是我自己封装的请求方法(Get.api())。
商户API证书 v.s 微信支付平台证书
事情复杂起来了,

获取平台证书
参见文档、更新指引。
貌似证书生成之后就不用更新。官方推荐更新,是为了更好的安全性,如果你想省事,就压根不做更新吧,证书有效期到三年后(好像)。
另外官方还有微信支付 APIv3 平台证书的命令行下载工具:https://github.com/wechatpay-apiv3/CertificateDownloader
用户登录 & 注册
每个用户针对每个公众号会产生一个安全的 openid;openid 只有在 appid 的作用域下可用。
流程图如下
小程序前端设置一个登录按钮:
<button type="primary" open-type="getUserInfo" bindgetuserinfo="bindGetUserInfo">登录</button>
点击事件发起登录请求
bindGetUserInfo(res: any): void {
    let userInfo: any = res.detail.userInfo;

    wx.login({
      success(res) {
        if (res.code) {
          //发起网络请求
          wx.request({
            url: 'http://127.0.0.1:8080/cp/applet/user/login?code=' + res.code,
            method: 'POST',
            data: userInfo,
            header: { 'Content-Type': 'application/json' },
            success(res) {
              if (res.data.isOk) {
                //获取到用户凭证 存儲 3rd_session
                wx.setStorage({
                  key: "sessionId",
                  data: res.data.sessionId
                });
              } else
                console.error(res)
            },
            fail: function (res) {
              console.log(res)
            }
          });
        }
      },
      fail(res) {

      }
    });
  }
登录控制器 AppletUserController 如下
import java.util.HashMap;
import java.util.Map;

import javax.servlet.http.HttpServletRequest;

import org.springframework.beans.factory.annotation.Autowired;
import org.springframework.http.MediaType;
import org.springframework.web.bind.annotation.PostMapping;
import org.springframework.web.bind.annotation.RequestMapping;
import org.springframework.web.bind.annotation.RequestParam;
import org.springframework.web.bind.annotation.RestController;

import com.ajaxjs.framework.BaseController;
import com.ajaxjs.net.http.Get;
import com.ajaxjs.sql.orm.Repository;
import com.ajaxjs.user.model.User;
import com.ajaxjs.user.model.UserConstant;
import com.ajaxjs.user.model.UserOauth;
import com.ajaxjs.user.service.UserDao;
import com.ajaxjs.user.service.UserOauthDao;
import com.ajaxjs.util.StrUtil;
import com.ajaxjs.util.filter.DataBaseFilter;
import com.ajaxjs.util.logger.LogHelper;
import com.ajaxjs.util.map.MapTool;
import com.ajaxjs.web.WebHelper;
import com.ajaxjs.wechat.applet.model.LoginSession;
import com.ajaxjs.wechat.applet.model.UserInfo;
import com.ajaxjs.wechat.applet.model.WeChatAppletConfig;
import com.ajaxjs.wechat.user.UserMgr;

/**
 * 小程序用户接口
 *
 * @author Frank Cheung<sp42@qq.com>
 *
 */
@RestController
@RequestMapping("/applet/user")
public class AppletUserController {
	private static final LogHelper LOGGER = LogHelper.getLog(AppletUserController.class);

	@Autowired
	private WeChatAppletConfig cfg;

	private static UserDao userDao = new Repository().bind(UserDao.class);
	private static UserOauthDao userOauthDao = new Repository().bind(UserOauthDao.class);

	/**
	 * 登录 or 注册
	 *
	 * @param code 授权码
	 * @param req
	 * @return
	 */
	@PostMapping(value = "/login", produces = MediaType.APPLICATION_JSON_VALUE + ";charset=utf-8")
	@DataBaseFilter
	public String login(@RequestParam(required = true) String code, HttpServletRequest req) {
		LoginSession session = login(cfg, code);
		User user = userDao.findUserByOauthId(session.getOpenid());

		if (user == null) {
			Map<String, Object> userInfo = WebHelper.getRawBodyAsJson(req);

			if (userInfo != null) {
				LOGGER.info("没有会员,新注册 " + userInfo);
				user = register(userInfo, session.getOpenid());
			} else
				throw new IllegalArgumentException("缺少 userInfoJson 参数");
		} else {
			LOGGER.info("用户已经注册过");
		}

		Map<String, Object> map = new HashMap<>();
		map.put("isOk", true);
		map.put("msg", "登录成功");
		map.put("sessionId", session.getSession_id());
		map.put("userId", user.getId());
		map.put("userName", user.getUsername());

		return BaseController.toJson(map, true, false);
	}

	private final static String LOGIN_API = "https://api.weixin.qq.com/sns/jscode2session";

	/**
	 * 小程序登录
	 *
	 * @param cfg
	 * @param code
	 */
	private static LoginSession login(WeChatAppletConfig cfg, String code) {
		LOGGER.info("小程序登录");

		String params = String.format("?grant_type=authorization_code&appid=%s&secret=%s&js_code=%s", cfg.getAccessKeyId(), cfg.getAccessSecret(), code);
		Map<String, Object> map = Get.api(LOGIN_API + params);
		LoginSession session = null;

		if (map.containsKey("openid")) {
//			cfg.setAccessToken(map.get("access_token").toString());
			LOGGER.warning("小程序登录成功! AccessToken [{0}]", map.containsKey("openid"));

			String rndStr = StrUtil.getRandomString(8);
			session = new LoginSession();
			session.setOpenid(map.get("openid").toString());
			session.setSession_key(map.get("session_key").toString());
			session.setSession_id(rndStr);

			UserMgr.SESSION.put(rndStr, session);

		} else if (map.containsKey("errcode")) {
			LOGGER.warning("小程序登录失败! Error [{0}:{1}]", map.get("errcode"), map.get("errmsg"));
			throw new SecurityException(String.format("小程序登录失败,Error [%s]", map.get("errmsg")));
		} else {
			LOGGER.warning("小程序登录失败,未知异常 [{0}]", map);
			throw new SecurityException("小程序登录失败,未知异常");
		}

		return session;
	}

	/**
	 * 注册新用户
	 *
	 * @param userInfoJson 用户信息,微信后台提供
	 * @param string       OpenId
	 * @return 用户对象
	 */
	private User register(Map<String, Object> userInfoJson, String openId) {
		UserInfo wxUser = MapTool.map2Bean(userInfoJson, UserInfo.class);
		User user = wxUser.toSystemUser();
		Long userId = userDao.create(user);

		UserOauth oauth = new UserOauth();
		oauth.setUserId(userId);
		oauth.setIdentifier(openId);
		oauth.setLoginType(UserConstant.LoginType.WECHAT_APPLET);
		userOauthDao.saveOpenId(oauth);

		return user;
	}
}
小程序过来的用户信息有密文的,懒得使用或校验了。
参考:
- https://www.cnblogs.com/nosqlcoco/p/6105749.html
- https://cloud.tencent.com/developer/article/1158797
- https://blog.csdn.net/qq_41970025/article/details/90700677
下单
TODO
回调报文解密
在支付通知 API 时候会用到,参见《证书和回调报文解密》,解密类 AesUtil 如下:
import java.nio.charset.StandardCharsets;
import java.security.GeneralSecurityException;
import java.security.InvalidAlgorithmParameterException;
import java.security.InvalidKeyException;
import java.security.NoSuchAlgorithmException;
import java.util.Base64;
import javax.crypto.Cipher;
import javax.crypto.NoSuchPaddingException;
import javax.crypto.spec.GCMParameterSpec;
import javax.crypto.spec.SecretKeySpec;

/**
 * 证书和回调报文解密
 *
 * @author Frank Cheung<sp42@qq.com>
 *
 */
public class AesUtil {
	private static final String TRANSFORMATION = "AES/GCM/NoPadding";

	private static final int KEY_LENGTH_BYTE = 32;
	private static final int TAG_LENGTH_BIT = 128;

	private final byte[] aesKey;

	/**
	 * 解密器
	 *
	 * @param key
	 */
	public AesUtil(byte[] key) {
		if (key.length != KEY_LENGTH_BYTE)
			throw new IllegalArgumentException("无效的 ApiV3Key,长度必须为32个字节");

		this.aesKey = key;
	}

	/**
	 * AEAD_AES_256_GCM 解密
	 *
	 * @param associatedData
	 * @param nonce
	 * @param ciphertext
	 * @return
	 * @throws GeneralSecurityException
	 */
	public String decryptToString(byte[] associatedData, byte[] nonce, String ciphertext) throws GeneralSecurityException {
		try {
			SecretKeySpec key = new SecretKeySpec(aesKey, "AES");
			GCMParameterSpec spec = new GCMParameterSpec(TAG_LENGTH_BIT, nonce);

			Cipher cipher = Cipher.getInstance(TRANSFORMATION);
			cipher.init(Cipher.DECRYPT_MODE, key, spec);
			cipher.updateAAD(associatedData);

			// TODO base64 方法
			return new String(cipher.doFinal(Base64.getDecoder().decode(ciphertext)), StandardCharsets.UTF_8);
		} catch (NoSuchAlgorithmException | NoSuchPaddingException e) {
			throw new IllegalStateException(e);
		} catch (InvalidKeyException | InvalidAlgorithmParameterException e) {
			throw new IllegalArgumentException(e);
		}
	}
}
p12 证书转换
接手一个遗留项目,没办法获取新的证书。获取新的证书旧的就会作废,因为这是已经上线的项目。得到只有一个 *.p12 的证书,但新版的 v3 支付的要求 pem 证书。咋搞?原来可以从 p12 转换到 pem,这需要用到 openssl 命令行。提示一下,我 win 是上安装 openssl,执行报错,最后在 Linux 服务器成功执行。
# 查看所有信息
openssl pkcs12 -info -in apiclient_cert.p12 -nodes

# 导出证书
openssl pkcs12 -in apiclient_cert.p12 -out cert.pem -nokeys

# 导出秘钥
openssl pkcs12 -in apiclient_cert.p12 -out private_key.pem -nodes -nocerts

# 查看证书序列号
openssl x509 -in cert.pem -noout -serial
过程中会让输入密码,默认就是证书对应的商户号。
小结
其实可以参考一下人家开源写好的,比较成熟:https://github.com/Wechat-Group/WxJava。文章来源:https://www.toymoban.com/news/detail-496851.html
参考文献文章来源地址https://www.toymoban.com/news/detail-496851.html
- 《微信支付分,APIv3版本接口对接过程(附代码)》
- 《一文搞懂「微信支付 Api-v3」接口规则所有知识点》
- 《Spring Boot 对接微信V3支付(附源码)》
- 微信V3APP支付2022,全网最新+踩坑(已实现)
到了这里,关于实战微信支付 APIv3 接口(小程序的)的文章就介绍完了。如果您还想了解更多内容,请在右上角搜索TOY模板网以前的文章或继续浏览下面的相关文章,希望大家以后多多支持TOY模板网!