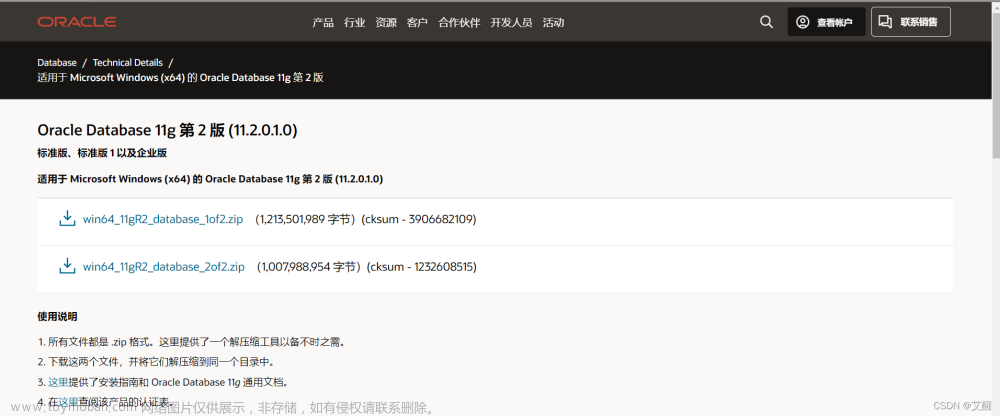
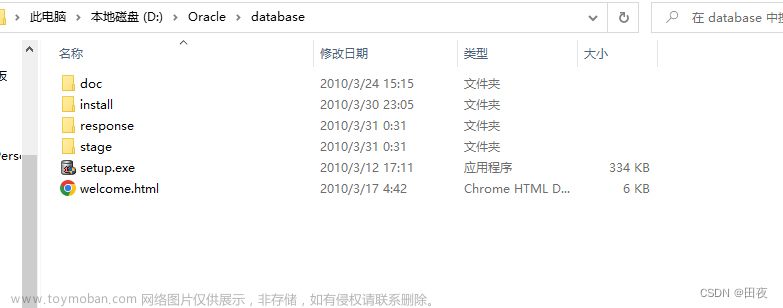
1、打开xmanager-passive
2、oracle 用户登录,开始安装
[root@rhel64 database]# su - oracle
[oracle@rhel64 ~]$ evn |grep oracle
-bash: evn: command not found
[oracle@rhel64 ~]$ evn | grep oracle
-bash: evn: command not found
[oracle@rhel64 ~]$ env | grep oracle
USER=oracle
LD_LIBRARY_PATH=/u01/app/oracle/product/11.2.0/dbhome_1/lib:/usr/lib
ORACLE_BASE=/u01/app/oracle
MAIL=/var/spool/mail/oracle
PATH=/u01/app/oracle/product/11.2.0/dbhome_1/bin:/usr/lib64/qt-3.3/bin:/usr/local/bin:/bin:/usr/bin:/usr/local/sbin:/usr/sbin:/sbin:/home/oracle/bin
PWD=/home/oracle
HOME=/home/oracle
LOGNAME=oracle
ORACLE_HOME=/u01/app/oracle/product/11.2.0/dbhome_1
[oracle@rhel64 ~]$ more .bash_profile
# .bash_profile

# Get the aliases and functions
if [ -f ~/.bashrc ]; then
        . ~/.bashrc
fi

# User specific environment and startup programs

PATH=$PATH:$HOME/bin
export PATH
umask 022
export ORACLE_BASE=/u01/app/oracle
export ORACLE_SID=PROD
export ORACLE_HOME=$ORACLE_BASE/product/11.2.0/dbhome_1
export PATH=$ORACLE_HOME/bin:$PATH
export LD_LIBRARY_PATH=$ORACLE_HOME/lib:/usr/lib
export LC_CTYPE=en_US.UTF-8 export NLS_LANG=AMERICAN_AMERICA.ZHS16GBK
[oracle@rhel64 ~]$ export DISPLAY=192.168.186.1:0.0
[oracle@rhel64 ~]$ echo $DISPLAY
192.168.186.1:0.0
[oracle@rhel64 ~]$ cd /software/
[oracle@rhel64 software]$ ls
database                                p13390677_112040_Linux-x86-64_2of7.zip
grid                                    p13390677_112040_Linux-x86-64_3of7.zip
p13390677_112040_Linux-x86-64_1of7.zip
[oracle@rhel64 software]$ cd database/
[oracle@rhel64 database]$ ls
install      response  runInstaller  stage
readme.html  rpm       sshsetup      welcome.html
[oracle@rhel64 database]$ ./runInstaller
Starting Oracle Universal Installer...

Checking Temp space: must be greater than 120 MB.   Actual 7233 MB    Passed
Checking swap space: must be greater than 150 MB.   Actual 8095 MB    Passed
Checking monitor: must be configured to display at least 256 colors.    Actual 16777216    Passed
Preparing to launch Oracle Universal Installer from /tmp/OraInstall2023-06-17_12-32-30AM. Please wait ...[oracle@rhel64 database]$
弹出图形界面,取消勾选
跳过软件更新

选择第二行,只安装软件
安装单实例
英语
选择企业版
保持环境变量设置的默认值
默认补丁包目录,安装失败后该目录必须删除

环境检查报错,有需要安装包
安装包
[root@rhel64 ~]# yum install elfutils* -y
[root@rhel64 ~]# yum install elfutils* -y
Loaded plugins: product-id, refresh-packagekit, security, subscription-manager
This system is not registered to Red Hat Subscription Management. You can use subscription-manager to register.
Setting up Install Process
Package elfutils-libelf-0.152-1.el6.x86_64 already installed and latest version
Package elfutils-0.152-1.el6.x86_64 already installed and latest version
Package elfutils-libs-0.152-1.el6.x86_64 already installed and latest version
Resolving Dependencies
--> Running transaction check
---> Package elfutils-devel.x86_64 0:0.152-1.el6 will be installed
---> Package elfutils-libelf-devel.x86_64 0:0.152-1.el6 will be installed
--> Finished Dependency Resolution

Dependencies Resolved

================================================================================
 Package                     Arch         Version            Repository    Size
================================================================================
Installing:
 elfutils-devel              x86_64       0.152-1.el6        rhel64        68 k
 elfutils-libelf-devel       x86_64       0.152-1.el6        rhel64        31 k

Transaction Summary
================================================================================
Install       2 Package(s)

Total download size: 99 k
Installed size: 262 k
Downloading Packages:
--------------------------------------------------------------------------------
Total                                           1.6 MB/s |  99 kB     00:00
Running rpm_check_debug
Running Transaction Test
Transaction Test Succeeded
Running Transaction
  Installing : elfutils-libelf-devel-0.152-1.el6.x86_64                     1/2
  Installing : elfutils-devel-0.152-1.el6.x86_64                            2/2
  Verifying  : elfutils-libelf-devel-0.152-1.el6.x86_64                     1/2
  Verifying  : elfutils-devel-0.152-1.el6.x86_64                            2/2

Installed:
  elfutils-devel.x86_64 0:0.152-1.el6
  elfutils-libelf-devel.x86_64 0:0.152-1.el6

Complete!
修改/etc/sysctl.conf,将aio-max-nr参数进行修改
[root@rhel64 ~]# vi /etc/sysctl.conf
[root@rhel64 ~]# tail -10 /etc/sysctl.conf

fs.aio-max-nr = 1048576
fs.file-max = 6815744
kernel.shmmni = 4096
kernel.sem = 250 32000 100 128
net.ipv4.ip_local_port_range = 9000 65500
net.core.rmem_default = 262144
net.core.rmem_max = 4194304
net.core.wmem_default = 262144
net.core.wmem_max = 1048586
[root@rhel64 ~]# ^C
sysctl -p生效
[root@rhel64 database]# sysctl -p
net.ipv4.ip_forward = 0
net.ipv4.conf.default.rp_filter = 1
net.ipv4.conf.default.accept_source_route = 0
kernel.sysrq = 0
kernel.core_uses_pid = 1
net.ipv4.tcp_syncookies = 1
net.bridge.bridge-nf-call-ip6tables = 0
net.bridge.bridge-nf-call-iptables = 0
net.bridge.bridge-nf-call-arptables = 0
kernel.msgmnb = 65536
kernel.msgmax = 65536
kernel.shmmax = 68719476736
kernel.shmall = 4294967296
fs.aio-max-nr = 1048576
fs.file-max = 6815744
kernel.shmmni = 4096
kernel.sem = 250 32000 100 128
net.ipv4.ip_local_port_range = 9000 65500
net.core.rmem_default = 262144
net.core.rmem_max = 4194304
net.core.wmem_default = 262144
net.core.wmem_max = 1048586
[root@rhel64 database]#
安装pdksh-5.2.14失败,需要pdksh与 ksh冲突,先卸载rpm -e卸载KSH,后rpm -ivh安装PDKSH
将 pdksh-5.2.14-37.el5.x86_64.rpm上传到database目录,修改属主权限进行安装
[root@rhel64 ~]# yum install pdksh-5.2.14
Loaded plugins: product-id, refresh-packagekit, security, subscription-manager
This system is not registered to Red Hat Subscription Management. You can use subscription-manager to register.
Setting up Install Process
No package pdksh-5.2.14 available.
Error: Nothing to do
[root@rhel64 ~]# cd /software/database/
[root@rhel64 database]# ll
total 268
drwxr-xr-x  4 oracle oinstall   4096 Aug 27  2013 install
-rw-r--r--  1 root   root     210482 Jun 17 01:14 pdksh-5.2.14-37.el5.x86_64.rpm
-rw-r--r--  1 oracle oinstall  30016 Aug 27  2013 readme.html
drwxr-xr-x  2 oracle oinstall   4096 Aug 27  2013 response
drwxr-xr-x  2 oracle oinstall   4096 Aug 27  2013 rpm
-rwxr-xr-x  1 oracle oinstall   3267 Aug 27  2013 runInstaller
drwxr-xr-x  2 oracle oinstall   4096 Aug 27  2013 sshsetup
drwxr-xr-x 14 oracle oinstall   4096 Aug 27  2013 stage
-rw-r--r--  1 oracle oinstall    500 Aug 27  2013 welcome.html
[root@rhel64 database]# ^C
[root@rhel64 database]# chown oracle:oinstall pdksh-5.2.14-37.el5.x86_64.rpm
[root@rhel64 ~]# rpm -e ksh
[root@rhel64 database]# ll
total 268
drwxr-xr-x  4 oracle oinstall   4096 Aug 27  2013 install
-rw-r--r--  1 oracle oinstall 210482 Jun 17 01:14 pdksh-5.2.14-37.el5.x86_64.rpm
-rw-r--r--  1 oracle oinstall  30016 Aug 27  2013 readme.html
drwxr-xr-x  2 oracle oinstall   4096 Aug 27  2013 response
drwxr-xr-x  2 oracle oinstall   4096 Aug 27  2013 rpm
-rwxr-xr-x  1 oracle oinstall   3267 Aug 27  2013 runInstaller
drwxr-xr-x  2 oracle oinstall   4096 Aug 27  2013 sshsetup
drwxr-xr-x 14 oracle oinstall   4096 Aug 27  2013 stage
-rw-r--r--  1 oracle oinstall    500 Aug 27  2013 welcome.html
[root@rhel64 database]# rpm -ivh pdksh-5.2.14-37.el5.x86_64.rpm
warning: pdksh-5.2.14-37.el5.x86_64.rpm: Header V3 DSA/SHA1 Signature, key ID e8562897: NOKEY
Preparing...                ########################################### [100%]
   1:pdksh                  ########################################### [100%]
[root@rhel64 database]#
重新检查通过check again,
安装失败,需删除/u01/app/oralnventory /u01/app/oracle
提示root用户执行
/u01/app/oraInventory/orainstRoot.sh
[root@rhel64 database]# /u01/app/oraInventory/orainstRoot.sh
Changing permissions of /u01/app/oraInventory.
Adding read,write permissions for group.
Removing read,write,execute permissions for world.

Changing groupname of /u01/app/oraInventory to oinstall.
The execution of the script is complete.
[root@rhel64 database]# /u01/app/oracle/product/11.2.0/dbhome_1/root.sh
Performing root user operation for Oracle 11g

The following environment variables are set as:
    ORACLE_OWNER= oracle
    ORACLE_HOME=  /u01/app/oracle/product/11.2.0/dbhome_1

Enter the full pathname of the local bin directory: [/usr/local/bin]:
   Copying dbhome to /usr/local/bin ...
   Copying oraenv to /usr/local/bin ...
   Copying coraenv to /usr/local/bin ...


Creating /etc/oratab file...
Entries will be added to the /etc/oratab file as needed by
Database Configuration Assistant when a database is created
Finished running generic part of root script.
Now product-specific root actions will be performed.
Finished product-specific root actions.
[root@rhel64 database]#
数据库软件完成安装
配置监听
用户oracle登录,执行netca
-bash: netcat: command not found
[oracle@rhel64 database]$ netca

Oracle Net Services Configuration:


查看 监听状态
Oracle Net Services configuration terminated by user.  The exit code is -1
[oracle@rhel64 database]$ lsnrctl status

LSNRCTL for Linux: Version 11.2.0.4.0 - Production on 17-JUN-2023 01:36:29

Copyright (c) 1991, 2013, Oracle.  All rights reserved.

Connecting to (ADDRESS=(PROTOCOL=tcp)(HOST=)(PORT=1521))
STATUS of the LISTENER
------------------------
Alias                     PROD
Version                   TNSLSNR for Linux: Version 11.2.0.4.0 - Production
Start Date                17-JUN-2023 01:34:49
Uptime                    0 days 0 hr. 1 min. 40 sec
Trace Level               off
Security                  ON: Local OS Authentication
SNMP                      OFF
Listener Parameter File   /u01/app/oracle/product/11.2.0/dbhome_1/network/admin/listener.ora
Listener Log File         /u01/app/oracle/diag/tnslsnr/rhel64/prod/alert/log.xml
Listening Endpoints Summary...
  (DESCRIPTION=(ADDRESS=(PROTOCOL=tcp)(HOST=rhel64)(PORT=1521)))
  (DESCRIPTION=(ADDRESS=(PROTOCOL=ipc)(KEY=EXTPROC1521)))
The listener supports no services
The command completed successfully
[oracle@rhel64 database]$
建库dbca
[oracle@rhel64 database]$ dbca


修改字符集


占击完成,创建数据库
如果遇到 0ra-00845错误
修改fstab参数,执行文章来源:https://www.toymoban.com/news/detail-497978.html
[root@rhel64 database]# vi /etc/fstab
[root@rhel64 database]# more /etc/fstab

#
# /etc/fstab
# Created by anaconda on Fri Jun 16 17:12:35 2023
#
# Accessible filesystems, by reference, are maintained under '/dev/disk'
# See man pages fstab(5), findfs(8), mount(8) and/or blkid(8) for more info
#
/dev/mapper/vg_rhel64-lv_root /                       ext4    defaults        1
1
UUID=b17fde30-d52f-4e97-b7e1-4f1bd0b237bc /boot                   ext4    defaul
ts        1 2
/dev/mapper/vg_rhel64-lv_u01 /u01                    ext4    defaults        1 2
/dev/mapper/vg_rhel64-lv_swap swap                    swap    defaults        0
0
tmpfs                   /dev/shm                tmpfs   defaults,size=2800M
  0 0
devpts                  /dev/pts                devpts  gid=5,mode=620  0 0
sysfs                   /sys                    sysfs   defaults        0 0
proc                    /proc                   proc
[root@rhel64 database]# mount -o remount /dev/shm
 文章来源地址https://www.toymoban.com/news/detail-497978.html
到了这里,关于redhat安装oracle11g单实例软件建库的文章就介绍完了。如果您还想了解更多内容,请在右上角搜索TOY模板网以前的文章或继续浏览下面的相关文章,希望大家以后多多支持TOY模板网!


