https://pyimagesearch.com/2016/10/03/bubble-sheet-multiple-choice-scanner-and-test-grader-using-omr-python-and-opencv/?utm_source=Drip&utm_medium=Email&utm_campaign=CVandDLCrashCourse&utm_content=email4
Bubble sheet multiple choice scanner and test grader using OMR, Python, and OpenCV
数据集至关重要,允许训练一个模型来准确识别和评分,对自动化评估非常有用。Roboflow为计算机视觉每个流程提供工具,有先进的数据库。
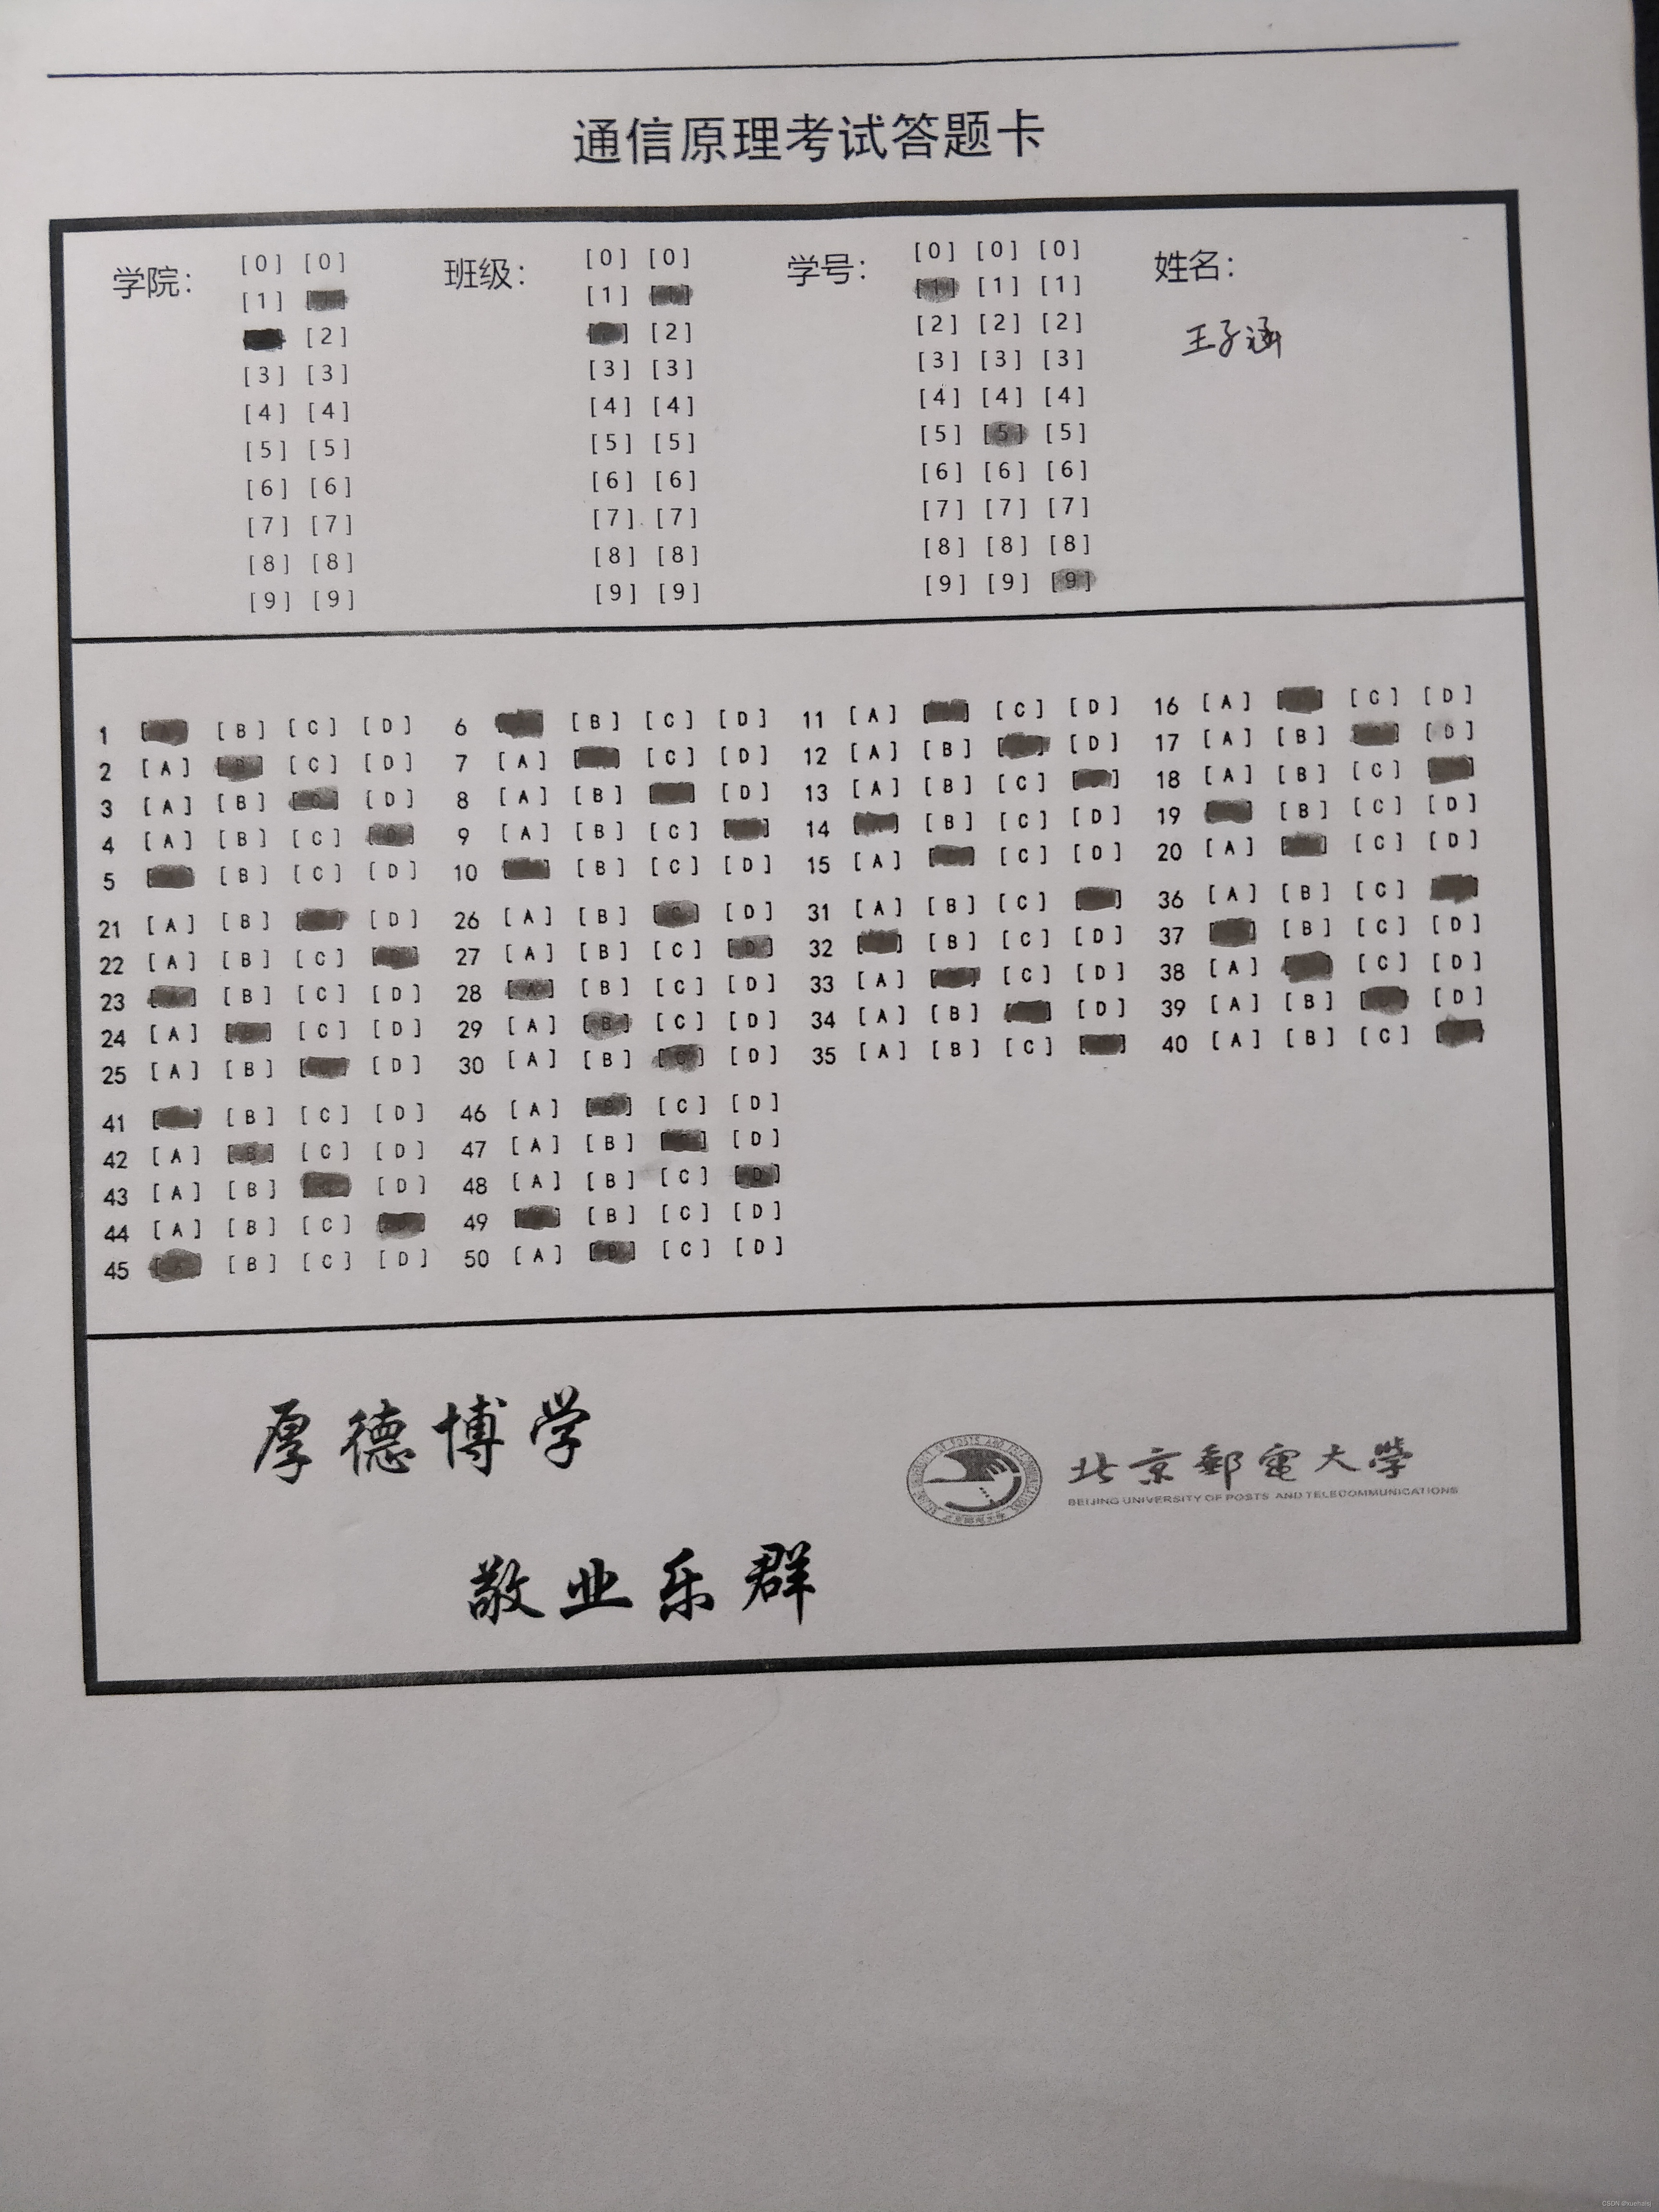
Optical Mark Recognition (OMR)
光学标记识别,是自动分析人类标记的文档并解释其结果的过程。
“Bubble sheet tests”:考试中的每一道题都是多选题,你可以用2号铅笔标记与正确答案相对应的“气泡”
Implementing
使用Python和OpenCV构建一个计算机视觉系统,该系统可以读取气泡表测试并对其进行评分
- 在图像中检测考试
- 应用透视变换提取自上而下的鸟瞰图
- 从变换后的图像提取bubbles集合(可能的答案)
- sortthhe bubbles(按行排序)
- 确定每行的标记答案
- 在答案集中找正确答案,来确定选择的正确性
- 对所有exam重复
注意:请注意文档的边缘是如何清晰定义的,检查的所有四个顶点都显示在图像中。
# import the necessary packages
from imutils.perspective import four_point_transform
from imutils import contours
import numpy as np
import argparse
import imutils
import cv2

# construct the argument parse and parse the arguments
ap = argparse.ArgumentParser()
ap.add_argument("-i", "--image", required=True,
	help="path to the input image")
args = vars(ap.parse_args())

# define the answer key
# which maps the question number to the correct answer
ANSWER_KEY = {0: 1, 1: 4, 2: 0, 3: 3, 4: 1} #提供了问题编号到正确气泡索引的整数映射
# 0:Question 1#, 1->B:correct answer; (ABCDE--01234)
# 1:Question 2#, 4->E

# 预处理输入图像

# load the image, convert it to grayscale, blur it
# slightly, then find edges
image = cv2.imread(args["image"])
gray = cv2.cvtColor(image, cv2.COLOR_BGR2GRAY)
blurred = cv2.GaussianBlur(gray, (5, 5), 0) #高斯模糊
edged = cv2.Canny(blurred, 75, 200) #边缘检测

'''cv2.imshow("Exam", edged)
cv2.waitKey(0)

'''

# 后续将使用轮廓作为标记,来对检查应用透视变换

# find contours in the edge map, then initialize
# the contour that corresponds to the document
cnts = cv2.findContours(edged.copy(), cv2.RETR_EXTERNAL,
	cv2.CHAIN_APPROX_SIMPLE)
# 找边缘图像 edged 的轮廓,cv2.RETR_LIST 表示检测所有轮廓,并将它们存储在列表中
cnts = imutils.grab_contours(cnts)
docCnt = None   # 文档轮廓初始化

# ensure that at least one contour was found
# 对每个轮廓,逼近轮廓形状并判断是否为一个矩形
if len(cnts) > 0:
	# sort the contours according to their size in descending order
	cnts = sorted(cnts, key=cv2.contourArea, reverse=True)
	# loop over the sorted contours
	for c in cnts:
		# approximate the contour 近似轮廓
		peri = cv2.arcLength(c, True)   # 计算轮廓周长,True表示轮廓闭合
		approx = cv2.approxPolyDP(c, 0.02 * peri, True) # 对轮廓 c 进行多边形逼近
		# if our approximated contour has four points,
		# then we can assume we have found the paper
		if len(approx) == 4:    #找到四个顶点
			docCnt = approx     #保存
			break

# apply a four point perspective transform to both the
# original image and grayscale image to obtain a top-down
# birds eye view of the paper
paper = four_point_transform(image, docCnt.reshape(4, 2))
warped = four_point_transform(gray, docCnt.reshape(4, 2))
# 作用:倾斜试卷得到自上而下的视图

'''cv2.imshow("Exam", warped)
cv2.waitKey(0)
'''

# python test_grader.py --image bubble.png

# 文档打分:从二值化开始,即从图像的背景对前景进行阈值化/分割的过程

# apply Otsu's thresholding method to binarize the warped
# piece of paper
thresh = cv2.threshold(warped, 0, 255,
	cv2.THRESH_BINARY_INV | cv2.THRESH_OTSU)[1]
# 应用Otsu阈值法对翘曲的纸张进行二值化
# 得到二值化图像:图像的背景是黑色的,前景是白色的


# 这种二值化将允许我们再次应用轮廓提取技术来找到图中的每个气泡

# find contours in the thresholded image, then initialize
# the list of contours that correspond to questions
cnts = cv2.findContours(thresh.copy(), cv2.RETR_EXTERNAL,
	cv2.CHAIN_APPROX_SIMPLE)
cnts = imutils.grab_contours(cnts)
questionCnts = []
# loop over the contours
# 为了确定图像的哪些区域是气泡,我们首先在每个单独的轮廓上循环
for c in cnts:
	# compute the bounding box of the contour, then use the
	# bounding box to derive the aspect ratio
	(x, y, w, h) = cv2.boundingRect(c)      #计算边界框
	ar = w / float(h)                       #计算横纵比
	# in order to label the contour as a question, region
	# should be sufficiently wide, sufficiently tall, and
	# have an aspect ratio approximately equal to 1
	if w >= 20 and h >= 20 and ar >= 0.9 and ar <= 1.1:
		#判断气泡区域的条件,足够宽和足够高,横纵比
		questionCnts.append(c)  # 更新questionCnts列表
# 此时能够圈出all bubbles


# grading-判断正误
# sort the question contours top-to-bottom, then initialize
# the total number of correct answers
questionCnts = contours.sort_contours(questionCnts,
	method="top-to-bottom")[0]
# 从上到下对问题轮廓进行排序,确保更接近试卷顶部的问题行将首先出现在排序列表中
correct = 0         # 初始化,记录正确答案的数量

# each question has 5 possible answers,
# to loop over the question in batches of 5
# 五个一组进行循环
for (q, i) in enumerate(np.arange(0, len(questionCnts), 5)):
	# 从左到右对当前轮廓集合进行排序,初始化冒泡答案的索引
	# sort the contours for the current question from left to right,
	# then initialize the index of the bubbled answer
	cnts = contours.sort_contours(questionCnts[i:i + 5])[0] #为了从左到右排序
	# 我们已经从上到下对轮廓进行了排序。
    # 我们知道每个问题的5个气泡将按顺序出现在列表中——但我们不知道这些气泡是否会从左到右排序。
    # contours.sort_contours排序轮廓调用,确保每行轮廓从左到右排序成行。
	bubbled = None

# 下一步是对给定某排bubbles, 确定填充了哪个
# 计算每个气泡区域中的非零像素(即前景像素)的数量
    # loop over the sorted contours
	for (j, c) in enumerate(cnts):
		# construct a mask that reveals only the current
		# "bubble" for the question
        # 构造一个掩码,只显示当前问题的“气泡”
		mask = np.zeros(thresh.shape, dtype="uint8")
		cv2.drawContours(mask, [c], -1, 255, -1)
		# apply the mask to the thresholded image, then
		# count the number of non-zero pixels in the
		# bubble area
        # 将mask应用于阈值图像,然后计算气泡区域中非零像素的数量
		mask = cv2.bitwise_and(thresh, thresh, mask=mask)
		total = cv2.countNonZero(mask)
		# if the current total has a larger number of total non-zero pixels,
		# then we are examining the currently bubbled-in answer
        # 如果当前的总数有更多的非零像素,那么我们正在检查当前冒泡的答案
        # 即:具有最大非零计数的气泡是测试者所选择标注的答案
		if bubbled is None or total > bubbled[0]:
			bubbled = (total, j)


# 在ANSWER_KEY中查找正确答案,更新任何相关的簿记器变量,并最终在我们的图像上绘制标记的气泡
    # initialize the contour color and the index of the
	# *correct* answer
	color = (0, 0, 255)
	k = ANSWER_KEY[q]
	# check to see if the bubbled answer is correct
	if k == bubbled[1]: #检查答案是否正确
		color = (0, 255, 0) #正确则绿色标出
		correct += 1
	# draw the outline of the correct answer on the test
	cv2.drawContours(paper, [cnts[k]], -1, color, 3)
	# 画出正确答案的轮廓,红色标记答题错误的,会标出正确的答案位置

# 处理考试评分并在屏幕上显示结果
# grab the test taker
score = (correct / 5.0) * 100
print("[INFO] score: {:.2f}%".format(score))
cv2.putText(paper, "{:.2f}%".format(score), (10, 30),
	cv2.FONT_HERSHEY_SIMPLEX, 0.9, (0, 0, 255), 2)
cv2.imshow("Original", image)
cv2.imshow("Exam", paper)
cv2.waitKey(0)
基于一个假设:考生在每个问题行中只涂满了一个气泡。我们只是通过计算一行中阈值像素的数量,然后按降序排序来确定一个特定的气泡是否被“填充”,这可能会导致两个问题:
-
如果用户没有输入特定问题的答案,会发生什么?
-
如果用户恶意地在同一行中将多个气泡标记为“正确”怎么办?文章来源:https://www.toymoban.com/news/detail-501936.html
只需要插入一点逻辑:文章来源地址https://www.toymoban.com/news/detail-501936.html
- 如果考生选择不输入特定行的答案,那么我们可以在计算cv2.countNonZero设置最小阈值。如果这个值足够大,那么我们可以将气泡标记为“已填充”。相反,如果总数太小,那么我们可以跳过这个特定的气泡。如果在这一行的末尾没有足够大的阈值计数的气泡,我们可以将该问题标记为考生“跳过“。
- 应用阈值和计数步骤,这一次跟踪是否有多个气泡的总数超过了某个预定义的值。如果是这样,我们可以使问题无效,并将问题标记为不正确
到了这里,关于[Day 4 of 17]opencv扫描文稿并应用于考试测试答题卡的文章就介绍完了。如果您还想了解更多内容,请在右上角搜索TOY模板网以前的文章或继续浏览下面的相关文章,希望大家以后多多支持TOY模板网!


