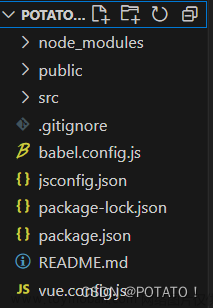
主要功能:初始化openlayers地图,实现鼠标移入、点击、右键等事件,以及获取当前图标的feature,将当前图标信息以弹框方式进行展示;地图上展示拾取到的经纬度
前端使用的是vue技术栈
步骤一:将地图的公用配置项单独提出成一个js文件,方便打包后进行修改,代码如下文章来源:https://www.toymoban.com/news/detail-505244.html
import TileLayer from 'ol/layer/Tile'
import TileArcGISRest from 'ol/source/TileArcGISRest'
import OSM from 'ol/source/OSM'
import XYZ from 'ol/source/XYZ'
//0表示部署的离线瓦片地图,1表示OSM,2表示使用Arcgis在线午夜蓝地图服务
let streetMap=function(){
  let mapLayer = null
  switch(mapType){
    case 0:
      mapLayer=new TileLayer({
        source: new XYZ({
          // url:'http://你的地图服务器地址:8080/geowebcache/service/wmts?tilematrix=EPSG%3A3857_google_rs%3A{z}&layer=google_rs&style=raster&tilerow={y}&tilecol={x}&tilematrixset=EPSG%3A3857_google_rs&format=image%2Fjpeg&service=WMTS&version=1.0.0&request=GetTile'
          //mapUrl我提取到了公用全局变量里,内容和上边是一样的
          url: mapUrl
        })
      })
      break
    case 1:
      mapLayer=new TileLayer({
        source: new OSM()
      })
      break
    case 2:
      mapLayer=new TileLayer({
        source:new TileArcGISRest({
          url:'https://map.geoq.cn/ArcGIS/rest/services/ChinaOnlineCommunity/MapServer'
        })
      })
      break
  }
  return [mapLayer]
}

let mapConfig = {
  x: 115.8906,
  y: 19.1597,
  zoom: 6,//初始地图级别
  streetMap: streetMap
}

export default mapConfig
步骤二:初始化openlayers地图文章来源地址https://www.toymoban.com/news/detail-505244.html
<template>
<div class="map-view-wrapper">
<div class='olMap' ref='rootMap'></div>
<div id="mouse-position"></div>
<div id="popup" class="ol-popup">
<div class="ol-popup-title">
<span>{{popupText}}</span>
</div>
</div>
</div>
</template>
<script>
import 'ol/ol.css'
import { Map, View } from 'ol'
import {ScaleLine} from 'ol/control';
import MousePosition from 'ol/control/MousePosition';
import {createStringXY} from 'ol/coordinate';
import {defaults as defaultControls} from 'ol/control';
import mapConfig from "../../../config/mapconfig";
import Overlay from "ol/Overlay";
import {Icon, Style} from "ol/style";
export default {
name: 'MapView',
components:{},
props:{
},
watch:{
},
data () {
return {
map: null,
overlay:null,
popupCoordinates: "",
popupText: "",
moveFeature:null
}
},
mounted () {
this.initMap();
},
methods: {
initMap(){
let mousePositionControl = new MousePosition({
coordinateFormat: createStringXY(4),
projection: 'EPSG:4326',
className: 'custom-mouse-position',
target: document.getElementById('mouse-position'),
undefinedHTML: ' ',
});
let mapContainer = this.$refs.rootMap;
this.map = new Map({
target: mapContainer,
controls: defaultControls().extend([mousePositionControl]),
layers: mapConfig.streetMap(),
view: new View({
projection: 'EPSG:4326',
//center: [113.960623, 22.546082],
center: [mapConfig.x, mapConfig.y],//读取上边mapConfig.js里内容
zoom: mapConfig.zoom,
// minZoom:4,
maxZoom: 6,
})
})
//添加比例尺 //单位有5种:degrees imperial us nautical metric
this.map.addControl(new ScaleLine({units: 'metric'}));
let me = this;
//鼠标移入点是,展示的弹框
this.overlay = new Overlay({
element: document.getElementById('popup'),
autoPan: true,
autoPanAnimation: {
duration: 250
}
});
this.map.addOverlay(this.overlay);
//设置地图缩放监听
this.map.on("moveend", function (e) {
let zoom = me.map.getView().getZoom();
// console.log("zoom",zoom);
});
//鼠标移动
this.map.on('pointermove',function (e){
let feature = me.map.forEachFeatureAtPixel(e.pixel,function (feature,layer){
return feature;
})
if(feature){
if(feature.get("type")){
let types = feature.get("type").split("&");
if(!me.isEmpty(types[1])){
me.popupText = types[1];
me.popupCoordinates = feature.getGeometry().flatCoordinates;
// me.overlay.setPosition(me.popupCoordinates);
me.overlay.setPosition([parseFloat(me.popupCoordinates[0])+0.45,parseFloat(me.popupCoordinates[1])]);
}
}
me.map.getTargetElement().style.cursor="pointer";
}else{
//me.moveFeature && me.moveFeature.setStyle(me.setMapMoveStyle('out'));
me.map.getTargetElement().style.cursor="auto";
me.popupCoordinates && me.overlay.setPosition(undefined);
me.popupCoordinates = null;
}
})
//地图点击
me.map.on('click',function (e){
let feature = me.map.forEachFeatureAtPixel(e.pixel,function (feature,layer){
return feature;
})
if(feature){
me.$emit('click-icon',feature)
}
})
//右键事件
me.map.on('contextmenu',function (e){
e.preventDefault();
let feature = me.map.forEachFeatureAtPixel(e.pixel,function (feature,layer){
return feature;
})
if(feature){
// console.log("右击地图feature",feature);
me.moveFeature = feature;
feature.setStyle(me.setMapMoveStyle('in'));
//抛出右击点击
me.$emit('map-contextmenu',feature);
}
})
//因为我将地图单独封装成了组件,所以这里将map emit出去,方便调用组件的页面单独使用
setTimeout(function () {
me.$emit('out-map',me.map)
},100)
},
//修改鼠标移入、移出的样式
setMapMoveStyle(str){
let src = str === 'in' ? "./static/images/port-icon-select.png" : "./static/images/port-icon-new.png";
let iconStyle = new Style({
image: new Icon({
anchor: [0.5, 0.5],
anchorXUnits: 'fraction',
anchorYUnits: 'fraction',
src: src,
})
});
return iconStyle;
}
}
}
</script>
<style rel="stylesheet/scss" lang="scss" scoped>
@import "../../../assets/styles/base_style";
.map-view-wrapper{
width:100%;
height: 100%;
position: relative;
.olMap{
width:100%;
height: calc(100%);
}
.ol-popup{
background: rgba(32,100,176,.8);
color: #fff;
font-size: 14px;
padding: 2px 8px;
border: 1px solid #22CEFF;
border-radius: 6px;
}
#mouse-position{
position: absolute;
bottom: 5px;
right:20px;
}
}
</style>
到了这里,关于vue+openlayers,初始化openlayers地图,实现鼠标移入、点击、右键等事件的文章就介绍完了。如果您还想了解更多内容,请在右上角搜索TOY模板网以前的文章或继续浏览下面的相关文章,希望大家以后多多支持TOY模板网!


