开发工具:IDEA 2022.3.2,未连接数据库。验证用的用户名和密码为内置硬编码
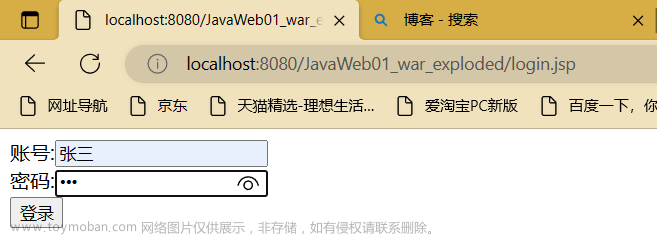
演示程序运行效果:

设计器中的用户登录页面布局:

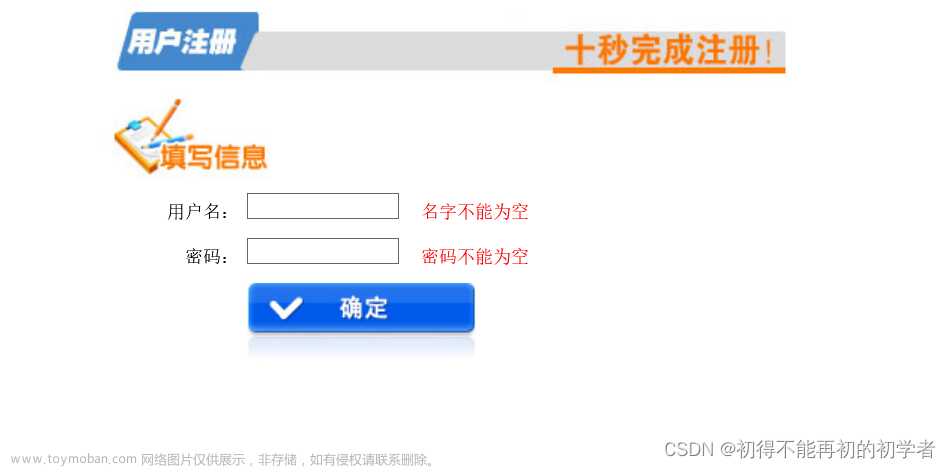
登录验证容错提示如下:
1,用户名不能为空:

2,密码不能为空:

3,用户名不存在:

4,用户密码错误

5,登录验证成功跳转到用户中心:

源码如下:
登录页面布局:
<?xml version="1.0" encoding="utf-8"?>

<androidx.constraintlayout.widget.ConstraintLayout
        xmlns:android="http://schemas.android.com/apk/res/android"
        xmlns:tools="http://schemas.android.com/tools"
        xmlns:app="http://schemas.android.com/apk/res-auto"
        android:layout_width="match_parent"
        android:layout_height="match_parent"
        tools:context=".MainActivity">
    <EditText
            android:id="@+id/editName"
            android:layout_width="wrap_content"
            android:layout_height="wrap_content"
            android:hint="请输入用户名"
            android:drawableLeft="@drawable/baseline_people_24"
            android:drawablePadding="10dp"
            android:paddingLeft="10dp"
            android:singleLine="true"
            android:ems="10"
            app:layout_constraintTop_toTopOf="parent"
            app:layout_constraintStart_toStartOf="parent"
            app:layout_constraintEnd_toEndOf="parent"
            android:layout_marginTop="88dp"/>
    <EditText
            android:id="@+id/editPass"
            android:layout_width="wrap_content"
            android:layout_height="wrap_content"
            android:hint="请输入密码"
            android:drawableLeft="@drawable/baseline_fingerprint_24"
            android:drawablePadding="10dp"
            android:paddingLeft="10dp"
            android:singleLine="true"
            android:ems="10"
            app:layout_constraintStart_toStartOf="@+id/editName"
            android:layout_marginTop="16dp"
            app:layout_constraintTop_toBottomOf="@+id/editName"
            app:layout_constraintEnd_toEndOf="@+id/editName"
            app:layout_constraintHorizontal_bias="0.0"
            android:password="true"/>

    <Button
            android:id="@+id/btnLogin"
            android:text="登录"
            android:onClick="btnLoginClick"
            android:layout_width="100dp"
            android:layout_height="47dp"
            tools:ignore="MissingConstraints"
            app:layout_constraintEnd_toStartOf="@+id/guideline21"
            android:layout_marginRight="8dp"
            android:layout_marginEnd="8dp"
            app:layout_constraintTop_toTopOf="@+id/guideline22"/>
    <Button
            android:id="@+id/btnReg"
            android:text="注册"
            android:onClick="btnRegClick"
            android:layout_width="100dp"
            android:layout_height="47dp"
            tools:ignore="MissingConstraints"
            app:layout_constraintStart_toStartOf="@+id/guideline21"
            android:layout_marginLeft="8dp"
            android:layout_marginStart="8dp"
            app:layout_constraintTop_toTopOf="@+id/guideline22"/>
    <androidx.constraintlayout.widget.Guideline android:layout_width="wrap_content" android:layout_height="wrap_content"
                                                android:id="@+id/guideline21"
                                                android:orientation="vertical"
                                                app:layout_constraintGuide_percent="0.5"/>
    <androidx.constraintlayout.widget.Guideline android:layout_width="wrap_content" android:layout_height="wrap_content"
                                                android:id="@+id/guideline22" app:layout_constraintGuide_begin="216dp"
                                                android:orientation="horizontal"/>


</androidx.constraintlayout.widget.ConstraintLayout>
登录成功页面布局:
<?xml version="1.0" encoding="utf-8"?>
<androidx.constraintlayout.widget.ConstraintLayout
        xmlns:android="http://schemas.android.com/apk/res/android"
        xmlns:tools="http://schemas.android.com/tools"
        xmlns:app="http://schemas.android.com/apk/res-auto"
        android:layout_width="match_parent"
        android:layout_height="match_parent"
        tools:context=".UserCenter">

    <TextView
            android:id="@+id/textUserInfo"
            android:layout_width="248dp"
            android:layout_height="73dp"
            app:layout_constraintTop_toTopOf="parent"
            app:layout_constraintStart_toStartOf="parent"
            android:layout_marginTop="160dp"
            android:layout_marginLeft="96dp"
            android:layout_marginStart="96dp"/>
</androidx.constraintlayout.widget.ConstraintLayout>登录页面java代码:
package com.example.Login;

import android.app.AlertDialog;
import android.content.Intent;
import android.os.Bundle;
import android.util.Log;
import android.view.View;
import android.widget.EditText;
import android.widget.Toast;
import androidx.appcompat.app.AppCompatActivity;

public class MainActivity extends AppCompatActivity {
    private static final String TAG="LOG";
    static String UserName="crystal";
    static String Password="abc456";

    //btnLogin点击事件
    public  void btnLoginClick(View v) {
        Log.e(TAG,"onClick");
        EditText etUser = findViewById(R.id.editName);
        String strUser = etUser.getText().toString().trim();
        EditText edtPass = findViewById(R.id.editPass);
        String strPass = edtPass.getText().toString().trim();

        if (strUser.equals(""))  {
            Toast.makeText(MainActivity.this, "用户名不能为空", Toast.LENGTH_SHORT).show();
            return;
        }
        if (strPass.equals(""))  {
            Toast.makeText(MainActivity.this, "密码不能为空", Toast.LENGTH_SHORT).show();
            return;
        }

        if (!strUser.equals(UserName))  {
            Toast.makeText(MainActivity.this, "用户名不存在", Toast.LENGTH_SHORT).show();
            return;
        }

        if (!strPass.equals(Password))  {
            Toast.makeText(MainActivity.this, "密码错误", Toast.LENGTH_SHORT).show();
            return;
        }

        //页面跳转并传参
        Intent intent =new Intent(MainActivity.this, UserCenter.class);
        intent.putExtra("name",strUser);
        intent.putExtra("password",strPass);
        startActivity(intent);

/*
        //验证成功创建一个弹出对话框
        new  AlertDialog.Builder(MainActivity.this)
                .setTitle("提示信息")
                .setMessage("您刚刚点击了登录按钮\n"+"您输入的用户名为:"+strUser+"  密码为:"+strPass)
                .setPositiveButton("确定",null)
                .show();
*/

    }


    //btnReg点击事件Toast消息框的应用
    public void btnRegClick(View v) {
        //创建一个弹出对话框
        Toast.makeText(MainActivity.this,"您刚刚点击了注册按钮", Toast.LENGTH_SHORT).show();
    }

    @Override
    protected void onCreate(Bundle savedInstanceState) {
        super.onCreate(savedInstanceState);
        setContentView(R.layout.activity_main);
    }
}登录成功用户中心java代码:文章来源:https://www.toymoban.com/news/detail-505534.html
package com.example.Login;

import android.content.Intent;
import android.widget.TextView;
import androidx.appcompat.app.ActionBar;
import androidx.appcompat.app.AppCompatActivity;
import android.os.Bundle;

public class UserCenter extends AppCompatActivity {

    @Override
    protected void onCreate(Bundle savedInstanceState) {
        super.onCreate(savedInstanceState);
        setContentView(R.layout.activity_user_center);

        //更改页面标题
        ActionBar actionBar = getSupportActionBar();
        actionBar.setTitle("用户中心");

        TextView info=findViewById(R.id.textUserInfo);
        Intent intent=getIntent();
        String name=intent.getStringExtra("name");
        String password=intent.getStringExtra("password");
        info.setText("用户:"+name+" 登录成功! ["+name+":"+password+"]");

    }
}有兴趣的朋友,可以复制代码进行测试,再添加上注册,注销退出功能进行练习巩固.文章来源地址https://www.toymoban.com/news/detail-505534.html
到了这里,关于IDEA Android用户登录页面、登录验证、页面跳转演示示例全部源码的文章就介绍完了。如果您还想了解更多内容,请在右上角搜索TOY模板网以前的文章或继续浏览下面的相关文章,希望大家以后多多支持TOY模板网!