因为以前学过一次,但是不深入。所以这次重学,记录一下。
这次用了最新的东东,畅快无极限!
-
官网在这里:https://arduino-esp8266.readthedocs.io/en/3.1.1/index.html
-
在ArduinoIDE里下载开发板esp8266是一件很痛苦的事情,虽然成功过,但是后来找到最好的方法还是下载中国的离线版,Arduino中文社区和点灯科技是个好东西;
-
目录没变,还是C:\Users\Administrator\AppData\Local\Arduino15,这个目录还有个好东西,就是引脚映射:C:\Users\Administrator\AppData\Local\Arduino15\packages\esp8266\hardware\esp8266\3.1.1\variants
-
D1的板子 #define LED_BUILTIN 2,这个2对应着Arduino板子上的D9这个引脚,D9它呢,又对应着内部esp12-F的第11个引脚,名称是IO2,功能是GPIO2/UART1_TXD,奇怪的是它没有接收引脚对应;另外,这个LED是低电平点亮的;
-
ESP模块貌似有个好处,它内部GPIO是什么数字,它对应的整数值也是那个数值。比如GPIO2就是数字2,GPIO0就是0,这一点又跟Arduino官方版一样方便了;
-
仅有的模拟输入口A0,它内部的值是17;
-
esp12-F的外壳就是GND
-
Server — ESP8266 Arduino Core 3.1.1 documentation
-
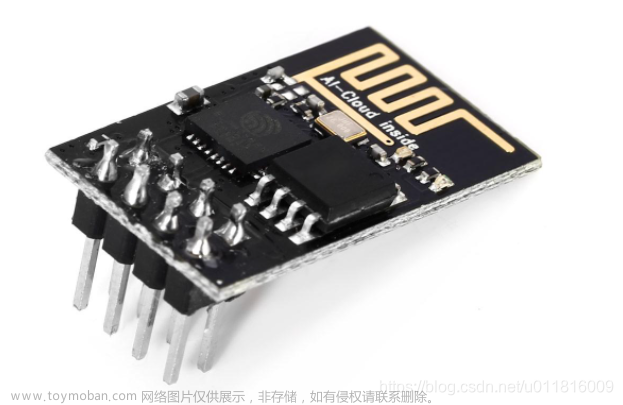
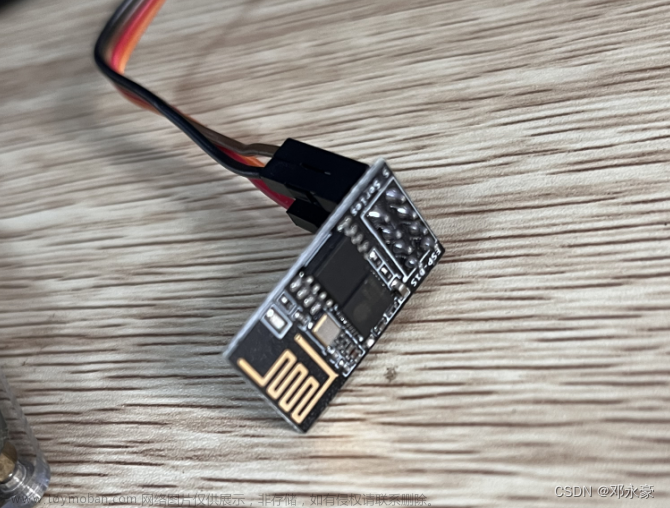
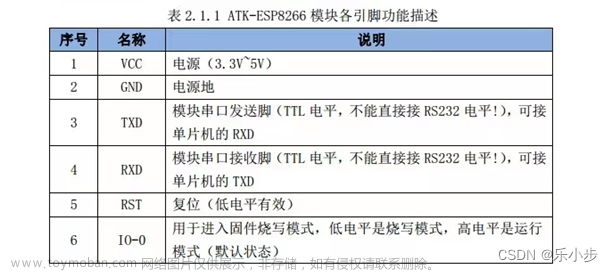
esp01s进入下载模式的方法是:将IO0接地,用杜邦线触碰RST一点时间即可
-
安信可启动的乱码问题,要先把VCC拔掉,把USBTLL串口波特率设置为74880,然后插上就可以显示前面那部分乱码的真实文字,不过后半部分的波特率还是115200的
-
以下代码是可用的,主要是一些连接的逻辑花了很多时间,无法确知available、accepted、connected的内在含义,但是经过参考了官方文档、示例并进行了试验,得到了这个稳定版本,可助理解。
-
WiFi - client.connected()
Description
Whether or not the client is connected. Note that a client is considered connected if the connection has been closed but there is still unread data.
WiFi - client.available()
Description
Returns the number of bytes available for reading (that is, the amount of data that has been written to the client by the server it is connected to).
available() inherits from the Stream utility class.文章来源:https://www.toymoban.com/news/detail-506068.html
WiFi - server.available()
Description
Gets a client that is connected to the server and has data available for reading. The connection persists when the returned client object goes out of scope; you can close it by calling client.stop().
available() inherits from the Stream utility class.
WiFi - client.stop()
Disconnect from the server文章来源地址https://www.toymoban.com/news/detail-506068.html
这是官方版本。

void loop()
{
  WiFiClient client = server.accept();
  // wait for a client (web browser) to connect
  if (client)
  {
    Serial.println("\n[Client connected]");
    while (client.connected())
    {
      // read line by line what the client (web browser) is requesting
      if (client.available())
      {
        String line = client.readStringUntil('\r');
        Serial.print(line);
        // wait for end of client's request, that is marked with an empty line
        if (line.length() == 1 && line[0] == '\n')
        {
          client.println(prepareHtmlPage());
          break;
        }
      }
    }

    while (client.available()) {
      // but first, let client finish its request
      // that's diplomatic compliance to protocols
      // (and otherwise some clients may complain, like curl)
      // (that is an example, prefer using a proper webserver library)
      client.read();
    }

    // close the connection:
    client.stop();
    Serial.println("[Client disconnected]");
  }
}
以下为我编写的控制继电器版本
#include <ESP8266WiFi.h>
#define DEBUG
#define GPIO0 0
#define GPIO2 2
#define L false
#define H true
#define DELAYTRIGGER(GPIO, LEVEL) \
do { \
digitalWrite(GPIO, LEVEL); \
delay(200); \
digitalWrite(GPIO, !LEVEL); \
} while (0)
const char* ssid = "14-2001";
const char* password = "******";
IPAddress local_IP(192, 168, 3, 31);
IPAddress gateway(192, 168, 3, 1);
IPAddress subnet(255, 255, 255, 0);
WiFiServer server(80);
void connectToWiFi() {
Serial.print("\n\nConnecting to ");
Serial.println(ssid);
WiFi.config(local_IP, gateway, subnet); //设置静态IP
WiFi.mode(WIFI_STA);
WiFi.begin(ssid, password);
while (WiFi.status() != WL_CONNECTED) {
delay(1000);
Serial.print(".");
}
Serial.println("\nWiFi connected");
Serial.print("IP address: ");
Serial.println(WiFi.localIP());
}
void setup() {
Serial.begin(115200);
pinMode(GPIO0, OUTPUT);
pinMode(GPIO2, OUTPUT);
digitalWrite(GPIO0, HIGH);
digitalWrite(GPIO2, HIGH);
connectToWiFi();
server.begin();
Serial.println("Server started : To control GPIO, use Android APP [esp8266 controller].");
}
void loop() {
WiFiClient client = server.accept();
if (!client) {
Serial.print("A");
delay(200);
return;
}
Serial.println("\n\n");
Serial.println("Client " + client.remoteIP().toString() + " connected.");
while (client.connected()) {
Serial.print("C");
delay(100);
if (client.available()) {
Serial.println("\nclient available...");
String req = client.readStringUntil('\r');
Serial.println("client request:");
Serial.println(req);
// Match the request
int val;
if (req.indexOf("ON1") != -1) { //IO0 ON 高电平触发
Serial.println("ON1");
DELAYTRIGGER(GPIO0, H);
} else if (req.indexOf("OFF1") != -1) { //IO0 OFF 低电平触发
Serial.println("OFF1");
DELAYTRIGGER(GPIO0, L);
} else if (req.indexOf("ON2") != -1) { //IO2 ON 高电平触发
Serial.println("ON2");
DELAYTRIGGER(GPIO2, H);
} else if (req.indexOf("OFF2") != -1) { //IO2 OFF 低电平触发
Serial.println("OFF2");
DELAYTRIGGER(GPIO2, L);
} else {
Serial.println("invalid request, reset...");
client.print("HTTP/1.1 404\r\n");
client.stop();
return;
}
// Prepare the response
String s = "HTTP/1.1 200 OK\r\nContent-Type: text/html\r\n\r\n<!DOCTYPE HTML>\r\n<html>\r\nGPIO is now ";
s += (val) ? "high" : "low";
s += "</html>\n";
client.print(s);
client.flush();
client.stop();
}
}
Serial.println("\n[Client disonnected]");
}
到了这里,关于Arduino D1开发板 ESP8266 ESP01-S Wifi 模块 手机控制继电器 学习手记的文章就介绍完了。如果您还想了解更多内容,请在右上角搜索TOY模板网以前的文章或继续浏览下面的相关文章,希望大家以后多多支持TOY模板网!


