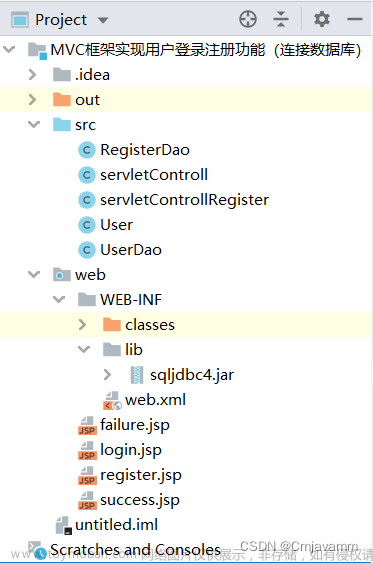
1:我们先从html开始,注释不多,希望谅解,下面是html页面的代码:
<%@ page contentType="text/html;charset=UTF-8" language="java" %>
<html>
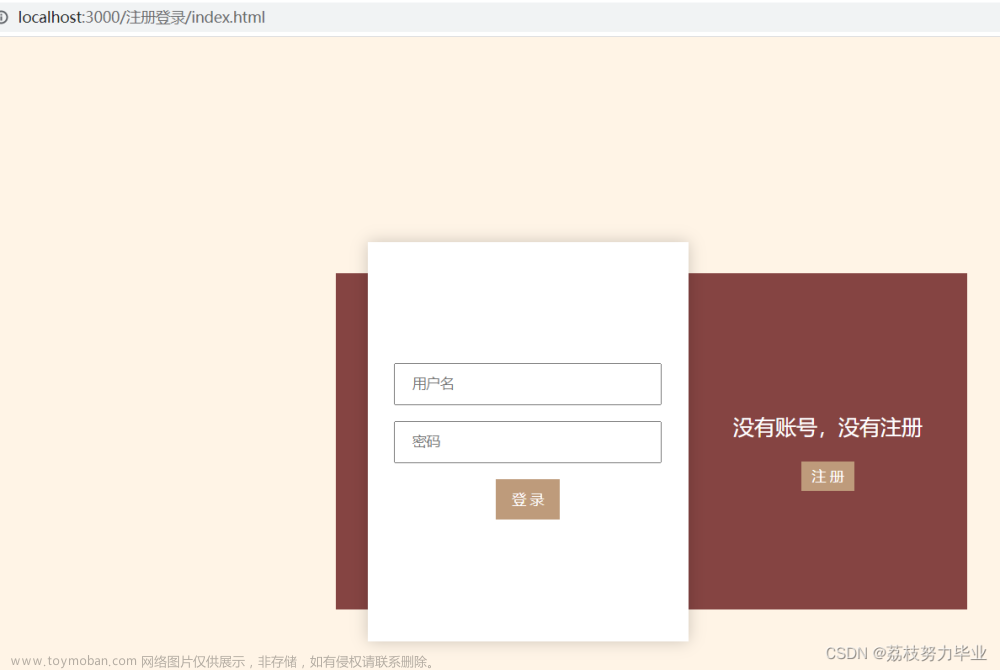
<head>
<title>Title</title>
<script type="text/javascript" src="jq/jquery-3.3.1.js"></script>
<link href="css/login.css" rel="stylesheet">
<script type="text/javascript" src="js/login.js"></script>
</head>
<body>
<div id="pop" style="display: none">
<div id="pop_ts">提示</div>
<div id="pop_tz">注册成功!</div>
<div id="span" style="color: white" onclick="confirm()">确定</div>
</div>
<div id="header_top">
<div id="login">
<form id="form_1" class="box">
<span class="logo_logo"><a href="header.jsp" class="a_logo">LOGO</a></span>
<h1>登录</h1>
<div id="login_ww" style="color: yellow"></div>
<input class="dc" id="username1" type="text" name="username" placeholder="用户名">
<input class="dc" id="password1" type="password" name="password" placeholder="密码">
<input type="submit" name="no" value="登录" id="no">
<p class="meassage">还未注册?<a id="onclick_1" onclick="fun('no')"> 注册</a></p>
<div class="checkbox">
<label>
<input type="checkbox" name="yes" value="no" ><span class="checkboxmessage" style="font-size: 12px;">自动登录</span>
</label>
</div>
</form>
</div>
<div id="register">
<form id="form" name="form" class="box">
<span class="logo_logo"><a href="header.jsp" class="a_logo">LOGO</a></span>
<h1>注册页面</h1>
<div id="errorMsg" style="color: yellow"></div>
<input class="a" id="username_1" type="text" name="username" placeholder="用户名英文" >
<input class="a" id="password_1" type="password" name="password" placeholder="密码:数字加英文">
<input class="a" id="phone_1" type="phone" name="phone" placeholder="中国移动电话号码11位">
<input class="a" id="address_1" type="idcard" name="address" placeholder="地址如:四川省成都市武侯区">
<input class="a" id="rgdate_1" type="rgdate" name="rgdate" placeholder="时间" style="display: none">
<input type="submit" name="ok" id="ww" value="注册">
<p class="meassage">已有账号?<a id="onclick_2" onclick="fun('yes')">登录</a></p>
</form>
</div>
</div>
</body>
</html>2:下面是一个css代码,可能比较乱:
body{
margin: 0;
padding: 0;
font-family: sans-serif;
background-image: url("../images/bg_01.png");
background-size: cover;
}
a{
cursor: pointer;
}
.box{
width: 300px;
padding: 40px;
position: absolute;
top: 50%;
left: 50%;
transform: translate(-50%,-50%);
background: #191919;
opacity: 0.5;
text-align: center;
}
.box h1{
color: white;
text-transform: uppercase;
font-weight: 500;
}
.box input[type = "text"],.box input[type = "password"]{
border:0;
background: none;
display: block;
margin: 20px auto;
text-align: center;
border: 2px solid #3498db;
padding: 14px 10px;
width: 200px;
outline: none;
color: white;
border-radius: 24px;
transition: 0.25s;
}
.box input[type = "text"]:focus,.box input[type = "password"]:focus{
width: 280px;
border-color: #2ecc71;
}
.box input[type = "text"],.box input[type = "rgdate"]{
border:0;
background: none;
display: block;
margin: 20px auto;
text-align: center;
border: 2px solid #3498db;
padding: 14px 10px;
width: 200px;
outline: none;
color: white;
border-radius: 24px;
transition: 0.25s;
}
.box input[type = "text"]:focus,.box input[type = "rgdate"]:focus{
width: 280px;
border-color: #2ecc71;
}
.box input[type = "submit"]{
border:0;
background: none;
display: block;
margin: 20px auto;
text-align: center;
border: 2px solid #2ecc71;
padding: 14px 40px;
outline: none;
color: white;
border-radius: 24px;
transition: 0.25s;
cursor: pointer;
}
.box input[type = "submit"]:hover{
background: #2ecc71;
}
.box .meassage{
text-transform: uppercase;
color:white;
}
.box .meassage a{
color: aqua;
text-decoration: none;
}
.checkboxmessage{
color:white;
font-size:18px;
}
.box input[type = "text"]:focus,.box input[type = "idcard"]:focus{
width: 280px;
border-color: #2ecc71;
}
.box input[type = "text"],.box input[type = "idcard"]{
border:0;
background: none;
display: block;
margin: 20px auto;
text-align: center;
border: 2px solid #3498db;
padding: 14px 10px;
width: 200px;
outline: none;
color: white;
border-radius: 24px;
transition: 0.25s;
}.box input[type = "text"]:focus,.box input[type = "phone"]:focus{
width: 280px;
border-color: #2ecc71;
}
.box input[type = "text"],.box input[type = "phone"]{
border:0;
background: none;
display: block;
margin: 20px auto;
text-align: center;
border: 2px solid #3498db;
padding: 14px 10px;
width: 200px;
outline: none;
color: white;
border-radius: 24px;
transition: 0.25s;
}
.a_logo{
cursor: pointer;
color: rgb(189, 159, 170) ;
}
#register{
display: none;
}
.logo_logo {
width: 70px;
height: 20px;
overflow: hidden;
text-overflow: ellipsis;
white-space: nowrap;
float: left;
text-align: center;
display: inline;
font-size: 20px;
color: rgb(189, 159, 170) ;
font-family: "Lucida Calligraphy";
}
#pop {
width: 400px;
height: 250px;
top: 20%;
left: 37%;
position: absolute;
background-color: white;
z-index: 10;
}
#pop_ts{
width: 400px;
height: 100px;
background-color: #191919;
color: white;
font-size: 35px;
text-align: center;
line-height: 100px;
}
#pop_tz{
width: 400px;
height: 50px;
text-align: center;
line-height: 50px;
margin-top: 40px;
}
#span {
width: 100px;
height: 40px;
background-color: #3498db;
text-align: center;
line-height: 40px;
margin: 20px auto;
cursor: pointer;
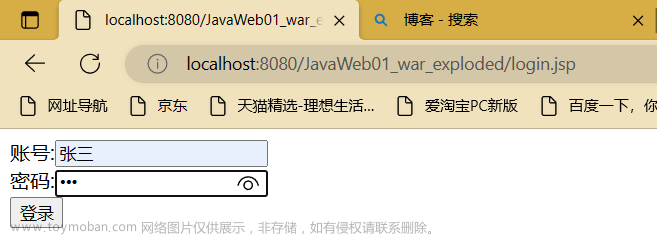
}3:然后我们看看样式是什么样子吧:


4:因为登录注册是在一个页面上面显示的,点击登录会把登录这个div页面隐藏,然后显示注册的div页面.利用的是点击事件;剩下的请看第二章哦!!!文章来源:https://www.toymoban.com/news/detail-507856.html
 文章来源地址https://www.toymoban.com/news/detail-507856.html
到了这里,关于登录注册页面连接数据库并完成注册(一)的文章就介绍完了。如果您还想了解更多内容,请在右上角搜索TOY模板网以前的文章或继续浏览下面的相关文章,希望大家以后多多支持TOY模板网!