Spring Boot 3.x系列文章
- Spring Boot 2.7.8 中文参考指南(一)
- Spring Boot 2.7.8 中文参考指南(二)-Web
- Spring Boot 源码阅读初始化环境搭建
- Spring Boot 框架整体启动流程详解
- Spring Boot 系统初始化器详解
自定义系统初始化器
Spring Boot 有多种加载自定义初始化器的方法:
1、创建一个实现ApplicationContextInitializer接口的类,在spring.factories中添加,如MyInitializer
2、创建一个实现ApplicationContextInitializer接口的类,在SpringApplication 中使用addInitializers添加,如MyInitializer2
3、创建一个实现ApplicationContextInitializer接口的类,在application.yml或application.properties中使用context.initializer.classes添加,如MyInitializer3
4、创建一个实现EnvironmentPostProcessor接口的类,在spring.factories中添加,如MyEnvironmentPostProcessor
代码如下所示:
MyInitializer.java
import lombok.extern.slf4j.Slf4j;
import org.springframework.context.ApplicationContextInitializer;
import org.springframework.context.ConfigurableApplicationContext;
import org.springframework.core.annotation.Order;
import org.springframework.core.env.ConfigurableEnvironment;
import org.springframework.core.env.MapPropertySource;

import java.util.HashMap;
import java.util.Map;

@Slf4j
@Order(2)
public class MyInitializer implements ApplicationContextInitializer<ConfigurableApplicationContext> {
    @Override
    public void initialize(ConfigurableApplicationContext applicationContext) {
        ConfigurableEnvironment configurableEnvironment = applicationContext.getEnvironment();
        Map<String, Object> map = new HashMap<>();
        map.put("key", "value");
        MapPropertySource mapPropertySource = new MapPropertySource("mySource", map);
        configurableEnvironment.getPropertySources().addLast(mapPropertySource);
        log.info("My Initializer run");
    }
}
MyInitializer2.java
import lombok.extern.slf4j.Slf4j;
import org.springframework.context.ApplicationContextInitializer;
import org.springframework.context.ConfigurableApplicationContext;
import org.springframework.core.annotation.Order;
import org.springframework.core.env.ConfigurableEnvironment;
import org.springframework.core.env.MapPropertySource;

import java.util.HashMap;
import java.util.Map;

@Slf4j
@Order(1)
public class MyInitializer2 implements ApplicationContextInitializer<ConfigurableApplicationContext> {
    @Override
    public void initialize(ConfigurableApplicationContext applicationContext) {
        ConfigurableEnvironment configurableEnvironment = applicationContext.getEnvironment();
        Map<String, Object> map = new HashMap<>();
        map.put("key2", "value2");
        MapPropertySource mapPropertySource = new MapPropertySource("mySource", map);
        configurableEnvironment.getPropertySources().addLast(mapPropertySource);
        log.info("My Initializer2 run");
    }
}
MyInitializer3.java
import lombok.extern.slf4j.Slf4j;
import org.springframework.context.ApplicationContextInitializer;
import org.springframework.context.ConfigurableApplicationContext;
import org.springframework.core.annotation.Order;
import org.springframework.core.env.ConfigurableEnvironment;
import org.springframework.core.env.MapPropertySource;

import java.util.HashMap;
import java.util.Map;

@Slf4j
@Order(10)
public class MyInitializer3 implements ApplicationContextInitializer<ConfigurableApplicationContext> {
    @Override
    public void initialize(ConfigurableApplicationContext applicationContext) {
        ConfigurableEnvironment configurableEnvironment = applicationContext.getEnvironment();
        Map<String, Object> map = new HashMap<>();
        map.put("key3", "value3");
        MapPropertySource mapPropertySource = new MapPropertySource("mySource", map);
        configurableEnvironment.getPropertySources().addLast(mapPropertySource);
        log.info("My Initializer3 run");
    }
}
MyEnvironmentPostProcessor.java
import lombok.extern.slf4j.Slf4j;
import org.springframework.boot.SpringApplication;
import org.springframework.boot.env.EnvironmentPostProcessor;
import org.springframework.core.annotation.Order;
import org.springframework.core.env.ConfigurableEnvironment;
import org.springframework.core.env.MapPropertySource;

import java.util.HashMap;
import java.util.Map;

@Slf4j
@Order(5)
public class MyEnvironmentPostProcessor implements EnvironmentPostProcessor {
    @Override
    public void postProcessEnvironment(ConfigurableEnvironment environment, SpringApplication application) {
        Map<String, Object> map = new HashMap<>();
        map.put("key", "value");
        MapPropertySource mapPropertySource = new MapPropertySource("mySource", map);
        environment.getPropertySources().addLast(mapPropertySource);
        //为什么不打印日志
//        log.info("My EnvironmentPostProcessor run");
        System.out.println("My EnvironmentPostProcessor run");
    }
}
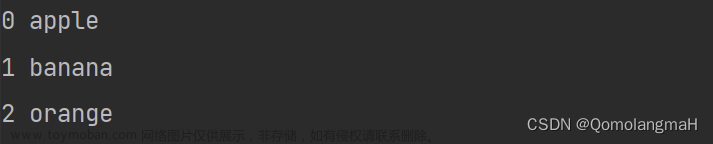
启动后截图:
疑问❓
- 在MyEnvironmentPostProcessor的示例中,用
log.info("My EnvironmentPostProcessor run");不会打印日志。- MyInitializer3的输出怎么会在MyInitializer2之前。
加载原理
实例1加载原理
在之前的文章中《Spring Boot 框架整体启动流程详解》有介绍到Spring Boot 应用程序初始化的时候会从META-INF/spring.factories加载ApplicationContextInitializer类实例

SpringFactoriesLoader 是Spring 框架中的类,用于从多个Jar文件的META-INF/spring.factories中加载并实例化给定的类型,spring.factories文件必须采用Properties格式,其中key是接口或抽象类的完全限定名称,value是以逗号分隔的实现类名列表。例如:
example.MyService=example.MyServicesImpl1,example.MyService Impl2
其中example.MyService是接口的名称,MyServiceImpl1和MyServiceImpl2是两个实现。
获取实例分成了两部分,首先从多个Jar文件的META-INF/spring.factories中加载key和value,返回一个SpringFactoriesLoader实例,然后调用SpringFactoriesLoader的load方法初始化指定key(key为接口或者抽象类的全限定名)对应的所有value(接口实现类),返回实例列表。
spring.factories的加载

FACTORIES_RESOURCE_LOCATION指定了加载的路径
public static final String FACTORIES_RESOURCE_LOCATION = "META-INF/spring.factories";
public static SpringFactoriesLoader forResourceLocation(String resourceLocation, @Nullable ClassLoader classLoader) {
// 判断资源路径是否为空,若为空则抛出异常
	Assert.hasText(resourceLocation, "'resourceLocation' must not be empty");
// 获取资源对应的类加载器,若传入的类加载器为空,则使用SpringFactoriesLoader类的类加载器
	ClassLoader resourceClassLoader = (classLoader != null ? classLoader :
			SpringFactoriesLoader.class.getClassLoader());
// 从缓存中获取SpringFactoriesLoader,若不存在,则创建一个并缓存 Map<String, SpringFactoriesLoader>,key为ClassLoader,资源对应的类加载器
	Map<String, SpringFactoriesLoader> loaders = cache.computeIfAbsent(
			resourceClassLoader, key -> new ConcurrentReferenceHashMap<>());
// 返回resourceLocation对应的SpringFactoriesLoader对象,若不存在,则创建一个并缓存,key为resourceLocation,资源路径
	return loaders.computeIfAbsent(resourceLocation, key ->
			new SpringFactoriesLoader(classLoader, loadFactoriesResource(resourceClassLoader, resourceLocation)));
}
computeIfAbsent 返回的是key关联的value值
最后一步value创建了一个SpringFactoriesLoader实例,loadFactoriesResource 使用给定的资源类加载器从"META-INF/spring.factories"中加载
protected static Map<String, List<String>> loadFactoriesResource(ClassLoader classLoader, String resourceLocation) {
//实现列表,key=接口或抽象类全限定名 value=实现类全限定名
	Map<String, List<String>> result = new LinkedHashMap<>();
	try {
	//获取指定路径下所有的资源URL
		Enumeration<URL> urls = classLoader.getResources(resourceLocation);
		while (urls.hasMoreElements()) {
			UrlResource resource = new UrlResource(urls.nextElement());
			//从URL资源中读取配置
			Properties properties = PropertiesLoaderUtils.loadProperties(resource);
			properties.forEach((name, value) -> {
			//实现类逗号分割,转换为数组
				String[] factoryImplementationNames = StringUtils.commaDelimitedListToStringArray((String) value);
				//接口的实现类列表
				List<String> implementations = result.computeIfAbsent(((String) name).trim(),
						key -> new ArrayList<>(factoryImplementationNames.length));

//去掉实现类两边空格,并插入实现类列表
				Arrays.stream(factoryImplementationNames).map(String::trim).forEach(implementations::add);
			});
		}

//去重
result.replaceAll(SpringFactoriesLoader::toDistinctUnmodifiableList);
	}
	catch (IOException ex) {
		throw new IllegalArgumentException("Unable to load factories from location [" + resourceLocation + "]", ex);
	}
	//返回不可修改的map
	return Collections.unmodifiableMap(result);
}
加载部分有很多的key,value 要分清楚。
spring.factories接口实现类的实例化
实例化通过调用SpringFactoriesLoader的load方法
	public <T> List<T> load(Class<T> factoryType, @Nullable ArgumentResolver argumentResolver) {
		return load(factoryType, argumentResolver, null);
	}
factoryType指定要实例化的类型,这里为 org.springframework.context.ApplicationContextInitializerargumentResolver 实例化需要的参数,这里为null
public <T> List<T> load(Class<T> factoryType, @Nullable ArgumentResolver argumentResolver,
		@Nullable FailureHandler failureHandler) {

	Assert.notNull(factoryType, "'factoryType' must not be null");
	//从factories 中获取指定接口类型的所有实现
	//factories就是加载步骤中返回的result
	List<String> implementationNames = loadFactoryNames(factoryType);
	logger.trace(LogMessage.format("Loaded [%s] names: %s", factoryType.getName(), implementationNames));
	List<T> result = new ArrayList<>(implementationNames.size());
	//定义失败处理器
	FailureHandler failureHandlerToUse = (failureHandler != null) ? failureHandler : THROWING_FAILURE_HANDLER;
	//循环,实例化
	for (String implementationName : implementationNames) {
	//通过构造函数实例化
		T factory = instantiateFactory(implementationName, factoryType, argumentResolver, failureHandlerToUse);
		if (factory != null) {
			result.add(factory);
		}
	}
	//根据order 排序
	AnnotationAwareOrderComparator.sort(result);
	return result;
}
最终返回排序后的ApplicationContextInitializer 实例,赋值SpringApplication 的 initializers 变量。
执行
执行会在SpringApplication类的prepareContext(准备上下文)中进行调用,如图所示:
	//返回一个只读的有序,LinkedHashSet 类型
	public Set<ApplicationContextInitializer<?>> getInitializers() {
		return asUnmodifiableOrderedSet(this.initializers);
	}
	protected void applyInitializers(ConfigurableApplicationContext context) {
	//获取所有的ApplicationContextInitializer实例
		for (ApplicationContextInitializer initializer : getInitializers()) {
			Class<?> requiredType = GenericTypeResolver.resolveTypeArgument(initializer.getClass(),
					ApplicationContextInitializer.class);
			// 判断ApplicationContextInitializer实例泛型是否与context对象类型一致
			Assert.isInstanceOf(requiredType, context, "Unable to call initializer.");
			// 调用ApplicationContextInitializer实例的initialize方法进行初始化操作
			initializer.initialize(context);
		}
	}
实例2加载原理
创建一个实现ApplicationContextInitializer接口的类,在SpringApplication 中使用addInitializers添加,如MyInitializer2。
我们使用addInitializers 将ApplicationContextInitializer接口的实现加入到SpringApplication中。
	public void addInitializers(ApplicationContextInitializer<?>... initializers) {
		this.initializers.addAll(Arrays.asList(initializers));
	}
initializers 就是 SpringApplication中的initializers变量,执行点同实例1,在准备上下文的时候执行,由于执行前会进行一次排序,所以他们两的顺序是正确的。
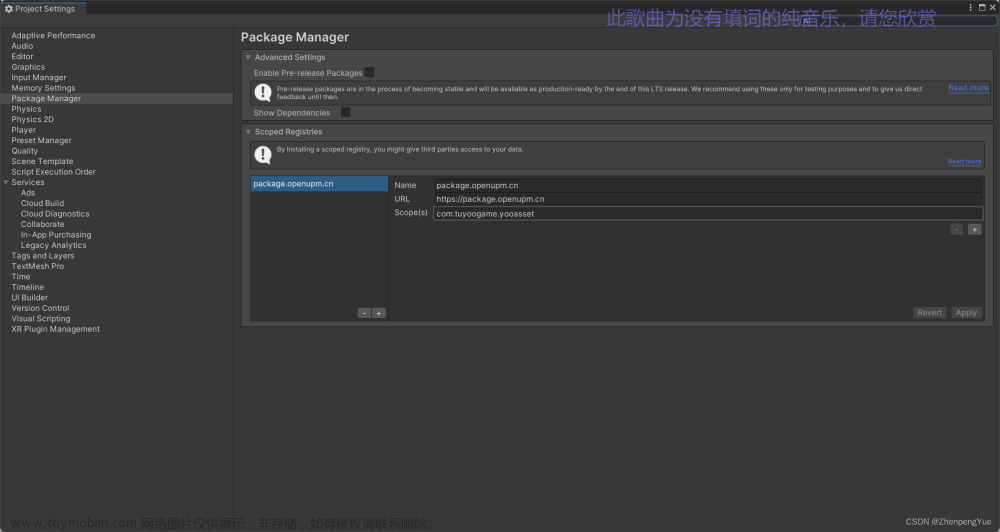
实例3加载原理
创建一个实现ApplicationContextInitializer接口的类,在application.yml或application.properties中使用context.initializer.classes添加,如MyInitializer3
该处通过配置文件添加ApplicationContextInitializer实现类,并且通过DelegatingApplicationContextInitializer 初始化器进行加载和执行。

DelegatingApplicationContextInitializer 被定义在了spring-boot.jar 的 META-INF/spring.factories中,并且由于他的order是0,所以会在我们自定义MyInitializer和MyInitializer2 前执行,它是另外一种独立的初始化器,专门用于将配置文件中的ApplicationContextInitializer实现类加载到Spring容器中。

执行在DelegatingApplicationContextInitializer类的applyInitializers方法中
private void applyInitializers(ConfigurableApplicationContext context,
		List<ApplicationContextInitializer<?>> initializers) {
		//排序
	initializers.sort(new AnnotationAwareOrderComparator());
	for (ApplicationContextInitializer initializer : initializers) {
	//调用initialize方法
		initializer.initialize(context);
	}
}
实例4加载原理
创建一个实现EnvironmentPostProcessor接口的类,在spring.factories中添加,如MyEnvironmentPostProcessor。
实例4是在所有的测试中最先打印日志的,是因为它是在prepareEnvironment(准备环境)中执行,而前面3个实例都是在prepareContext(准备上下文)中执行。
该实例中EventPublishingRunListener会调用prepareEnvironment方法,EventPublishingRunListener被定义在Spring Boot Jar包的META-INF/spring.factories中,用于发布各种SpringApplicationEvent事件。
EventPublishingRunListener类中
public void environmentPrepared(ConfigurableBootstrapContext bootstrapContext,
		ConfigurableEnvironment environment) {
		//广播环境准备完成事件
	multicastInitialEvent(
			new ApplicationEnvironmentPreparedEvent(bootstrapContext, this.application, this.args, environment));
}

private void multicastInitialEvent(ApplicationEvent event) {
	//刷新SimpleApplicationEventMulticaster中的事件列表
	refreshApplicationListeners();
	//广播事件
	this.initialMulticaster.multicastEvent(event);
}

private void refreshApplicationListeners() {
	this.application.getListeners().forEach(this.initialMulticaster::addApplicationListener);
}
SimpleApplicationEventMulticaster类中
public void multicastEvent(ApplicationEvent event) {
	multicastEvent(event, null);
}

@Override
public void multicastEvent(ApplicationEvent event, @Nullable ResolvableType eventType) {
	ResolvableType type = (eventType != null ? eventType : ResolvableType.forInstance(event));
	// 获取执行事件的线程池
	Executor executor = getTaskExecutor();
	//获取指定事件类型的事件集合
	for (ApplicationListener<?> listener : getApplicationListeners(event, type)) {
	//如果定义了执行线程池,则用线程池调用
		if (executor != null) {
			executor.execute(() -> invokeListener(listener, event));
		}
		else {
		//同步调用监听器
			invokeListener(listener, event);
		}
	}
}

protected void invokeListener(ApplicationListener<?> listener, ApplicationEvent event) {
//获取失败处理器
	ErrorHandler errorHandler = getErrorHandler();
	if (errorHandler != null) {
		try {
			doInvokeListener(listener, event);
		}
		catch (Throwable err) {
			errorHandler.handleError(err);
		}
	}
	else {
		doInvokeListener(listener, event);
	}
}

@SuppressWarnings({"rawtypes", "unchecked"})
private void doInvokeListener(ApplicationListener listener, ApplicationEvent event) {
	try {
	//此处执行事件监听器的onApplicationEvent方法
		listener.onApplicationEvent(event);
	}
	catch (ClassCastException ex) {
		String msg = ex.getMessage();
		if (msg == null || matchesClassCastMessage(msg, event.getClass()) ||
				(event instanceof PayloadApplicationEvent payloadEvent &&
						matchesClassCastMessage(msg, payloadEvent.getPayload().getClass()))) {
			// Possibly a lambda-defined listener which we could not resolve the generic event type for
			// -> let's suppress the exception.
			Log loggerToUse = this.lazyLogger;
			if (loggerToUse == null) {
				loggerToUse = LogFactory.getLog(getClass());
				this.lazyLogger = loggerToUse;
			}
			if (loggerToUse.isTraceEnabled()) {
				loggerToUse.trace("Non-matching event type for listener: " + listener, ex);
			}
		}
		else {
			throw ex;
		}
	}
}
在listener.onApplicationEvent(event);处,在本例中为EnvironmentPostProcessorApplicationListener
EnvironmentPostProcessorApplicationListener类中:
public void onApplicationEvent(ApplicationEvent event) {
//根据各个事件类型分别去处理
	if (event instanceof ApplicationEnvironmentPreparedEvent environmentPreparedEvent) {
		onApplicationEnvironmentPreparedEvent(environmentPreparedEvent);
	}
	if (event instanceof ApplicationPreparedEvent) {
		onApplicationPreparedEvent();
	}
	if (event instanceof ApplicationFailedEvent) {
		onApplicationFailedEvent();
	}
}

private void onApplicationEnvironmentPreparedEvent(ApplicationEnvironmentPreparedEvent event) {
	ConfigurableEnvironment environment = event.getEnvironment();
	SpringApplication application = event.getSpringApplication();
	// 获取所有的 EnvironmentPostProcessor,然后执行其 postProcessEnvironment 方法
	for (EnvironmentPostProcessor postProcessor : getEnvironmentPostProcessors(application.getResourceLoader(),
			event.getBootstrapContext())) {
		postProcessor.postProcessEnvironment(environment, application);
	}
}

// 获取所有的 EnvironmentPostProcessor
List<EnvironmentPostProcessor> getEnvironmentPostProcessors(ResourceLoader resourceLoader,
		ConfigurableBootstrapContext bootstrapContext) {
	ClassLoader classLoader = (resourceLoader != null) ? resourceLoader.getClassLoader() : null;
	//postProcessorsFactory 是一个函数表达式
	EnvironmentPostProcessorsFactory postProcessorsFactory = this.postProcessorsFactory.apply(classLoader);
	return postProcessorsFactory.getEnvironmentPostProcessors(this.deferredLogs, bootstrapContext);
}
EnvironmentPostProcessorsFactory postProcessorsFactory = this.postProcessorsFactory.apply(classLoader);中的postProcessorsFactory是在EnvironmentPostProcessorApplicationListener实例化的时候初始化,根据前面的文章我们知道EnvironmentPostProcessorApplicationListener是一个监听器,会在SpringBoot初始化的时候初始化。
public EnvironmentPostProcessorApplicationListener() {
	this(EnvironmentPostProcessorsFactory::fromSpringFactories);
}

private EnvironmentPostProcessorApplicationListener(
		Function<ClassLoader, EnvironmentPostProcessorsFactory> postProcessorsFactory) {
	this.postProcessorsFactory = postProcessorsFactory;
	this.deferredLogs = new DeferredLogs();
}

static EnvironmentPostProcessorsFactory fromSpringFactories(ClassLoader classLoader) {
	return new SpringFactoriesEnvironmentPostProcessorsFactory(
			SpringFactoriesLoader.forDefaultResourceLocation(classLoader));
}
EnvironmentPostProcessorsFactory fromSpringFactories(ClassLoader classLoader) 会在EnvironmentPostProcessorsFactory postProcessorsFactory = this.postProcessorsFactory.apply(classLoader); apply的时候调用,如果没有加载META-INF/spring.factories会再这里再次加载。
EnvironmentPostProcessorsFactory 的主要作用是实例化EnvironmentPostProcessor,SpringFactoriesEnvironmentPostProcessorsFactory是其子类。
SpringFactoriesEnvironmentPostProcessorsFactory类中:
public List<EnvironmentPostProcessor> getEnvironmentPostProcessors(DeferredLogFactory logFactory,
		ConfigurableBootstrapContext bootstrapContext) {
	ArgumentResolver argumentResolver = ArgumentResolver.of(DeferredLogFactory.class, logFactory);
	//向argumentResolver对象中添加ConfigurableBootstrapContext.class和bootstrapContext,获取更新后的argumentResolver对象
	argumentResolver = argumentResolver.and(ConfigurableBootstrapContext.class, bootstrapContext);
	// // 向argumentResolver对象中添加BootstrapRegistry.class和bootstrapContext,获取更新后的argumentResolver对象
	argumentResolver = argumentResolver.and(BootstrapContext.class, bootstrapContext);
	 通过this.loader.load方法加载EnvironmentPostProcessor类型的对象,参数为argumentResolver
	argumentResolver = argumentResolver.and(BootstrapRegistry.class, bootstrapContext);
	//加载EnvironmentPostProcessor类型的对象
	return this.loader.load(EnvironmentPostProcessor.class, argumentResolver);
}
最后循环调用postProcessor.postProcessEnvironment(environment, application);完成执行。
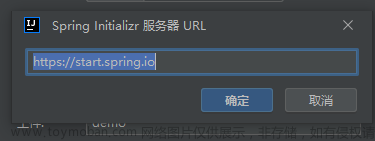
总结
同样的,用一张图来总结本文整个流程:
作者其他文章:
Prometheus 系列文章
- Prometheus 的介绍和安装
- 直观感受PromQL及其数据类型
- PromQL之选择器和运算符
- PromQL之函数
- Prometheus 告警机制介绍及命令解读
- Prometheus 告警模块配置深度解析
- Prometheus 配置身份认证
- Prometheus 动态拉取监控服务
- Prometheus 监控云Mysql和自建Mysql
Grafana 系列文章,版本:OOS v9.3.1文章来源:https://www.toymoban.com/news/detail-509230.html
- Grafana 的介绍和安装
- Grafana监控大屏配置参数介绍(一)
- Grafana监控大屏配置参数介绍(二)
- Grafana监控大屏可视化图表
- Grafana 查询数据和转换数据
- Grafana 告警模块介绍
- Grafana 告警接入飞书通知
Spring Boot Admin 系列文章来源地址https://www.toymoban.com/news/detail-509230.html
- Spring Boot Admin 参考指南
- SpringBoot Admin服务离线、不显示健康信息的问题
- Spring Boot Admin2 @EnableAdminServer的加载
- Spring Boot Admin2 AdminServerAutoConfiguration详解
- Spring Boot Admin2 实例状态监控详解
- Spring Boot Admin2 自定义JVM监控通知
- Spring Boot Admin2 自定义异常监控
- Spring Boot Admin 监控指标接入Grafana可视化
到了这里,关于Spring Boot 系统初始化器详解的文章就介绍完了。如果您还想了解更多内容,请在右上角搜索TOY模板网以前的文章或继续浏览下面的相关文章,希望大家以后多多支持TOY模板网!