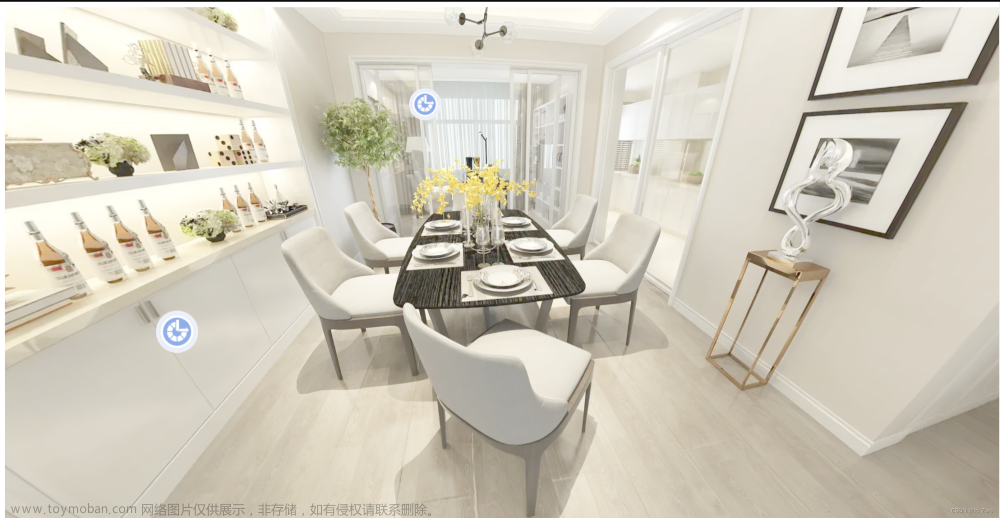
1.下载依赖:
VS code终端执行两个命令
npm install three --save-dev

npm install photo-sphere-viewer
2.<template>模块代码
<template>
  <div class="demo-container">
    <div id="viewer"></div>
  </div>
</template>3.<script>模块代码文章来源:https://www.toymoban.com/news/detail-512549.html
<script>
import { Viewer } from "photo-sphere-viewer";
import "photo-sphere-viewer/dist/photo-sphere-viewer.css";
import { MarkersPlugin } from "photo-sphere-viewer/dist/plugins/markers";
import "photo-sphere-viewer/dist/plugins/markers.css";
export default {
data() {
return {
viewer: "",
markersPlugin: "",
itemArr: [
{
name: "house0",
img: require("@/views/montage/images/yidongyun/marks.jpg"),
},
{
name: "house1",
// img: require('@/assets/imgs/demo/demo1.jpeg'),
img: "https://p3-juejin.byteimg.com/tos-cn-i-k3u1fbpfcp/0ebbea0343bf44d2aabab3dc58aa4c3a~tplv-k3u1fbpfcp-watermark.awebp",
},
{
name: "house2",
img: "https://p3-juejin.byteimg.com/tos-cn-i-k3u1fbpfcp/6df92ba39aa94aec889582df60d3d0d0~tplv-k3u1fbpfcp-watermark.awebp",
},
{
name: "house3",
img: "https://p3-juejin.byteimg.com/tos-cn-i-k3u1fbpfcp/40135df7df034eb5a76daa76f26fe046~tplv-k3u1fbpfcp-watermark.awebp",
},
],
currentDataMark: [],
// 数据配置,每个图片中存在几个可点击的标记,tooltip对应的是图片名称
dataMark: {
house0: [
{
// 自定义样式的标记
id: "circle0",
longitude: 1.5,
latitude: -0.28,
html: "<b>house1</b> ♥", // 显示内容
anchor: "center center",
scale: [0.5, 1.5],
style: {
// maxWidth: "100px",
color: "white",
fontSize: "20px",
fontFamily: "Helvetica, sans-serif",
textAlign: "center",
},
note: 1,
},
{
id: "circle1",
tooltip: "house2",
circle: 31,
svgStyle: {
fill: "rgba(255,255,0,0.3)",
stroke: "yellow",
strokeWidth: "2px",
},
longitude: -1.5,
latitude: -0.28,
anchor: "center center",
note: 2,
},
],
house1: [
{
id: "circle0",
tooltip: "house2",
circle: 30,
svgStyle: {
fill: "rgba(255,255,0,0.3)",
stroke: "yellow",
strokeWidth: "2px",
},
longitude: 1.5,
latitude: -0.28,
anchor: "center center",
note: 2,
},
{
id: "circle1",
tooltip: "house3",
circle: 31,
svgStyle: {
fill: "rgba(255,255,0,0.3)",
stroke: "yellow",
strokeWidth: "2px",
},
longitude: -1.5,
latitude: -0.28,
anchor: "center center",
note: 3,
},
],
house2: [
{
id: "circle0",
tooltip: "house0",
circle: 30,
svgStyle: {
fill: "rgba(255,255,0,0.3)",
stroke: "yellow",
strokeWidth: "2px",
},
longitude: 1.5,
latitude: -0.28,
anchor: "center center",
note: 0,
},
],
house3: [
{
id: "circle0",
tooltip: "house1",
circle: 30,
svgStyle: {
fill: "rgba(255,255,0,0.3)",
stroke: "yellow",
strokeWidth: "2px",
},
longitude: 1.5,
latitude: -0.28,
anchor: "center center",
note: 1,
},
],
},
};
},
mounted() {
//默认显示第一张照片
this.currentDataMark = this.dataMark.house0;
this.setViewer(this.itemArr[0].img);
},
methods: {
setViewer(panorama) {
if (this.viewer)
try {
this.viewer.destroy();
} catch (e) {
console.log(e);
const viewer = document.querySelector("#viewer");
viewer.removeChild(viewer.childNodes[0]);
}
this.viewer = new Viewer({
container: document.querySelector("#viewer"),
panorama: panorama,
size: {
width: "100vw",
height: "100vh",
},
plugins: [
[
MarkersPlugin,
{
markers: this.currentDataMark,
},
],
],
navbar: [
{
hidden: false,
},
],
});
this.viewer.once("ready", () => {
//自动旋转
this.viewer.startAutorotate();
});
this.markersPlugin = this.viewer.getPlugin(MarkersPlugin);
this.markersPlugin.on("select-marker", (e, marker) => {
// 判断数据中的note字段选择要进入的场景图片
if (e.args[0].config.note) {
let index = e.args[0].config.note;
let indexName = "house" + index;
this.currentDataMark = this.dataMark[indexName];
this.setViewer(this.itemArr[e.args[0].config.note].img);
}
});
},
},
};
</script>4.<style>模块的代码:文章来源地址https://www.toymoban.com/news/detail-512549.html
<style lang="scss" scoped>
.demo-container {
  position: relative;
  min-width: 1439px;
  margin: 0 auto;
  #viewer {
    margin: 0 auto;
  }
}
</style>
到了这里,关于Vue实现vr看房效果的文章就介绍完了。如果您还想了解更多内容,请在右上角搜索TOY模板网以前的文章或继续浏览下面的相关文章,希望大家以后多多支持TOY模板网!


