一、解压授权
tar -xzvf kibana-8.3.3-linux-x86_64.tar.gz
chown -R elasticsearch101  kibana-8.3.3
二、修改配置文件
cd kibana-8.3.3/config
vim kibana.yml
# For more configuration options see the configuration guide for Kibana in
# https://www.elastic.co/guide/index.html
# =================== System: Kibana Server ===================
# Kibana is served by a back end server. This setting specifies the port to use.
#server.port: 5601
# Specifies the address to which the Kibana server will bind. IP addresses and host names are both valid values.
# The default is 'localhost', which usually means remote machines will not be able to connect.
# To allow connections from remote users, set this parameter to a non-loopback address.
#ip地址配置
server.host: "192.168.159.101"
# Enables you to specify a path to mount Kibana at if you are running behind a proxy.
# Use the `server.rewriteBasePath` setting to tell Kibana if it should remove the basePath
# from requests it receives, and to prevent a deprecation warning at startup.
# This setting cannot end in a slash.
#server.basePath: ""
# Specifies whether Kibana should rewrite requests that are prefixed with
# `server.basePath` or require that they are rewritten by your reverse proxy.
# Defaults to `false`.
#server.rewriteBasePath: false
# Specifies the public URL at which Kibana is available for end users. If
# `server.basePath` is configured this URL should end with the same basePath.
#server.publicBaseUrl: ""
# The maximum payload size in bytes for incoming server requests.
#server.maxPayload: 1048576
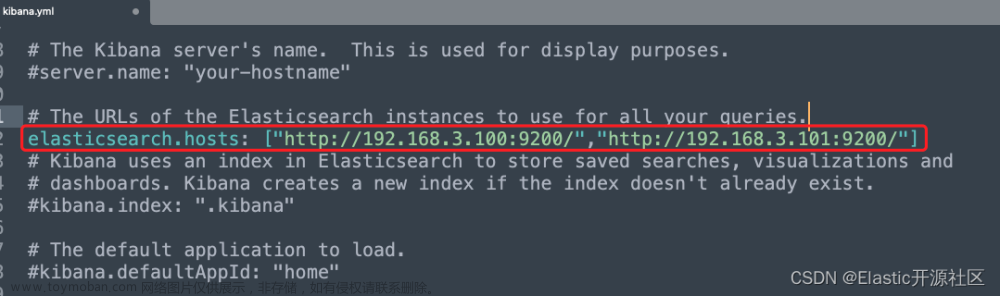
# The Kibana server's name. This is used for display purposes.
#server.name: "your-hostname"
# =================== System: Kibana Server (Optional) ===================
# Enables SSL and paths to the PEM-format SSL certificate and SSL key files, respectively.
# These settings enable SSL for outgoing requests from the Kibana server to the browser.
#server.ssl.enabled: false
#server.ssl.certificate: /path/to/your/server.crt
#server.ssl.key: /path/to/your/server.key
# =================== System: Elasticsearch ===================
# The URLs of the Elasticsearch instances to use for all your queries.
#配置集群地址
elasticsearch.hosts: ["http://192.168.159.101:9200","http://192.168.159.101:9200","http://192.168.159.102:9200"]
# If your Elasticsearch is protected with basic authentication, these settings provide
# the username and password that the Kibana server uses to perform maintenance on the Kibana
# index at startup. Your Kibana users still need to authenticate with Elasticsearch, which
# is proxied through the Kibana server.
#elasticsearch.username: "kibana_system"
#elasticsearch.password: "pass"
# Kibana can also authenticate to Elasticsearch via "service account tokens".
# Service account tokens are Bearer style tokens that replace the traditional username/password based configuration.
# Use this token instead of a username/password.
# elasticsearch.serviceAccountToken: "my_token"
# Time in milliseconds to wait for Elasticsearch to respond to pings. Defaults to the value of
# the elasticsearch.requestTimeout setting.
#elasticsearch.pingTimeout: 1500
# Time in milliseconds to wait for responses from the back end or Elasticsearch. This value
# must be a positive integer.
#elasticsearch.requestTimeout: 30000
# The maximum number of sockets that can be used for communications with elasticsearch.
# Defaults to `Infinity`.
#elasticsearch.maxSockets: 1024
# Specifies whether Kibana should use compression for communications with elasticsearch
# Defaults to `false`.
#elasticsearch.compression: false
# List of Kibana client-side headers to send to Elasticsearch. To send *no* client-side
# headers, set this value to [] (an empty list).
#elasticsearch.requestHeadersWhitelist: [ authorization ]
# Header names and values that are sent to Elasticsearch. Any custom headers cannot be overwritten
# by client-side headers, regardless of the elasticsearch.requestHeadersWhitelist configuration.
#elasticsearch.customHeaders: {}
# Time in milliseconds for Elasticsearch to wait for responses from shards. Set to 0 to disable.
#elasticsearch.shardTimeout: 30000
# =================== System: Elasticsearch (Optional) ===================
# These files are used to verify the identity of Kibana to Elasticsearch and are required when
# xpack.security.http.ssl.client_authentication in Elasticsearch is set to required.
#elasticsearch.ssl.certificate: /path/to/your/client.crt
#elasticsearch.ssl.key: /path/to/your/client.key
# Enables you to specify a path to the PEM file for the certificate
# authority for your Elasticsearch instance.
#elasticsearch.ssl.certificateAuthorities: [ "/path/to/your/CA.pem" ]
# To disregard the validity of SSL certificates, change this setting's value to 'none'.
#elasticsearch.ssl.verificationMode: full
# =================== System: Logging ===================
# Set the value of this setting to off to suppress all logging output, or to debug to log everything. Defaults to 'info'
#logging.root.level: debug
# Enables you to specify a file where Kibana stores log output.
#logging.appenders.default:
# type: file
# fileName: /var/logs/kibana.log
# layout:
# type: json
# Logs queries sent to Elasticsearch.
#logging.loggers:
# - name: elasticsearch.query
# level: debug
# Logs http responses.
#logging.loggers:
# - name: http.server.response
# level: debug
# Logs system usage information.
#logging.loggers:
# - name: metrics.ops
# level: debug
# =================== System: Other ===================
# The path where Kibana stores persistent data not saved in Elasticsearch. Defaults to data
#path.data: data
# Specifies the path where Kibana creates the process ID file.
#pid.file: /run/kibana/kibana.pid
# Set the interval in milliseconds to sample system and process performance
# metrics. Minimum is 100ms. Defaults to 5000ms.
#ops.interval: 5000
# Specifies locale to be used for all localizable strings, dates and number formats.
# Supported languages are the following: English (default) "en", Chinese "zh-CN", Japanese "ja-JP", French "fr-FR".
#配置中文显示
i18n.locale: "zh-CN"
# =================== Frequently used (Optional)===================
# =================== Saved Objects: Migrations ===================
# Saved object migrations run at startup. If you run into migration-related issues, you might need to adjust these settings.
# The number of documents migrated at a time.
# If Kibana can't start up or upgrade due to an Elasticsearch `circuit_breaking_exception`,
# use a smaller batchSize value to reduce the memory pressure. Defaults to 1000 objects per batch.
#migrations.batchSize: 1000
# The maximum payload size for indexing batches of upgraded saved objects.
# To avoid migrations failing due to a 413 Request Entity Too Large response from Elasticsearch.
# This value should be lower than or equal to your Elasticsearch cluster’s `http.max_content_length`
# configuration option. Default: 100mb
#migrations.maxBatchSizeBytes: 100mb
# The number of times to retry temporary migration failures. Increase the setting
# if migrations fail frequently with a message such as `Unable to complete the [...] step after
# 15 attempts, terminating`. Defaults to 15
#migrations.retryAttempts: 15
# =================== Search Autocomplete ===================
# Time in milliseconds to wait for autocomplete suggestions from Elasticsearch.
# This value must be a whole number greater than zero. Defaults to 1000ms
#unifiedSearch.autocomplete.valueSuggestions.timeout: 1000
# Maximum number of documents loaded by each shard to generate autocomplete suggestions.
# This value must be a whole number greater than zero. Defaults to 100_000
#unifiedSearch.autocomplete.valueSuggestions.terminateAfter: 100000
三、配置开机自启
#进入到目录
cd /etc/init.d
#创建kibana系统启动服务文件
vim kibana
注意kibana只支持非root启动,我没有新建用户,还是用的elasticsearch101文章来源地址https://www.toymoban.com/news/detail-514118.html
#!/bin/bash
#chkconfig: 345 63 37
#description: kibana
#processname:kibana-8.3.3

export KIBANA_HOME=/usr/local/kibana/kibana-8.3.3

case $1 in
        start)
                su elasticsearch101<<!
                cd $KIBANA_HOME
                ./bin/kibana  -p pid &
                exit
!
                echo "kibana is started"
                ;;
        stop)
                pid=`cat $KIBANA_HOME/pid`
                kill -9 $pid
                echo "kibana is stopped"
                ;;
        restart)
                pid=`cat $KIBANA_HOME/pid`
                kill -9 $pid
                echo "kibana is stopped"
                sleep 5
                su elasticsearch101<<!
                cd $KIBANA_HOME
                ./bin/kibana  -p pid &
                exit
!
                echo "kibana is started"
        ;;
    *)
        echo "start|stop|restart"
        ;;
esac
exit 0
#修改文件权限
chmod 777 kibana
#添加系统服务
chkconfig --add kibana
#删除系统服务
chkconfig --del kibana
#启动
service kibana start
#停止
service kibana stop
#重启
service kibana restart
#开启开机自启
chkconfig kibana on
#关闭开机自启
chkconfig kibana off


firewall-cmd --zone=public --add-port=5601/tcp --permanent

firewall-cmd --reload
文章来源:https://www.toymoban.com/news/detail-514118.html
到了这里,关于Kibana配置ES集群(版本号8.3.3)的文章就介绍完了。如果您还想了解更多内容,请在右上角搜索TOY模板网以前的文章或继续浏览下面的相关文章,希望大家以后多多支持TOY模板网!