获取流程图
ui库Vant Weapp:Vant Weapp地址(点击跳转)
第一种方法
适用于直接点击登录获取
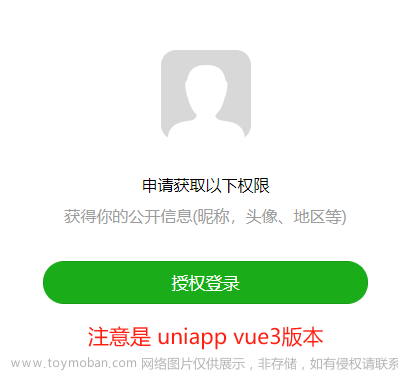
在界面添加登录按钮,用户点击按钮调用wx.getUserProfile()函数来提示用户授权登录,授权成功后,把用户头像数据和名称数据保存到缓存区里,并且改变全局变量的值

点击登录后
登录成功后跳转到首页
<van-button size="small" type="primary" block color="rgba(0, 153, 255, 1)" open-type="getUserInfo" bindtap="getUserProfile">微信一键登录</van-button>
布局以及路由跳转可以根据需求结合hasUserInfo以及canIUseGetUserProfile状态进行加判断改动
js代码
data: {
    //是否已经获取用户信息
    hasUserInfo: false,
    //是否可以调用获取信息得函数
    canIUseGetUserProfile: false,
  },
  //第一次获取用户信息
  getUserProfile: function (e) {
    wx.getUserProfile({
      desc: '获取您的微信个人信息',
      success: (res) => {
        this.setData({
          hasUserInfo: true
        })
        var app = getApp()
           app.globalData.userInfo = res.userInfo; // 将用户信息存到globalData里面
      },
      fail: function (e) {
        wx.showToast({
          title: '你选择了取消',
          icon: "none",
          duration: 1500,
          mask: true
        })
      }
    })
  },
  onLoad: function (n) {
    this.setData({
      canIUseGetUserProfile: true
    })
  },
  // 当我们登录完退出再次进入,为了避免再次点击登录按钮多次获取用户信息的情况,如果后台userInfo信息存在,直接进入登录页面,无需再次登录进行获取
  onShow: function () {
    //获取用户globalData信息
    var n = getApp().globalData.userInfo
    //当本地缓存的用户名称不为""或者null时,设置userinfo信息
    if (n.nickName != '' && n.nickName != null) {
      this.setData({
        hasUserInfo: true,
        canIUseGetUserProfile: true
      })
      wx.navigateTo({
        url: '../first/first'  // 跳转到首页
      })
      // 通过wx.login获取登录凭证(code),然后通过code去获取我们用户的openid
      wx.login({
        success: (res) => {
          console.log(res);
        },
      })
    }
  }
第二种方法,弹框点击允许=》获取用户信息=》跳转到首页
效果图 文章来源:https://www.toymoban.com/news/detail-514897.html
<!-- 验证码弹框 -->
  <van-dialog use-slot title="请填写手机短信验证码" show="{{ show }}" show-cancel-button confirm-button-open-type="getUserInfo" bind:close="onClose" confirmButtonText="允许" cancelButtonText="拒绝" bind:getuserinfo="getUserInfo">
    <view class="check">
      <!-- 输入验证码 -->
      <view class="query">
        <view class="query_item_name">已发送到手机号: 137***3701</view>
        <view class="query_num_block">
          <input type='number' class="num_item_block" wx:for="{{inputLen}}" wx:key="{{index}}" disabled bindtap='onFocus' value="{{iptValue.length>=index+1?iptValue[index]:''}}" />
        </view>
        <input name="password" password="{{true}}" class='hidden_ipt' maxlength="{{inputLen}}" focus="{{isFocus}}" bindinput="setValue"></input>
        <view class="getCode">
          <text bindtap="countDown" wx:if="{{countDownNum == 60 || countDownNum == -1}}">获取验证码</text>
          <text type="primary" plain="true" wx:else>{{countDownNum}}秒可重发</text>
        </view>
      </view>
    </view>
  </van-dialog>
 // 获取用户信息
  getUserInfo: function (e) {
    if (e.detail.userInfo) {
      var app = getApp()
      app.globalData.userInfo = e.detail.userInfo;
      //用户按了允许授权按钮
      var that = this;
      var code = '',
      wx.login({
        //获取code
        success: function (res) {
          code = res.code //返回code
          console.log(code, 'code')
        }
      })
      //授权成功后,跳转进入小程序首页
      wx.navigateTo({
        url: '/pages/first/first'
      })
    } else {
      //用户按了拒绝按钮
      wx.showModal({
        title: '警告',
        content: '您点击了拒绝授权,将无法进入小程序,请授权之后再进入!!!',
        showCancel: false,
        confirmText: '返回授权',
        success: function (res) {
          if (res.confirm) {
            console.log('用户点击了“返回授权”')
          }
        }
      })
    }
  },
弹框css文章来源地址https://www.toymoban.com/news/detail-514897.html
.query{
  padding-top:90rpx;
}
.query .query_item_name{
  font-family: PingFangSC-Regular;
  font-size: 35rpx;
  color: #737586;
  letter-spacing: 0;
  margin-left: 35rpx;
}
.query_num_block{
  display: -webkit-flex;
  display: flex;
  justify-content: space-between;
  padding-left:36rpx;
  padding-right:36rpx;
  margin:80rpx auto 110rpx;
}
.check .confirm{
  margin:auto;
  width:200rpx;
  height: 68rpx;
  background: #F86221;
  border-radius: 33px;
  text-align: center;
  line-height: 68rpx;
  font-family: PingFangSC-Medium;
  font-size: 30rpx;
  color: #FFFFFF;
  letter-spacing: 0;
}
.num_item_block{
  height: 116rpx;
  width:80rpx;
  border:1px solid #cdcdcd;
  font-family: PingFangSC-Regular;
  border-radius: 8rpx;
  line-height: 116rpx;
  text-align: center;
  font-size: 36rpx;
  color: #25252B;
}
.hidden_ipt{
  height: 0rpx;
  width:0rpx;
  border:none;
  margin:0;
}
.getCode{
  margin-left: 35rpx;
  margin-top: -120rpx;
  margin-bottom: 30rpx;
  font-size: 35rpx;
}
到了这里,关于微信小程序之获取用户信息(流程+2种方法)的文章就介绍完了。如果您还想了解更多内容,请在右上角搜索TOY模板网以前的文章或继续浏览下面的相关文章,希望大家以后多多支持TOY模板网!


