//app.vue
//设备信息
onLaunch: async function () {
    let app = uni.getSystemInfoSync();
    console.log('设备信息', app)
    let top = app.safeArea.top //屏幕顶部安全距离
    let height = app.safeAreaInsets.bottom //屏幕底部安全距离
}

//vux 保存上面获取到的两个变量
this.set_top(top);
this.set_safeAreaBottom(height);
 methods: {
    ...mapActions(['setLogined', 'removeLogined']),
    ...mapMutations(['set_safeAreaBottom', 'set_top'])
  },
//vuex
const store = new Vuex.Store({
state: {
safeAreaBottom: 0,
top: 0,
mutations: {
set_safeAreaBottom (state, data) {
state.safeAreaBottom = data
},
set_top (state, data) {
state.top = data
},
},
actions: {
....
}
})//这里dom结构我举个例子,仅供参考
<view class="safeArea" :style="{ 'padding-bottom': `${safeAreaBottom + 114}` + 'rpx' }">
<view class="content">
</view>
//底部
<view class="flex justify-around bg-white" style="width:100%;height: 100rpx;">
</view>
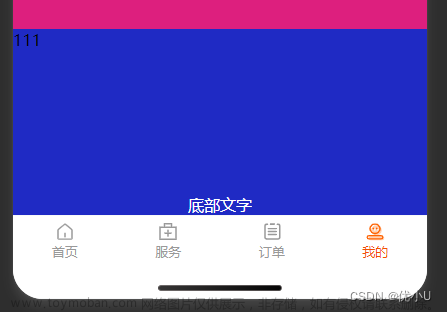
</view>上面dom结构的,根据需求是这样的:整个屏幕被两个view占满,其中底部view是固定在底部不动的,content内容立马是高度盛满剩下屏幕高度,并且overflow:scorll ; safeArea里面的动态样式中的safeAreaBottom是vuex保存的值,后面加的114,是底部高度再略高一点:“100+14” ,其中14你给不给随意。文章来源:https://www.toymoban.com/news/detail-517768.html
.safeArea {
  height: 100%;
  // padding-bottom: var(--safeAreaBottom);
}

.content {
  height: 100%;
  overflow-y: scroll;
}
写到这里就没啦~ 手机顶部的安全距离 等有需求碰到了我再过来详细记录~~ 值已经在上面获取到了,就是vuex保存的top变量的值。文章来源地址https://www.toymoban.com/news/detail-517768.html
到了这里,关于uniapp开发小程序,设置iphone底部安全区域的文章就介绍完了。如果您还想了解更多内容,请在右上角搜索TOY模板网以前的文章或继续浏览下面的相关文章,希望大家以后多多支持TOY模板网!


