这个例子主要是使用android开发出一个简单的记事本应用,可以实现数据的增加、修改以及删除等操作。
主要参考:哔哩哔哩up主:子林android。
主要涉及的相关知识:
1、控件RecyclerView的使用
2、轻量级数据库SQLite的使用
3、activity之间的跳转以及参数传递
首先创建MainActivity
为方便这里使用的是帧布局FrameLayout,主要包含两个控件,一个是用于显示记事本相关信息的RecyclerView,另一个是用于进行添加记事信息FloatingActionButton按钮,布局文件代码如下:
<?xml version="1.0" encoding="utf-8"?>
<FrameLayout xmlns:android="http://schemas.android.com/apk/res/android"
    xmlns:tools="http://schemas.android.com/tools"
    android:layout_width="match_parent"
    android:layout_height="match_parent"
    tools:context=".MainActivity">

    <androidx.recyclerview.widget.RecyclerView
        android:layout_width="match_parent"
        android:layout_height="match_parent"
        android:id="@+id/rlv"/>

    <com.google.android.material.floatingactionbutton.FloatingActionButton
        android:id="@+id/btn_add"
        android:layout_width="wrap_content"
        android:layout_height="wrap_content"
        android:src="@drawable/ic_baseline_add_24"
        android:layout_gravity="bottom|right"
        android:layout_margin="20dp"
        android:background="@color/green_200"
        android:onClick="add"/>
</FrameLayout>
接下来是对应的Java代码。首先是控件的一些初始化工作,这些在onCreate()函数中的 initView()中完成,MainActivity的对应代码如下:
public class MainActivity extends AppCompatActivity {
    private final String DB_Name="mySQLite.db";
    private RecyclerView mRecyclerView;
    private FloatingActionButton mButton;
    private List<NewsBean> newsBeanList;
    private NewsAdapter newsAdapter;
    private MySQILOpenHelper mySQILOpenHelper;

    @RequiresApi(api = Build.VERSION_CODES.N)
    @Override
    protected void onCreate(Bundle savedInstanceState) {
        super.onCreate(savedInstanceState);
        setContentView(R.layout.activity_main);
        initView();
        initData();
        initEvent();
    }

    @Override
    protected void onResume() {
        super.onResume();
        refreshDataFromDB();
    }

    private void refreshDataFromDB() {
        newsBeanList=getDataFromDB();
        newsAdapter.refreshData(newsBeanList);
    }

    private void initEvent() {
        newsAdapter=new NewsAdapter(newsBeanList,this);
        mRecyclerView.setAdapter(newsAdapter);
        LinearLayoutManager layoutManager=new LinearLayoutManager(this);
        mRecyclerView.setLayoutManager(layoutManager);
    }

    private void initData() {
        newsBeanList= new ArrayList<>();
        mySQILOpenHelper=new MySQILOpenHelper(this);
        newsBeanList=getDataFromDB();
    }

    private List<NewsBean> getDataFromDB() {
        return newsBeanList=mySQILOpenHelper.query();
    }

    private void initView() {
        mRecyclerView=findViewById(R.id.rlv);

    }

    @Override
    public boolean onCreateOptionsMenu(Menu menu) {
        getMenuInflater().inflate(R.menu.menu_main,menu);
        SearchView searchView= (SearchView) menu.findItem(R.id.menu_serach).getActionView();
        searchView.setOnQueryTextListener(new SearchView.OnQueryTextListener() {
            @Override
            public boolean onQueryTextSubmit(String query) {
                return false;
            }

            @Override
            public boolean onQueryTextChange(String newText) {
                List<NewsBean> List = mySQILOpenHelper.queryByTitle(newText);
                newsAdapter.refreshData(List);
                return true;
            }
        });
        return super.onCreateOptionsMenu(menu);
    }

    @Override
    public boolean onOptionsItemSelected(@NonNull MenuItem item) {
        return super.onOptionsItemSelected(item);
    }

    public void add(View view) {
        Intent intent=new Intent(MainActivity.this,AddActivity.class);
        startActivity(intent);
    }
*
注意:当其他Activity跳转到MainActivity时,由于生命周期的原因,onCreate()函数不在执行,因此此时必须重写onResume() 函数,在onResume()中重新查询数据库相关操作,并刷新当前适配器adapter对应数据,否则MainActivity界面不会有显示信息。
其次,RecyclerView的实现还需相关的数据源,以及两者之间的桥梁适配器adapter。记事本主要有三部分信息:标题、内容和创建时间。此处我们用一个标准的JavaBean类来封装这个实体类,并使其实现Serializable从而用于后文中activity之间跳转时自定义参数的传递,代码如下:
public class NewsBean implements Serializable {
private String title;
private String content;
private String createdTime;
private int id;
public String getTitle() {
return title;
}
public void setTitle(String title) {
    this.title = title;
}

public String getContent() {
    return content;
}

public void setContent(String content) {
    this.content = content;
}

public String getCreatedTime() {
    return createdTime;
}

public void setCreatedTime(String createdTime) {
    this.createdTime = createdTime;
}

public int getId() {
    return id;
}

public void setId(int id) {
    this.id = id;
}

@Override
public String toString() {
    return "NewsBean{" +
            "title='" + title + '\'' +
            ", content='" + content + '\'' +
            ", createdTime='" + createdTime + '\'' +
            ", id=" + id +
            '}';
}
接下来定义一个名为NewsAdapter的适配器,继承自 RecyclerView.Adapter,代码如下,其中适配器中用到了一个布局文件new_layout.xml,用于指定记事本信息显示格式如下:

适配器NewsAdapter的代码如下
public class NewsAdapter extends RecyclerView.Adapter<NewsAdapter.MyViewHolder> {
private List newsBeanList;
private LayoutInflater layoutInflater;
private Context context;
public NewsAdapter(List<NewsBean> newsBeanList, Context context) {
    this.newsBeanList = newsBeanList;
    this.context = context;
    layoutInflater=LayoutInflater.from(context);
}

@Override
public int getItemCount() {
    return newsBeanList.size();
}

@NonNull
@Override
public MyViewHolder onCreateViewHolder(@NonNull ViewGroup parent, int viewType) {
    View view = layoutInflater.inflate(R.layout.new_layout, parent, false);
    MyViewHolder myViewHolder=new MyViewHolder(view);
    return myViewHolder;
}

@Override
public void onBindViewHolder(@NonNull MyViewHolder holder, @SuppressLint("RecyclerView") int position) {
    NewsBean newsBean = newsBeanList.get(position);
    holder.tvContent.setText(newsBean.getContent());
    holder.tvTitle.setText(newsBean.getTitle());
    holder.tvTime.setText(newsBean.getCreatedTime());
    holder.rlContainer.setOnClickListener(new View.OnClickListener() {
        @Override
        public void onClick(View v) {
            Intent intent=new Intent(context, EditActivity.class);
            intent.putExtra("new",newsBean);
            context.startActivity(intent);
        }
    });
    holder.rlContainer.setOnLongClickListener(new View.OnLongClickListener() {
        @Override
        public boolean onLongClick(View v) {
            Dialog dialog=new Dialog(context,
            android.R.style.ThemeOverlay_Material_Dialog_Alert);
            View view = layoutInflater.inflate(R.layout.diag_layout, null);
            TextView tvDelete=view.findViewById(R.id.tv_delete);
            TextView tvEdit=view.findViewById(R.id.tv_edit);
            tvDelete.setOnClickListener(new View.OnClickListener() {
                @Override
                public void onClick(View v) {
                    int row = mySQILOpenHelper.deleteFromDbById(newsBean.getId());
                    if(row>0){
                        deleteData(position);

                        Toast.makeText(context,"删除成功",Toast.LENGTH_SHORT).show();
                    }else {
                        Toast.makeText(context,"删除失败",Toast.LENGTH_SHORT).show();
                    }
                    dialog.dismiss();
                }
            });

            tvEdit.setOnClickListener(new View.OnClickListener() {
                @Override
                public void onClick(View v) {
                    Intent intent=new Intent(context, EditActivity.class);
                    intent.putExtra("new",newsBean);
                    context.startActivity(intent);
                    dialog.dismiss();
                }
            });
            dialog.setContentView(view);
            dialog.show();
            return true;
        }
    });
}

public void refreshData(List<NewsBean>list){
    this.newsBeanList=list;
    notifyDataSetChanged();
    //notifyDataSetChanged();

}

public void deleteData(int position){
    newsBeanList.remove(position);
    notifyItemRemoved(position);
}

class MyViewHolder extends RecyclerView.ViewHolder{
    TextView tvTitle,tvContent,tvTime;
    ViewGroup rlContainer;

    public MyViewHolder(@NonNull View itemView) {
        super(itemView);
        this.tvTime=itemView.findViewById(R.id.tv_time);
        this.tvContent=itemView.findViewById(R.id.tv_content);
        this.tvTitle=itemView.findViewById(R.id.tv_title);
        this.rlContainer=itemView.findViewById(R.id.rl_item_container);
    }
}
}
上述代码中,在viewHolder中为new_layout.xml整个区域设计了长按弹对话框模式(包含删除和编辑当前记事本信息),以及短按跳转至编辑界面的点击事件。
接下来是编辑界面和添加界面
分别创建名为AddActivity和EditActivity两个Activity,两个界面基本一致,界面如下:
对应的布局文件xml比较简单,详细代码如下:
<?xml version="1.0" encoding="utf-8"?>
<LinearLayout
    xmlns:android="http://schemas.android.com/apk/res/android"
    xmlns:tools="http://schemas.android.com/tools"
    android:layout_width="match_parent"
    android:layout_height="match_parent"
    tools:context=".EditActivity"
    android:orientation="vertical"
    android:padding="10dp">

    <LinearLayout
        android:layout_width="match_parent"
        android:layout_height="wrap_content"
        android:orientation="horizontal"
        android:gravity="center_vertical">
        <TextView
            android:layout_width="wrap_content"
            android:layout_height="wrap_content"
            android:text="标题"
            android:textSize="30sp"/>
        <EditText
            android:padding="5dp"
            android:background="@drawable/edit_bg"
            android:id="@+id/et_edit_title"
            android:layout_width="match_parent"
            android:layout_height="40dp"
            android:layout_marginLeft="10dp"/>
    </LinearLayout>

    <LinearLayout
        android:layout_marginTop="10dp"
        android:layout_width="match_parent"
        android:layout_height="wrap_content"
        android:orientation="vertical">
        <TextView
            android:layout_width="wrap_content"
            android:layout_height="wrap_content"
            android:text="内容"
            android:textSize="30sp"/>
        <EditText
            android:padding="5dp"
            android:layout_marginTop="10dp"
            android:id="@+id/et_edit_content"
            android:layout_width="match_parent"
            android:layout_height="250dp"
            android:background="@drawable/edit_bg"/>
    </LinearLayout>
    <Button
        android:layout_marginTop="10dp"
        android:id="@+id/save"
        android:layout_width="match_parent"
        android:layout_height="wrap_content"
        android:background="@drawable/btn_bg"
        android:text="保存"
        android:textSize="25sp"
        android:textColor="@color/white"
        android:onClick="save"/>
</LinearLayout>
接下来最重要的就是数据库SQLite的创建,这里使用数据库帮助类SQLiteOpenHelper 来实现,包含了增,删,改和查四种操作,其代码如下:文章来源:https://www.toymoban.com/news/detail-518650.html
public class MySQILOpenHelper extends SQLiteOpenHelper {
    private static final String DB_Name="mySQLite.db";
    private static final String TABLE_NAME="note";
    private static final String sql="create table "+TABLE_NAME+" (id integer primary key autoincrement,title text,content,text,createdTime text)";

    public MySQILOpenHelper(Context context){
        super(context,DB_Name,null,1);
    }
    /*public MySQILOpenHelper(Context context,String name){
        super(context,name,null,1);
    }*/


    @Override
    public void onCreate(SQLiteDatabase db) {
        db.execSQL(sql);

    }

    public long insertData(NewsBean newsBean){
        SQLiteDatabase db=getWritableDatabase();
        ContentValues value=new ContentValues();
        value.put("title",newsBean.getTitle());
        value.put("content",newsBean.getContent());
        value.put("createdTime",newsBean.getCreatedTime());
        return db.insert(TABLE_NAME,null,value);
    }

    public int updateData(NewsBean newsBean){
        //Log.d("TAG", "updateData: "+newsBean);
        SQLiteDatabase db=getWritableDatabase();
        ContentValues value=new ContentValues();
        //value.put("id",newsBean.getId());
        value.put("title",newsBean.getTitle());
        value.put("content",newsBean.getContent());
        value.put("createdTime",newsBean.getCreatedTime());
        return db.update(TABLE_NAME,value,"id like ?",new String[]{String.valueOf(newsBean.getId())});
    }

    public List<NewsBean> query(){
        SQLiteDatabase db=getWritableDatabase();
        List<NewsBean>newsBeanList=new ArrayList<>();
        Cursor cursor = db.query(TABLE_NAME, null, null, null, null, null, null);
        if(cursor!=null){
            while ((cursor.moveToNext())){
               @SuppressLint("Range") int id=Integer.parseInt(cursor.getString(cursor.getColumnIndex("id")));

                @SuppressLint("Range") String title=cursor.getString(cursor.getColumnIndex("title"));
                @SuppressLint("Range") String content=cursor.getString(cursor.getColumnIndex("content"));
                @SuppressLint("Range") String createdTime=cursor.getString(cursor.getColumnIndex("createdTime"));
                NewsBean newsBean=new NewsBean();
                newsBean.setId(id);
                newsBean.setCreatedTime(createdTime);
                newsBean.setContent(content);
                newsBean.setTitle(title);
                newsBeanList.add(newsBean);
            }
            cursor.close();
        }
        return newsBeanList;
    }

    public List<NewsBean> queryByTitle(String title1){
        if(TextUtils.isEmpty(title1))
        {
            return query();
        }
        SQLiteDatabase db=getWritableDatabase();
        List<NewsBean>newsBeanList=new ArrayList<>();
        Cursor cursor = db.query(TABLE_NAME, null, "title like ?", new String[]{"%"+title1+"%"}, null, null, null);
        if(cursor!=null){
            while ((cursor.moveToNext())){
                @SuppressLint("Range") int id=Integer.parseInt(cursor.getString(cursor.getColumnIndex("id")));
                //@SuppressLint("Range") String id=cursor.getString(cursor.getColumnIndex("id"));
                @SuppressLint("Range") String title=cursor.getString(cursor.getColumnIndex("title"));
                @SuppressLint("Range") String content=cursor.getString(cursor.getColumnIndex("content"));
                @SuppressLint("Range") String createdTime=cursor.getString(cursor.getColumnIndex("createdTime"));
                NewsBean newsBean=new NewsBean();
                newsBean.setId(id);
                newsBean.setCreatedTime(createdTime);
                newsBean.setContent(content);
                newsBean.setTitle(title);
                newsBeanList.add(newsBean);
            }
            cursor.close();
        }
        return newsBeanList;
    }


    @Override
    public void onUpgrade(SQLiteDatabase db, int oldVersion, int newVersion) {

    }

    public int deleteFromDbById(int id) {
        SQLiteDatabase db=getWritableDatabase();
        return db.delete(TABLE_NAME,"id like ?",new String[]{String.valueOf(id)});
    }
}
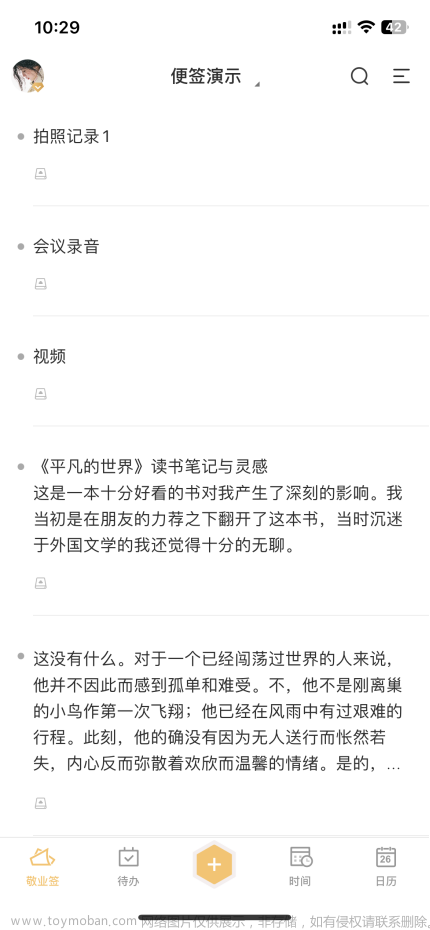
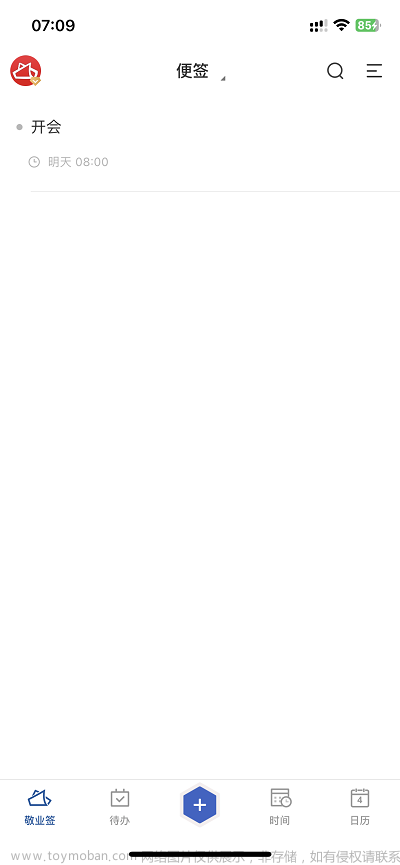
写到这里,基本上已经完成了一个简单记事本APP的开发,最后运行成功的界面如下:


 文章来源地址https://www.toymoban.com/news/detail-518650.html
到了这里,关于实现一个简单的记事本APP的文章就介绍完了。如果您还想了解更多内容,请在右上角搜索TOY模板网以前的文章或继续浏览下面的相关文章,希望大家以后多多支持TOY模板网!