有道无术,术尚可求,有术无道,止于术。
本系列Spring Boot 版本 3.0.4
本系列Spring Security 版本 6.0.2
本系列Spring Authorization Server 版本 1.0.2
源码地址:https://gitee.com/pearl-organization/study-spring-security-demo
1. 前言
在前几篇文档中,我们学习了OAuth 2.0协议,并使用spring-security-oauth2-client完成了基于授权码模式的第三方平台登录功能。
OAuth 2.0中的四大角色,Spring Security原生框架已经帮我们实现了资源所有者、客户端、资源服务器,那么Spring是否提供了授权服务器的实现呢?
2. Spring Security OAuth
GitHub地址
2.1 简介
在OAuth 1.0 时代,Spring组织已经开始开发基于Spring Security对OAuth的支持,该框架就是Spring Security OAuth。其实现了大部分的OAuth规范,并提供了资源服务器、客户端和授权服务器。
2.2 停止维护
2018年1月,Spring 官方发布了一个将会停更Spring Security OAuth的通知,并开始在 Spring Security 5.0中构建下一代 0Auth2.0支持。
2019年11月,Spring Security 0Auth中客户端、资源服务器的功能大部分已迁移到Spring Security 5中,在5.3版本中完成了迁移工作,并添加了许多新功能,比如对OpenID Connect 1.0的支持。
在Spring Security源码oauth2模块中可以看到相关体现:

同时还宣布不再支持授权服务器,因为Spring 觉得授权服务器更像是一个产品,而Spring Security作为框架,并不适合做这件事情,而且已经有大量商业和开源并且成熟的授权服务器。
2022年5月31日,Spring Security OAuth正式归档。
3. Spring Authorization Server
GitHub地址
Spring Security OAuth的停止维护,以及Spring Security不再提供授权服务器这件事,在社区一石激起千层浪,引起很多人的反对,经过Spring社区的努力,Spring决定在2020年4月开始启动新的授权服务器项目。
3.1 简介
Spring Authorization Server是一个授权服务器框架,提供 OAuth 2.1 和 OpenID Connect 1.0 规范及其他相关规范的实现。它建立在 Spring Security 之上,为构建开发标准的授权服务器产品提供了一个安全、轻量级和可定制的基础。
注意: 是基于OAuth 2.1而不是2.0!!!目前最新版本为1.0.2,早前已经成为spring-projects下的正式项目,表明已经生产可用!!!
3.2 功能特性
授权模式支持:
- 授权码模式
- 客户端模式
- 刷新令牌模式
令牌格式支持:
- JWT
- JWS
客户端认证方式支持:
-
client_secret_basic:基于
Basic消息头认证 -
client_secret_post:
POST请求进行认证 -
private_key_jwt: 基于
JWT进行认证,请求方使用私钥对JWT签名,授权服务器使用对应公钥进行验签认证 -
client_secret_jwt:基于
JWT进行认证,对JWT使用客户端密码+签名算法 签名 - none (public clients):公共客户端
协议端点支持:
-
OAuth2 Authorization Endpoint:申请授权端点,默认为
/oauth2/authorize -
OAuth2 Token Endpoint:获取访问令牌端点,默认为
/oauth2/token -
OAuth2 Token Introspection Endpoint:令牌自省端点,默认为
/oauth2/introspect -
OAuth2 Token Revocation Endpoint:令牌撤销端点,默认为
/oauth2/revoke -
OAuth2 Authorization Server Metadata Endpoint:获取授权服务器元信息的端点,默认为
/.well-known/oauth-authorization-server -
JWK Set Endpoint:
JWK信息端点,默认为/oauth2/jwks -
OpenID Connect 1.0 Provider Configuration Endpoint:查询提供者配置端点,默认为
/.well-known/openid-configuration -
OpenID Connect 1.0 UserInfo Endpoint:用户信息端点,默认为
/userinfo -
OpenID Connect 1.0 Client Registration Endpoint:客户端注册端点,默认为
/connect/registe
4. 案例演示
Spring Authorization Server基于 OAuth 2.1 和 OpenID Connect 1.0 规范,OAuth 2.1和2.0最大的区别就是删除了密码和简化模式。
4.1 环境搭建
创建一个Spring Boot基础工程,引入Spring授权服务器依赖:
        <!--Spring 授权服务器-->
        <dependency>
            <groupId>org.springframework.security</groupId>
            <artifactId>spring-security-oauth2-authorization-server</artifactId>
            <version>1.0.2</version>
        </dependency>
4.2 配置类
添加SpringSecurity配置类,授权服务器是基于Spring Security开发的,本身也需要认证授权功能。
@Configuration(proxyBeanMethods = false)
public class SpringSecurityConfig {

    /**
     * Spring Security SecurityFilterChain 认证配置
     */
    @Bean
    @Order(2)
    public SecurityFilterChain defaultSecurityFilterChain(HttpSecurity http)
            throws Exception {
        http.authorizeHttpRequests((authorize) -> authorize
                        .anyRequest().authenticated()
                )
                .formLogin(Customizer.withDefaults());
        return http.build();
    }

    /**
     * 内存存储用户
     */
    @Bean
    public UserDetailsService userDetailsService() {
        UserDetails userDetails = User.withDefaultPasswordEncoder()
                .username("user")
                .password("123456")
                .roles("USER")
                .build();
        return new InMemoryUserDetailsManager(userDetails);
    }
}
添加授权服务器配置类:
@Configuration(proxyBeanMethods = false)
public class SpringAuthServerConfig {

    /**
     * 授权服务器 SecurityFilterChain
     */
    @Bean
    @Order(Ordered.HIGHEST_PRECEDENCE)
    public SecurityFilterChain authorizationServerSecurityFilterChain(HttpSecurity http)
            throws Exception {
        OAuth2AuthorizationServerConfiguration.applyDefaultSecurity(http);
        http.getConfigurer(OAuth2AuthorizationServerConfigurer.class)
                .oidc(Customizer.withDefaults());    // Enable OpenID Connect 1.0
        http
                // Redirect to the login page when not authenticated from the
                // authorization endpoint
                .exceptionHandling((exceptions) -> exceptions
                        .authenticationEntryPoint(
                                new LoginUrlAuthenticationEntryPoint("/login"))
                )
                // Accept access tokens for User Info and/or Client Registration
                .oauth2ResourceServer(OAuth2ResourceServerConfigurer::jwt);
        return http.build();
    }

    /**
     * 客户端配置,基于内存
     */
    @Bean
    public RegisteredClientRepository registeredClientRepository() {
        // http://localhost:8080/oauth2/authorize?client_id=client&scope=user_info&state=123456&response_type=code&redirect_uri=http://127.0.0.1:8080/authorized
        RegisteredClient registeredClient = RegisteredClient.withId(UUID.randomUUID().toString())
                .clientId("client")
                .clientSecret("{noop}secret")
                .clientAuthenticationMethod(ClientAuthenticationMethod.CLIENT_SECRET_BASIC)
                .authorizationGrantType(AuthorizationGrantType.AUTHORIZATION_CODE)
                .authorizationGrantType(AuthorizationGrantType.REFRESH_TOKEN)
                .authorizationGrantType(AuthorizationGrantType.CLIENT_CREDENTIALS)
                .redirectUri("http://127.0.0.1:8080/callback")
                .scope("user_info")
                .clientSettings(ClientSettings.builder().requireAuthorizationConsent(true).build())
                .build();
        return new InMemoryRegisteredClientRepository(registeredClient);
    }


    /**
     * 解码签名访问令牌
     */
    @Bean
    public JwtDecoder jwtDecoder(JWKSource<SecurityContext> jwkSource) {
        return OAuth2AuthorizationServerConfiguration.jwtDecoder(jwkSource);
    }

    /**
     * 配置Spring授权服务器
     */
    @Bean
    public AuthorizationServerSettings authorizationServerSettings() {
        return AuthorizationServerSettings.builder().build();
    }

    /**
     * 访问令牌签名
     */
    @Bean
    public JWKSource<SecurityContext> jwkSource() {
        KeyPair keyPair = generateRsaKey();
        RSAPublicKey publicKey = (RSAPublicKey) keyPair.getPublic();
        RSAPrivateKey privateKey = (RSAPrivateKey) keyPair.getPrivate();
        RSAKey rsaKey = new RSAKey.Builder(publicKey)
                .privateKey(privateKey)
                .keyID(UUID.randomUUID().toString())
                .build();
        JWKSet jwkSet = new JWKSet(rsaKey);
        return new ImmutableJWKSet<>(jwkSet);
    }

    /**
     * 其 key 在启动时生成,用于创建上述 JWKSource
     */
    private static KeyPair generateRsaKey() {
        KeyPair keyPair;
        try {
            KeyPairGenerator keyPairGenerator = KeyPairGenerator.getInstance("RSA");
            keyPairGenerator.initialize(2048);
            keyPair = keyPairGenerator.generateKeyPair();
        } catch (Exception ex) {
            throw new IllegalStateException(ex);
        }
        return keyPair;
    }
}
4.3 授权码模式
浏览器地址栏访问申请授权码端点:
http://localhost:8080/oauth2/authorize?
client_id=client&
scope=user_info&
state=123456&
response_type=code&
redirect_uri=http://127.0.0.1:8080/callback
参数说明:
| 参数 | 说明 | 是否必填 |
|---|---|---|
| client_id | 客户端ID
|
YES |
| response_type | 响应模式,固定为code (授权码) |
YES |
| redirect_uri | 回调地址,当授权码申请成功后l浏览器会重定向到此地址,并在后边带上code参数(授权码) |
YES |
| scope | 用来限制客户端的访问范围(权限),如果为空的话,那么会返回客户端拥有全部的访问范围 | NO |
| state | 可以取随机值, 用于防止CSRF攻击 |
NO |
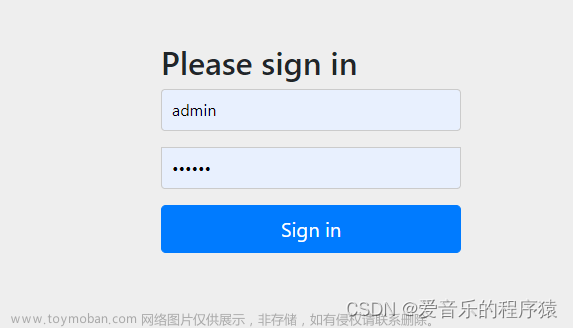
之后会调转到登录接口,输入用户名密码:

登录成功后跳转到授权页面,是否允许这个客户端访问你的资源,选择允许访问的范围,点击Submit Consent提交授权:

之后浏览器会重定向到回调地址,并携带授权码参数:

重定向URL如下所示:
http://127.0.0.1:8080/callback?
code=5rZRbGqLbqWxj1aeLP9otKce0XE_CfH4&
state=123456
接着使用授权码获取访问令牌端,需要Post请求,这里使用Postman,访问地址为http://localhost:8080/oauth2/token,首先需要传入客户端的ID及密码,可以采用Basic认证方式,并将其拼接成用户名:密码格式,中间是一个冒号,再用Base64编码,然后在请求头中附加 Authorization:Basic xxx。这里可以使用Postman选择Basic Auth,然后输入客户端ID及密码。

添加请求参数,发送请求,可以看到成功返回了访问令牌、刷新令牌等信息:

请求参数说明:
| 参数 | 说明 |
|---|---|
| code | 授权码,就是刚刚获取的授权码,注意:授权码只使用一次就无效了,需要重新申请 |
| grant_type | 授权类型,填写authorization_code,表示授权码模式 |
| redirect_uri | 申请授权码时的跳转url,一定要和申请授权码时用的redirect_uri一致。 |
当再次点击时,会报错,说明code只能使用一次:

4.4 客户端模式
客户端模式,可以直接通过客户端认证返回访问令牌,授权类型为client_credentials,访问端点为:
http://localhost:8080/oauth2/token?grant_type=client_credentials
首先设置Basic认证参数:

发送请求返回令牌:

4.5 刷新令牌模式
访问令牌的有效期一般较短,这样可以保证在发生访问令牌泄露时,不至于造成太坏的影响,但是因为有限期太短,过期之后,需要重新授权获取令牌,这种方式不太友好。
所以在下发访问令牌的同时下发一个有效期较长的刷新令牌,访问令牌失效时,可以利用刷新令牌去授权服务器换取新的访问令牌。
首先同上设置Basic认证参数,然后访问/oauth2/token:

请求参数说明:
| 参数 | 说明 |
|---|---|
| refresh_token | 刷新令牌 |
| grant_type | 授权类型,填写refresh_token,表示刷新令牌模式 |
响应结果如下:文章来源:https://www.toymoban.com/news/detail-520502.html
 文章来源地址https://www.toymoban.com/news/detail-520502.html
到了这里,关于Spring Security 6.x 系列【28】授权服务器篇之Spring Authorization Server 1.0 入门案例的文章就介绍完了。如果您还想了解更多内容,请在右上角搜索TOY模板网以前的文章或继续浏览下面的相关文章,希望大家以后多多支持TOY模板网!


