1、尺寸变换
1.1 图像差值原理

文章来源地址https://www.toymoban.com/news/detail-524483.html
1.2 图像缩放、翻转、拼接
1.2.1 图像缩放

1.2.2 图像翻转

1.2.3 图像拼接

#include <iostream>
#include <fstream>
#include <opencv2/opencv.hpp>

using namespace std;
using namespace cv;

int main()
{
	Mat gray = imread(" lena.png",IMREAD_GRAYSCALE);
	Mat sma1lImg,bigImg0,biglmg1,bigImg2;
	resize(gray, sma1lImg,Size(15, 15), 0, 0, INTER_AREA);//先将图像缩小resize(smalllmg,bigImg0,Size(30,30),0,0,INTER_NEAREST);//最近邻差值resize(smallImg,bigImgl,Size(30,30),0,0,INTER_LINEAR);//双线性差值resize(smalllmg,bigImg2,Size(30,30),0,0,INTER_CUBIC);//双三次差值
	Mat img_x,img_y,img_xy;
	flip(gray,img_x,0);// 沿x轴对称
	flip(gray,img_y,1);//沿y轴对称
	flip(gray,img_xy, -1); //先x轴对称,再y轴对称
	Mat img00 = imread("lena00.png");
	Mat img01 = imread("lena01.png");
	Mat img10 = imread("lena10.png") ;
	Mat imgl1 = imread("lenal1.png" );

	//图像连接
	Mat img,img0,imgl;//图像横向连接
	hconcat(img00,img01,img0);
	hconcat(img10, imgl1, imgl);//横向连接结果再进行竖向连接
	vconcat(img0, imgl, img);

	waitKey(0);
	system("pause");
	return 0;
}
2、仿射变换
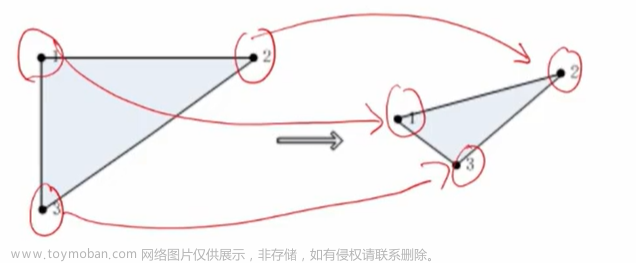
2.1 仿射变换原理

2.2 仿射变换函数

2.3 边界填充方法和对应标志

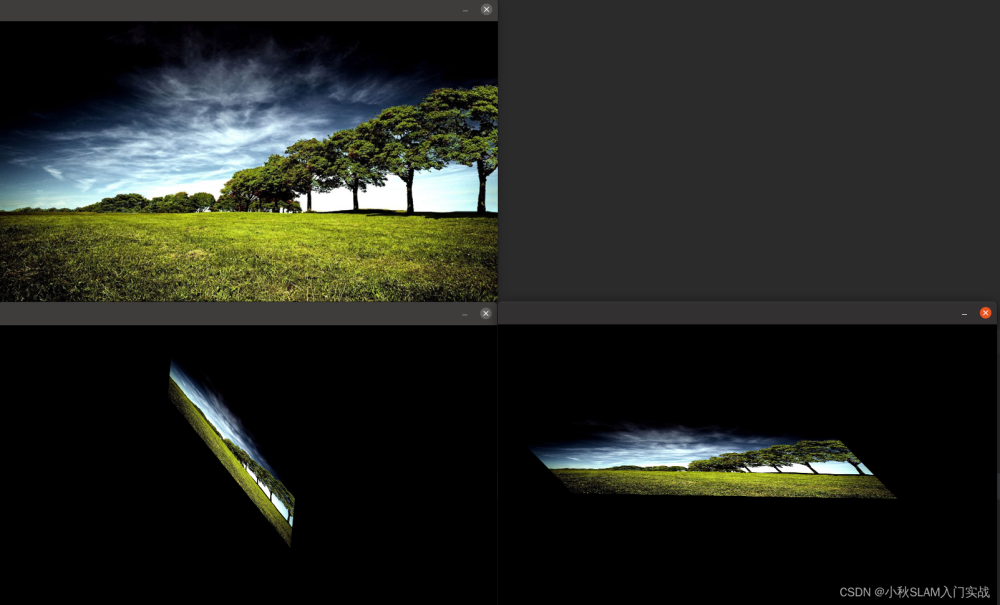
2.4 图像旋转

2.5 计算仿射变换矩阵

//仿射变换
int affineConversion(void)
{
	Mat img = imread("F:/testMap/lena.png");
	if (img.empty())
	{
		cout << "请确认图像文件名称是否正确" << endl;
		return -1;
	}

	Mat rotation0, img_warp0;
	double angle = 45;//设置图像旋转的角度
	Size dst_size(img.rows, img.cols);//设置输出图像的尺寸
	Point2f center(img.rows/2.0,img.cols/2.0);//设置图像的旋转中心

	rotation0 = getRotationMatrix2D(center,angle,1);//计算仿射变换矩阵

	warpAffine(img,img_warp0,rotation0,dst_size);//进行仿射变换
	imshow("img_warp0", img_warp0);

	//根据定义的三个点进行仿射变换
	Point2f src_points[3];
	Point2f dst_points[3];
	src_points[0] = Point2f(0,0);//原始图像中的三个点
	src_points[1] = Point2f(0,(float)(img.cols - 1));
	src_points[2] = Point2f((float)(img.rows - 1),(float)(img.cols - 1));
	dst_points[0] = Point2f((float)(img.rows)*0.11,(float)(img.cols)*0.20);//放射变换后图像中的三个点
	dst_points[1] = Point2f((float)(img.rows)*0.15,(float)(img.cols)*0.70);
	dst_points[2] = Point2f((float)(img.rows)*0.81,(float)(img.cols)*0.85);

	Mat rotation1,img_warpl;
	rotation1 = getAffineTransform(src_points, dst_points);//根据对应点求取仿射变换矩阵
	warpAffine(img,img_warpl,rotation1,dst_size);//进行仿射变换
	imshow("img_warpl", img_warpl);
	waitKey(0);
}
3、透视变换
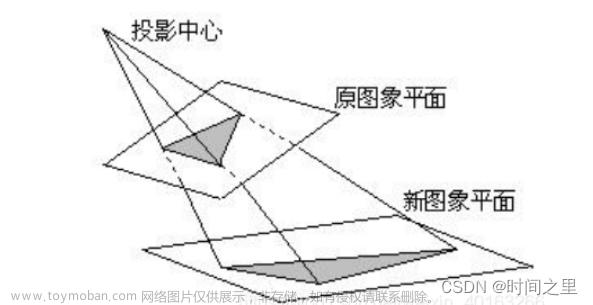
3.1 原理

3.2 计算透视变化矩阵函数
4个像素坐标,图有误

3.3 计算方法标志

3.4 透视变换函数
 文章来源:https://www.toymoban.com/news/detail-524483.html
//透视变换
int perspectiveConversion(void)
{
	Mat img = imread("F:/testMap/二维码.png");
	if (img.empty())
	{
		cout << "请确认图像文件名称是否正确" << endl;
		return -1;
	}

	Point2f src_points[4];
	Point2f dst_points[4];

	//通过Image Watch查看的二维码四个角点坐标
	src_points[0] = Point2f(100.0,401.0);
	src_points[1] = Point2f(551.0,403.0);
	src_points[2] = Point2f(1.0,676.0);
	src_points[3] = Point2f(684.0,678.0);

	//期望透视变换后二维码四个角点的坐标
	dst_points[0] = Point2f(0.0,0.0);
	dst_points[1] = Point2f(627.0,0.0);
	dst_points[2] = Point2f(0.0, 627.0);
	dst_points[3] = Point2f(627.0,627.0);

	Mat rotation,img_warp;
	rotation = getPerspectiveTransform(src_points,dst_points);//计算透视变换矩阵
	warpPerspective(img,img_warp,rotation,img.size());//透视变换投影
	imshow("img",img);
	imshow("img_warp",img_warp);

	waitKey(0);
}
到了这里,关于图像尺寸、仿射、透视变换的文章就介绍完了。如果您还想了解更多内容,请在右上角搜索TOY模板网以前的文章或继续浏览下面的相关文章,希望大家以后多多支持TOY模板网!


