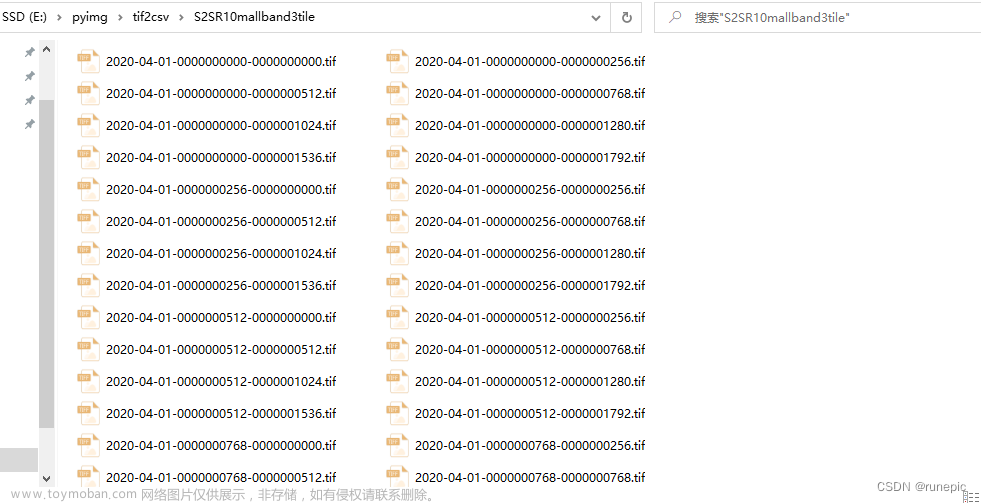
现在大部分图像软件都支持tiff影像的浏览,但都是仅限于8位的影像,对应CV16U类型的tiff影像并不支持(这需要专业的gis软件才可进行操作)。为了便捷操作,故此基于pyqt5+opencv实现16位tif影像转jpg的软件。
本博文涉及基于ui文件直接构建界面、实现文件拖拽打开、按钮组状态切换、点击图像弹出文件对话框功能。对于16位tif影像转jpg,实现了3种转换函数,分别为normalization_img、min_max_normalization_img、cut_normalization_img。其中cut_normalization_img函数可以滤除掉tiff影像中的异常值,可以在格式转换时增强图像效果的稳定性。
关于pyqt5的使用可以参考 https://hpg123.blog.csdn.net/article/details/131564563?spm=1001.2014.3001.5502
相关依赖库安装代码
pip install  python-opencv
pip install pyqt5
pip install pyqt5-tools
1、核心代码
对于16U的tiff影像可以使用opencv读取 代码示例:cv2.imread(path,-1),然后利用代码,修改图像的数据类型,并对图像的值域进行调整,即可实现将16U的tiff影像转为8U的影像。
1.1 基本转换
将16U的数据转换为8U有两种最简单的方式,即为归一化,具体如normalization_img函数代码所示,先将数据的值域压缩到0 ~ 1,然后再调整到 0 ~ 255。这种转换可能会存在某种问题,例如数据的整体值偏高,这样转化后就看不到差异了,故此又设计了min_max_normalization_img函数。先将数据的最小值调整为0,然后再进行归一化。
import cv2
import numpy as np

def normalization_img(img):
    img=img/img.max()
    img=img*255
    img=img.astype(np.uint8)
    return img

def min_max_normalization_img(img):
    img=img-img.min()
    return normalization_img(img)
1.2 截断转换
对于某些特殊的行业数据,可能存在较多的噪声,其最大值和最小值并不能真实反映数据的情况(可能为传感器故障),从而需要对数据值域的频率进行统计,找到噪声的阈值(最大值阈值、最小值阈值),将大于最大值阈值的数值修改为最大值阈值,将小于最小值阈值的数值修改为最小值阈值。然后再将值域压缩到0~255。
def cut_normalization_img(img):
	#统计每个值出现的频率
    img=img.astype(np.int32)
    frequence=np.bincount(img.reshape(-1))
    #设置用于计算最大值阈值,最小值阈值的参数
    all_pixs=frequence.sum()
    min_rate=0.005 #从左往右累加统计各个值域的频率,频率值大于min_rate时,则为最小值阈值
    max_rate=0.005#从右往左累加统计各个值域的频率,频率值大于min_rate时,则为最大值阈值
    now_min_rate=0
    now_max_rate=0

    min_index=0 #最小值阈值
    while now_min_rate>=min_rate:
        now_pixs=frequence[:min_index].sum()
        now_min_rate=now_pixs/all_pixs
        min_index+=1

    max_index=-1 #最小值阈值
    while now_max_rate>=max_rate:
        now_pixs=frequence[max_index:].sum()
        now_max_rate=now_pixs/all_pixs
        max_index-=1
    max_index=max_index+frequence.shape[0]#修正最小值阈值的表达方式

    #将数据的值域调整为0~(max_index-min_index)
    img[img>max_index]=max_index
    img[img<min_index]=min_index
    img=img-min_index

    #将数据的值域调整为0~255
    img=img.astype(np.float32)
    img=img/(max_index-min_index)
    img=img*255
    img=img.astype(np.uint8)
    return img
以上两端代码合并再一起保存为tif2jpg.py
2、软件实现
2.1 界面设计
页面布局中的关系如下,这里需要注意的是:其中label控件和pushButton控件是叠加在一起的,只不过pushButton的不透明度被设置0(通过在控件上单击右键=》修改样式表=》设置其样式为background-color: rgba(255, 255, 255, 0);)。
在本软件中博主自行将3个button放置到一个父容器内,意图实现类似单选按钮的功能。同时,关于图像的显示和文本的显示都使用label控件实现。然后,为了能让用户点选图片,故再label控件上面叠加了一个透明的pushButton控件。
2.2 事件设置
按钮组切换实现 在pyqt中并没有按钮组控件,为此只能将多个button强制进行组合。博主所实现的按钮组还包含一个名为groupBtnLabel的QLabel控件,在点击按钮后groupBtnLabel控件所显示的文本也会相应切换。
在ui初始化时按钮组的初始化代码如下所示,通过btn_group对象设置按钮上的文本和击中按钮后要显示的文本。
btn_group={
           "ZeroMax归一化":"将0到maxValue之间的值缩放到0~255",
           "MinMax归一化":"将minValue到maxValue之间的值缩放到0~255",
           "截断归一化":"统计数值出现的频率,将最大值和最小值频率低于0.5%的数据进行滤除",
           }
		#设置窗口标题
        self.ui.setWindowTitle('16位tif转8位软件')
        # 绑定按钮组事件
        bgkl=list(btn_group.keys())
        self.ui.pushButton_1.setText(bgkl[0])#重新为3个按钮设置文本
        self.ui.pushButton_2.setText(bgkl[1])
        self.ui.pushButton_3.setText(bgkl[2])
        self.ui.pushButton_1.clicked.connect(self.groupBtnClick)#为3个按钮绑定相同的槽函数
        self.ui.pushButton_2.clicked.connect(self.groupBtnClick)
        self.ui.pushButton_3.clicked.connect(self.groupBtnClick)
        #设置按钮组的默认设置
        self.btn_type=self.ui.pushButton_1.text() #设置默认选择pushButton_1
        self.ui.pushButton_1.setStyleSheet("background-color: rgb(0, 255, 127);")#设置默认选择pushButton_1的样式
        self.ui.groupBtnLabel.setText(btn_group[self.btn_type])#设置显示对应的文本提示
groupBtnClick的实现如下,在按钮被点击后先将所有的按钮设置为背景色,然后再将击中的按钮设置为选中色,同时根据击中按钮的文本值设置groupBtnLabel的值。
    def groupBtnClick(self):
        self.ui.pushButton_1.setStyleSheet("background-color: rgb(230, 230, 230);")
        self.ui.pushButton_2.setStyleSheet("background-color: rgb(230, 230, 230);")
        self.ui.pushButton_3.setStyleSheet("background-color: rgb(230, 230, 230);")
        buttonButton = self.ui.sender() # 获得信号发射的控件
        buttonButton.setStyleSheet("background-color: rgb(0, 255, 127);")
        self.btn_type=buttonButton.text()
        self.ui.groupBtnLabel.setText(btn_group[self.btn_type])
        print(self.btn_type)
文件拖拽实现 博主这里是使用ui文件直接构建界面,故此在实现文件拖拽时略有复杂,需要手动对ui.dragEnterEvent和self.ui.dropEvent进行事件绑定。
        #设置支持图片拖拽
        self.ui.setAcceptDrops(True)
        self.ui.dragEnterEvent=self.dragEnterEvent
        self.ui.dropEvent=self.dropEvent

    def dropEvent(self, evn):
        # print(f'鼠标放开 {evn.posF()}')
        path = evn.mimeData().text()
        if path.lower().endswith((".jpg",".jpeg",".png",".bmp",".tif",".tiff")):
            path=path.replace('file:///','')
            self.ui.label_state.setText(path)
            self.ui.label_state.setStyleSheet("color: rgb(28, 81, 255);")#设置字体颜色
            self.ui.label.setText(path+"处理中。。。")
            print('文件路径:\n' + path)
            thread_new = ServerThread(self.ui,path,self.btn_type)
            thread_new.start()
            thread_new.message.connect(self.show_result_img)
        else:
            self.ui.label_state.setText(path+"  不支持的文件类型!\n请输入jpg、png、png、tif格式的图片")
            self.ui.label_state.setStyleSheet("color: rgb(0, 240, 10);")#设置字体颜色
    def dragEnterEvent(self, evn):
        #print('鼠标拖入窗口')
        evn.accept()
点击图片弹出文件对话框 由于博主使用QLabel控件展示图片,故此无法针对QLabel设置点击事件,从而在其上面叠加了一个透明的pushButton控件(二者叠加在一起,点击QLabel必然要触发pushButton的click事件)。
		#实现点击图片,弹出文件对话框
        self.ui.pushButton.clicked.connect(self.select_file)
    def select_file(self):
        filename = QFileDialog.getOpenFileNames(self.ui, '选择图像', os.getcwd(), "Tiff Files(*.tif;*.tiff);Image Files(*.jpg;*.jpeg;*.png);")
        # 输出文件,查看文件路径
        if len(filename)==0:
            return
        if len(filename[0])==0:
            return
        path = filename[0][0]
        self.ui.label_state.setText(path)
        self.ui.label.setText(path+"处理中。。。")
        print('文件路径:\n' + path)
        thread_new = ServerThread(self.ui,path,self.btn_type)
        thread_new.start()
        thread_new.message.connect(self.show_result_img)
2.3 线程阻塞更新UI
由于某些tif影像size过大,在ui线程进行耗时运算必然使软件卡死,故此有必要将任务移动到子线程进行计算,计算完后再由子线程通知UI线程更新界面。
所实现的子线程代码如下所示,其中的parent参数是必要的(让子线程依附在MainWindow中),path,deal_type是子程序处理任务时的参数,具体对应run函数中的代码。其中需要注意的时message = pyqtSignal(str)创建了一个信号槽对象(由ui线程注入),用于通知ui线程更新界面 在这里时对应self.show_result_img函数
class ServerThread(QThread):
    #信号槽,用于与ui界面进行交互
    message = pyqtSignal(str)

    def __init__(self,parent, path,deal_type):
        super(ServerThread, self).__init__(parent)
        self.parent = parent
        self.working = True
        self.path=path
        self.deal_type=deal_type

    def __del__(self):
        self.working = False
        self.wait()

    def run(self):
        img=cv2.imread(self.path,-1)
        img=img.astype(np.float32)
        if self.deal_type=="截断归一化":
            img=cut_normalization_img(img)
        elif self.deal_type=="ZeroMax归一化":
            img=normalization_img(img)
        elif self.deal_type=="MinMax归一化":
            img=min_max_normalization_img(img)
        cv2.imwrite(self.path+".jpg",img)
        #通知UI界面进行更新
        self.message.emit(self.path+".jpg")
具体使用如下所示,在点击图片时触发select_file函数,从而创建ServerThread对象,然后启动子线程,并使用thread_new.message.connect(self.show_result_img)将ui更新函数注入到thread_new中。
    def select_file(self):
        filename = QFileDialog.getOpenFileNames(self.ui, '选择图像', os.getcwd(), "Tiff Files(*.tif;*.tiff);Image Files(*.jpg;*.jpeg;*.png);")
        # 输出文件,查看文件路径
        if len(filename)==0:
            return
        if len(filename[0])==0:
            return
        path = filename[0][0]
        self.ui.label_state.setText(path)
        self.ui.label.setText(path+"处理中。。。")
        print('文件路径:\n' + path)
        thread_new = ServerThread(self.ui,path,self.btn_type)
        thread_new.start()
        thread_new.message.connect(self.show_result_img)
    def show_result_img(self,path):
        self.ui.label_state.setText(path+"处理完成!!!!!!!!")
        self.ui.label_state.setStyleSheet("color: rgb(28, 81, 255);")#设置字体颜色
        pixmap = QPixmap(path)
        self.ui.label.setPixmap (pixmap)  # 在label上显示图片
        self.ui.label.setScaledContents (True)  # 让图片自适应label大小
3、代码及效果与软件
3.1 代码
所设计的代码都在 https://download.csdn.net/download/a486259/88014867 ,创作不易,希望各位支持一下。当然,核心代码在上述博客中已经完整描述了,对于pyqt5的使用有困难可以参考https://hpg123.blog.csdn.net/article/details/131564563 ,跟着做一遍 。
3.2 效果


3.3 软件
使用pyinstaller可以将py程序打包为exe程序,但是会连带很多其他不相干的库,为此需要在虚拟环境中进行打包,这里使用pipenv构建虚拟环境。
pip install pipenv
#pip install pyinstaller
激活虚拟环境
执行 pipenv shell 进入虚拟环境
(base) C:\Users\Administrator\Desktop\fsdownload>pipenv shell
Creating a virtualenv for this project...
Pipfile: C:\Users\Administrator\Desktop\fsdownload\Pipfile
Using default python from C:\anaconda\python.exe (3.9.12) to create virtualenv...
[ ===] Creating virtual environment...created virtual environment CPython3.9.12.final.0-64 in 629ms
  creator CPython3Windows(dest=C:\Users\Administrator\.virtualenvs\fsdownload-dZqvdOWt, clear=False, no_vcs_ignore=False, global=False)
  seeder FromAppData(download=False, pip=bundle, setuptools=bundle, wheel=bundle, via=copy, app_data_dir=C:\Users\Administrator\AppData\Local\pypa\virtualenv)
    added seed packages: pip==23.1.2, setuptools==67.8.0, wheel==0.40.0
  activators BashActivator,BatchActivator,FishActivator,NushellActivator,PowerShellActivator,PythonActivator

Successfully created virtual environment!
Virtualenv location: C:\Users\Administrator\.virtualenvs\fsdownload-dZqvdOWt
Creating a Pipfile for this project...
Launching subshell in virtual environment...
Microsoft Windows [版本 10.0.19044.1320]
(c) Microsoft Corporation。保留所有权利。

(fsdownload-dZqvdOWt) (base) C:\Users\Administrator\Desktop\fsdownload>
安装依赖包
使用pipenv instal package_name 进行包安装
pipenv install  python-opencv
pipenv install pyqt5
pipenv install pyqt5-tools
pipenv install pyinstaller
导出为可执行程序
打包为文件夹形式(-D),不显示控制台(-w)
pyinstaller -D -w maintool.py
打包为单个文件形式(-F),不显示控制台(-w)文章来源:https://www.toymoban.com/news/detail-531598.html
pyinstaller -F -w maintool.py
导出后的软件下载地址如下,为单个文件形式,约80m左右
https://download.csdn.net/download/a486259/88015083文章来源地址https://www.toymoban.com/news/detail-531598.html
到了这里,关于基于pyqt5+opencv实现16位tif影像转jpg的文章就介绍完了。如果您还想了解更多内容,请在右上角搜索TOY模板网以前的文章或继续浏览下面的相关文章,希望大家以后多多支持TOY模板网!


