1. 下载:
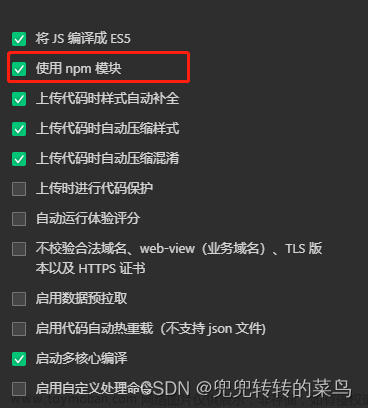
npm install wxml-to-canvas --save
2. json文件导入
"usingComponents": {
    "wxml-to-canvas": "wxml-to-canvas/index"
},
3、使用组件
index.wxml
<wxml-to-canvas width="350" height="550" class="widget"></wxml-to-canvas>
<button bindtap="extraImage">保存图片</button>index.js文章来源:https://www.toymoban.com/news/detail-534011.html
const { wxmls, style } = require('./demo.js')
let widget = null
Page({
 data: {

  },
 onLoad(options) {
    wx.showLoading({
      title: '图片生成中。。',
    })
     this.widget = this.selectComponent('.widget')
    // 必须要用定时器延迟,不然会报错
    setTimeout(()=>{
      this.renderToCanvas()
    },150)
 },
  //生成海报
  renderToCanvas() {
    let obj = {
        avatar: '头像.png',
        topImg: '头部.png',
        contentBg: '内容背景.png'
    }
    // 传入要填入的动态数据
    let wxml = wxmls(obj)
    const p1 = this.widget.renderToCanvas({ wxml, style })
    p1.then((res) => {
       wx.hideLoading()
    })
  },
//保存海报
  extraImage() {
    const p2 = this.widget.canvasToTempFilePath()
    p2.then(res => {
      console.log(res)
      wx.saveImageToPhotosAlbum({
        filePath: res.tempFilePath,
        success(res) {
          console.log(res)
        }
      })
    }).catch(err=>{
      console.log(err)
    })
  }
})demo.js中的配置文章来源地址https://www.toymoban.com/news/detail-534011.html
const wxmls = (info) => {
  return `
  <view class="container">
      <image class="bg" src="BG.jpg">
      </image>
      <image class="topImg" src="${info.topImg}"></image>
      <view class="content">
        <image class="contentBg" src="${info.contentBg}"></image>
        <view class="portrait">
          <image class="avatar" src="${info.avatar}"></image>
          <image class="frame" src="frame.png"></image>
        </view>
      </view>
    </view>
  `
}

const style = {
  container: {
    position: 'relative',
    width: 350,
    height: 550,
    display: 'flex',
    flexDirection: 'column',
    alignItems: 'center',
  },
  bg: {
    position: 'absolute',
    left: 0,
    top: 0,
    width: 350,
    height: 550,
  },
  topImg: {
    position: 'relative',
    width: 270,
    height: 120,
    marginTop: 40
  },

  content: {
    position: 'relative',
    width: 270,
    height: 270,
    display: 'flex',
    flexDirection: 'column',
    alignItems: 'center',
  },
  contentBg: {
    position: 'absolute',
    top: 0,
    left: 0,
    width: 270,
    height: 270
  },
  portrait: {
    position: 'relative',
    width: 100,
    height: 100,
    marginTop: -50,
    borderRadius: '50',
    overflow: 'hidden',
  },

  frame: {
    width: 100,
    height: 100,
    position: 'absolute',
    left: 0,
    top: 0,
  },

  avatar: {
    width: 100,
    height: 100,
    borderRadius: 50,
  }
}

module.exports = {
  wxmls,
  style
}
到了这里,关于微信小程序中使用wxml-to-canvas的文章就介绍完了。如果您还想了解更多内容,请在右上角搜索TOY模板网以前的文章或继续浏览下面的相关文章,希望大家以后多多支持TOY模板网!


![微信小程序逆向 小程序包使用unveilr工具解包后在开发者工具报[ WXML 文件编译错误] xxx.wxs Unexpected token `}`](https://imgs.yssmx.com/Uploads/2024/02/717369-1.png)


