在新版本的sas(1.2.1)中获取token更新了授权码校验逻辑,只能用form-data传递参数,使用url-params会失败,原因见issue1451
对应的 commit 在这里: Fix to ensure endpoints distinguish between form and query parameters
前言
文章较长,步骤比较繁琐,请各位读者耐心观看。
上篇文章大概了解了下框架的相关理论,本篇文章将带大家一步步构建一个简单的认证服务器
开始之前先放一下文档的链接:官网文档
项目环境要求(当前框架版本1.1.0)
- Spring Boot版本大于等于3.1.0-RC1
- JDK版本大于等于17
认证项目搭建
1. 在Idea中或Spring Initializr中创建spring boot项目
-
Spring Boot版本选择3.1.0,Java版本选择17以上,在Dependencies中勾选Spring Authorization Server和spring web依赖,其它看自己需要

引入持久层框架(本人用的是MybatisPlus,读者可自选)
 <dependency>
     <groupId>com.baomidou</groupId>
     <artifactId>mybatis-plus-boot-starter</artifactId>
     <version>3.5.3.1</version>
 </dependency>
引入webjars和bootstrap,自定义登录页和确认页面时使用
<dependency>
    <groupId>org.webjars</groupId>
    <artifactId>webjars-locator-core</artifactId>
</dependency>
<dependency>
    <groupId>org.webjars</groupId>
    <artifactId>bootstrap</artifactId>
    <version>5.2.3</version>
</dependency>
项目pom.xml示例
<?xml version="1.0" encoding="UTF-8"?> <project xmlns="http://maven.apache.org/POM/4.0.0" xmlns:xsi="http://www.w3.org/2001/XMLSchema-instance" xsi:schemaLocation="http://maven.apache.org/POM/4.0.0 https://maven.apache.org/xsd/maven-4.0.0.xsd"> <modelVersion>4.0.0</modelVersion> <parent> <groupId>org.springframework.boot</groupId> <artifactId>spring-boot-starter-parent</artifactId> <version>3.1.0</version> <relativePath/> <!-- lookup parent from repository --> </parent> <groupId>com.example</groupId> <artifactId>authorization-example</artifactId> <version>0.0.1-SNAPSHOT</version> <name>authorization-example</name> <description>authorization-example</description> <properties> <java.version>17</java.version> </properties> <dependencies> <dependency> <groupId>org.springframework.boot</groupId> <artifactId>spring-boot-starter-oauth2-authorization-server</artifactId> </dependency> <dependency> <groupId>org.springframework.boot</groupId> <artifactId>spring-boot-starter-thymeleaf</artifactId> </dependency> <dependency> <groupId>org.springframework.boot</groupId> <artifactId>spring-boot-starter-web</artifactId> </dependency> <dependency> <groupId>com.mysql</groupId> <artifactId>mysql-connector-j</artifactId> <scope>runtime</scope> </dependency> <dependency> <groupId>org.projectlombok</groupId> <artifactId>lombok</artifactId> <optional>true</optional> </dependency> <dependency> <groupId>org.springframework.boot</groupId> <artifactId>spring-boot-starter-test</artifactId> <scope>test</scope> </dependency> <dependency> <groupId>com.baomidou</groupId> <artifactId>mybatis-plus-boot-starter</artifactId> <version>3.5.3.1</version> </dependency> <dependency> <groupId>org.webjars</groupId> <artifactId>webjars-locator-core</artifactId> </dependency> <dependency> <groupId>org.webjars</groupId> <artifactId>bootstrap</artifactId> <version>5.2.3</version> </dependency> </dependencies> <build> <plugins> <plugin> <groupId>org.springframework.boot</groupId> <artifactId>spring-boot-maven-plugin</artifactId> <configuration> <excludes> <exclude> <groupId>org.projectlombok</groupId> <artifactId>lombok</artifactId> </exclude> </excludes> </configuration> </plugin> </plugins> </build> </project> -
初始化框架自带数据库表
schema位置如图

修改后适配MySQL的SQL如下
-- 用户授权确认表
CREATE TABLE oauth2_authorization_consent
(
    registered_client_id varchar(100)  NOT NULL,
    principal_name       varchar(200)  NOT NULL,
    authorities          varchar(1000) NOT NULL,
    PRIMARY KEY (registered_client_id, principal_name)
);
-- 用户认证信息表
CREATE TABLE oauth2_authorization
(
    id                            varchar(100) NOT NULL,
    registered_client_id          varchar(100) NOT NULL,
    principal_name                varchar(200) NOT NULL,
    authorization_grant_type      varchar(100) NOT NULL,
    authorized_scopes             varchar(1000) DEFAULT NULL,
    attributes                    blob          DEFAULT NULL,
    state                         varchar(500)  DEFAULT NULL,
    authorization_code_value      blob          DEFAULT NULL,
    authorization_code_issued_at  DATETIME      DEFAULT NULL,
    authorization_code_expires_at DATETIME      DEFAULT NULL,
    authorization_code_metadata   blob          DEFAULT NULL,
    access_token_value            blob          DEFAULT NULL,
    access_token_issued_at        DATETIME      DEFAULT NULL,
    access_token_expires_at       DATETIME      DEFAULT NULL,
    access_token_metadata         blob          DEFAULT NULL,
    access_token_type             varchar(100)  DEFAULT NULL,
    access_token_scopes           varchar(1000) DEFAULT NULL,
    oidc_id_token_value           blob          DEFAULT NULL,
    oidc_id_token_issued_at       DATETIME      DEFAULT NULL,
    oidc_id_token_expires_at      DATETIME      DEFAULT NULL,
    oidc_id_token_metadata        blob          DEFAULT NULL,
    refresh_token_value           blob          DEFAULT NULL,
    refresh_token_issued_at       DATETIME      DEFAULT NULL,
    refresh_token_expires_at      DATETIME      DEFAULT NULL,
    refresh_token_metadata        blob          DEFAULT NULL,
    user_code_value               blob          DEFAULT NULL,
    user_code_issued_at           DATETIME      DEFAULT NULL,
    user_code_expires_at          DATETIME      DEFAULT NULL,
    user_code_metadata            blob          DEFAULT NULL,
    device_code_value             blob          DEFAULT NULL,
    device_code_issued_at         DATETIME      DEFAULT NULL,
    device_code_expires_at        DATETIME      DEFAULT NULL,
    device_code_metadata          blob          DEFAULT NULL,
    PRIMARY KEY (id)
);
-- 客户端表
CREATE TABLE oauth2_registered_client
(
    id                            varchar(100)                            NOT NULL,
    client_id                     varchar(100)                            NOT NULL,
    client_id_issued_at           DATETIME      DEFAULT CURRENT_TIMESTAMP NOT NULL,
    client_secret                 varchar(200)  DEFAULT NULL,
    client_secret_expires_at      DATETIME      DEFAULT NULL,
    client_name                   varchar(200)                            NOT NULL,
    client_authentication_methods varchar(1000)                           NOT NULL,
    authorization_grant_types     varchar(1000)                           NOT NULL,
    redirect_uris                 varchar(1000) DEFAULT NULL,
    post_logout_redirect_uris     varchar(1000) DEFAULT NULL,
    scopes                        varchar(1000)                           NOT NULL,
    client_settings               varchar(2000)                           NOT NULL,
    token_settings                varchar(2000)                           NOT NULL,
    PRIMARY KEY (id)
);
2. 在config包下创建AuthorizationConfig类,并添加配置
配置端点的过滤器链
/**
 * 配置端点的过滤器链
 *
 * @param http spring security核心配置类
 * @return 过滤器链
 * @throws Exception 抛出
 */
@Bean
public SecurityFilterChain authorizationServerSecurityFilterChain(HttpSecurity http) throws Exception {
    // 配置默认的设置,忽略认证端点的csrf校验
    OAuth2AuthorizationServerConfiguration.applyDefaultSecurity(http);
    http.getConfigurer(OAuth2AuthorizationServerConfigurer.class)
        // 开启OpenID Connect 1.0协议相关端点
        .oidc(Customizer.withDefaults())
        // 设置自定义用户确认授权页
        .authorizationEndpoint(authorizationEndpoint -> authorizationEndpoint.consentPage(CUSTOM_CONSENT_PAGE_URI));
    http
        // 当未登录时访问认证端点时重定向至login页面
        .exceptionHandling((exceptions) -> exceptions
            .defaultAuthenticationEntryPointFor(
            new LoginUrlAuthenticationEntryPoint("/login"),
            new MediaTypeRequestMatcher(MediaType.TEXT_HTML)
            )
        )
        // 处理使用access token访问用户信息端点和客户端注册端点
        .oauth2ResourceServer((resourceServer) -> resourceServer
        .jwt(Customizer.withDefaults()));

    return http.build();
}
配置身份验证过滤器链
/**
 * 配置认证相关的过滤器链
 *
 * @param http spring security核心配置类
 * @return 过滤器链
 * @throws Exception 抛出
 */
@Bean
public SecurityFilterChain defaultSecurityFilterChain(HttpSecurity http) throws Exception {
    http.authorizeHttpRequests((authorize) -> authorize
            // 放行静态资源
            .requestMatchers("/assets/**", "/webjars/**", "/login").permitAll()
            .anyRequest().authenticated()
        )
        // 指定登录页面
        .formLogin(formLogin ->
            formLogin.loginPage("/login")
        );
    // 添加BearerTokenAuthenticationFilter,将认证服务当做一个资源服务,解析请求头中的token
    http.oauth2ResourceServer((resourceServer) -> resourceServer
        .jwt(Customizer.withDefaults()));

    return http.build();
}
配置密码解析器
/**
 * 配置密码解析器,使用BCrypt的方式对密码进行加密和验证
 *
 * @return BCryptPasswordEncoder
 */
@Bean
public PasswordEncoder passwordEncoder() {
    return new BCryptPasswordEncoder();
}
配置客户端repository
/**
 * 配置客户端Repository
 *
 * @param jdbcTemplate    db 数据源信息
 * @param passwordEncoder 密码解析器
 * @return 基于数据库的repository
 */
@Bean
public RegisteredClientRepository registeredClientRepository(JdbcTemplate jdbcTemplate, PasswordEncoder passwordEncoder) {
    RegisteredClient registeredClient = RegisteredClient.withId(UUID.randomUUID().toString())
        // 客户端id
        .clientId("messaging-client")
        // 客户端秘钥,使用密码解析器加密
        .clientSecret(passwordEncoder.encode("123456"))
        // 客户端认证方式,基于请求头的认证
        .clientAuthenticationMethod(ClientAuthenticationMethod.CLIENT_SECRET_BASIC)
        // 配置资源服务器使用该客户端获取授权时支持的方式
        .authorizationGrantType(AuthorizationGrantType.AUTHORIZATION_CODE)
        .authorizationGrantType(AuthorizationGrantType.REFRESH_TOKEN)
        .authorizationGrantType(AuthorizationGrantType.CLIENT_CREDENTIALS)
        // 授权码模式回调地址,oauth2.1已改为精准匹配,不能只设置域名,并且屏蔽了localhost
        .redirectUri("http://127.0.0.1:8080/login/oauth2/code/messaging-client-oidc")
        // 配置一个百度的域名回调,稍后使用该回调获取code
        .redirectUri("https://www.baidu.com")
        // 该客户端的授权范围,OPENID与PROFILE是IdToken的scope,获取授权时请求OPENID的scope时认证服务会返回IdToken
        .scope(OidcScopes.OPENID)
        .scope(OidcScopes.PROFILE)
        // 自定scope
        .scope("message.read")
        .scope("message.write")
        // 客户端设置,设置用户需要确认授权
        .clientSettings(ClientSettings.builder().requireAuthorizationConsent(true).build())
        .build();

    // 基于db存储客户端,还有一个基于内存的实现 InMemoryRegisteredClientRepository
    JdbcRegisteredClientRepository registeredClientRepository = new JdbcRegisteredClientRepository(jdbcTemplate);

    // 初始化客户端
    RegisteredClient repositoryByClientId = registeredClientRepository.findByClientId(registeredClient.getClientId());
    if (repositoryByClientId == null) {
        registeredClientRepository.save(registeredClient);
    }
    // 设备码授权客户端
    RegisteredClient deviceClient = RegisteredClient.withId(UUID.randomUUID().toString())
        .clientId("device-message-client")
        // 公共客户端
        .clientAuthenticationMethod(ClientAuthenticationMethod.NONE)
        // 设备码授权
        .authorizationGrantType(AuthorizationGrantType.DEVICE_CODE)
        .authorizationGrantType(AuthorizationGrantType.REFRESH_TOKEN)
        // 自定scope
        .scope("message.read")
        .scope("message.write")
        .build();
    RegisteredClient byClientId = registeredClientRepository.findByClientId(deviceClient.getClientId());
    if (byClientId == null) {
        registeredClientRepository.save(deviceClient);
    }
    return registeredClientRepository;
}
客户端设置(ClientSettings)说明
requireProofKey:当使用该客户端发起PKCE流程时必须设置为true。requireAuthorizationConsent:当设置为true时登录后会先跳转授权确认页面,确认后才会跳转到redirect_uri,为false时不会跳转至授权确认页面。jwkSetUrl:设置客户端jwks的url。tokenEndpointAuthenticationSigningAlgorithm:设置token端点对验证方法为CLIENT_SECRET_JWT,PRIVATE_KEY_JWT的客户端进行身份验证使用的签名算法。
token设置(TokenSettings)说明
authorizationCodeTimeToLive:授权码(authorization_code)有效时长。accessTokenTimeToLive:access_token有效时长。accessTokenFormat:access_token的格式,SELF_CONTAINED是自包含token(jwt格式),REFERENCE是不透明token,相相当于是token元数据的一个id,通过id找到对应数据(自省令牌时),如下
public final class OAuth2TokenFormat implements Serializable {
    private static final long serialVersionUID = SpringAuthorizationServerVersion.SERIAL_VERSION_UID;

	/**
	 * Self-contained tokens use a protected, time-limited data structure that contains token metadata
	 * and claims of the user and/or client. JSON Web Token (JWT) is a widely used format.
	 */
	public static final OAuth2TokenFormat SELF_CONTAINED = new OAuth2TokenFormat("self-contained");

	/**
	 * Reference (opaque) tokens are unique identifiers that serve as a reference
	 * to the token metadata and claims of the user and/or client, stored at the provider.
	 */
	public static final OAuth2TokenFormat REFERENCE = new OAuth2TokenFormat("reference");

}
deviceCodeTimeToLive:设备码有效时长。reuseRefreshTokens:刷新token时是否重用refresh token,设置为true后refresh token不变,false刷新token时会重新签发一个refresh token。refreshTokenTimeToLive:refresh token有效时长。idTokenSignatureAlgorithm:设置id token的加密算法。
如果数据库已经存在客户端数据或不需要默认设置,则直接注入一个JdbcRegisteredClientRepository即可
/**
 * 配置客户端Repository
 *
 * @param jdbcTemplate    db 数据源信息
 * @return 基于数据库的repository
 */
@Bean
public RegisteredClientRepository registeredClientRepository(JdbcTemplate jdbcTemplate) {
    return new JdbcRegisteredClientRepository(jdbcTemplate);
}
配置授权管理服务
/**
 * 配置基于db的oauth2的授权管理服务
 *
 * @param jdbcTemplate               db数据源信息
 * @param registeredClientRepository 上边注入的客户端repository
 * @return JdbcOAuth2AuthorizationService
 */
@Bean
public OAuth2AuthorizationService authorizationService(JdbcTemplate jdbcTemplate, RegisteredClientRepository registeredClientRepository) {
    // 基于db的oauth2认证服务,还有一个基于内存的服务InMemoryOAuth2AuthorizationService
    return new JdbcOAuth2AuthorizationService(jdbcTemplate, registeredClientRepository);
}
配置授权确认管理服务
/**
 * 配置基于db的授权确认管理服务
 *
 * @param jdbcTemplate               db数据源信息
 * @param registeredClientRepository 客户端repository
 * @return JdbcOAuth2AuthorizationConsentService
 */
@Bean
public OAuth2AuthorizationConsentService authorizationConsentService(JdbcTemplate jdbcTemplate, RegisteredClientRepository registeredClientRepository) {
    // 基于db的授权确认管理服务,还有一个基于内存的服务实现InMemoryOAuth2AuthorizationConsentService
    return new JdbcOAuth2AuthorizationConsentService(jdbcTemplate, registeredClientRepository);
}
配置jwk
/**
 * 配置jwk源,使用非对称加密,公开用于检索匹配指定选择器的JWK的方法
 *
 * @return JWKSource
 */
@Bean
public JWKSource<SecurityContext> jwkSource() {
    KeyPair keyPair = generateRsaKey();
    RSAPublicKey publicKey = (RSAPublicKey) keyPair.getPublic();
    RSAPrivateKey privateKey = (RSAPrivateKey) keyPair.getPrivate();
    RSAKey rsaKey = new RSAKey.Builder(publicKey)
        .privateKey(privateKey)
        .keyID(UUID.randomUUID().toString())
        .build();
    JWKSet jwkSet = new JWKSet(rsaKey);
    return new ImmutableJWKSet<>(jwkSet);
}

/**
 * 生成rsa密钥对,提供给jwk
 *
 * @return 密钥对
 */
private static KeyPair generateRsaKey() {
    KeyPair keyPair;
    try {
        KeyPairGenerator keyPairGenerator = KeyPairGenerator.getInstance("RSA");
        keyPairGenerator.initialize(2048);
        keyPair = keyPairGenerator.generateKeyPair();
    } catch (Exception ex) {
        throw new IllegalStateException(ex);
    }
    return keyPair;
}
配置jwt解析器
/**
 * 配置jwt解析器
 *
 * @param jwkSource jwk源
 * @return JwtDecoder
 */
@Bean
public JwtDecoder jwtDecoder(JWKSource<SecurityContext> jwkSource) {
    return OAuth2AuthorizationServerConfiguration.jwtDecoder(jwkSource);
}
配置认证服务器设置
/**
 * 添加认证服务器配置,设置jwt签发者、默认端点请求地址等
 *
 * @return AuthorizationServerSettings
 */
@Bean
public AuthorizationServerSettings authorizationServerSettings() {
    return AuthorizationServerSettings.builder().build();
}
配置一个基于内存的默认用户
/**
 * 先暂时配置一个基于内存的用户,框架在用户认证时会默认调用
 * {@link UserDetailsService#loadUserByUsername(String)} 方法根据
 * 账号查询用户信息,一般是重写该方法实现自己的逻辑
 *
 * @param passwordEncoder 密码解析器
 * @return UserDetailsService
 */
@Bean
public UserDetailsService users(PasswordEncoder passwordEncoder) {
    UserDetails user = User.withUsername("admin")
        .password(passwordEncoder.encode("123456"))
        .roles("admin", "normal")
        .authorities("app", "web")
        .build();
    return new InMemoryUserDetailsManager(user);
}
完整的AuthorizationConfig.java如下
package com.example.config;

import com.nimbusds.jose.jwk.JWKSet;
import com.nimbusds.jose.jwk.RSAKey;
import com.nimbusds.jose.jwk.source.ImmutableJWKSet;
import com.nimbusds.jose.jwk.source.JWKSource;
import com.nimbusds.jose.proc.SecurityContext;
import org.springframework.context.annotation.Bean;
import org.springframework.context.annotation.Configuration;
import org.springframework.http.MediaType;
import org.springframework.jdbc.core.JdbcTemplate;
import org.springframework.security.access.annotation.Secured;
import org.springframework.security.config.Customizer;
import org.springframework.security.config.annotation.method.configuration.EnableMethodSecurity;
import org.springframework.security.config.annotation.web.builders.HttpSecurity;
import org.springframework.security.config.annotation.web.configuration.EnableWebSecurity;
import org.springframework.security.core.userdetails.User;
import org.springframework.security.core.userdetails.UserDetails;
import org.springframework.security.core.userdetails.UserDetailsService;
import org.springframework.security.crypto.bcrypt.BCryptPasswordEncoder;
import org.springframework.security.crypto.password.PasswordEncoder;
import org.springframework.security.oauth2.core.AuthorizationGrantType;
import org.springframework.security.oauth2.core.ClientAuthenticationMethod;
import org.springframework.security.oauth2.core.oidc.OidcScopes;
import org.springframework.security.oauth2.jwt.JwtDecoder;
import org.springframework.security.oauth2.server.authorization.JdbcOAuth2AuthorizationConsentService;
import org.springframework.security.oauth2.server.authorization.JdbcOAuth2AuthorizationService;
import org.springframework.security.oauth2.server.authorization.OAuth2AuthorizationConsentService;
import org.springframework.security.oauth2.server.authorization.OAuth2AuthorizationService;
import org.springframework.security.oauth2.server.authorization.client.JdbcRegisteredClientRepository;
import org.springframework.security.oauth2.server.authorization.client.RegisteredClient;
import org.springframework.security.oauth2.server.authorization.client.RegisteredClientRepository;
import org.springframework.security.oauth2.server.authorization.config.annotation.web.configuration.OAuth2AuthorizationServerConfiguration;
import org.springframework.security.oauth2.server.authorization.config.annotation.web.configurers.OAuth2AuthorizationServerConfigurer;
import org.springframework.security.oauth2.server.authorization.settings.AuthorizationServerSettings;
import org.springframework.security.oauth2.server.authorization.settings.ClientSettings;
import org.springframework.security.provisioning.InMemoryUserDetailsManager;
import org.springframework.security.web.SecurityFilterChain;
import org.springframework.security.web.authentication.LoginUrlAuthenticationEntryPoint;
import org.springframework.security.web.util.matcher.MediaTypeRequestMatcher;

import java.security.KeyPair;
import java.security.KeyPairGenerator;
import java.security.interfaces.RSAPrivateKey;
import java.security.interfaces.RSAPublicKey;
import java.util.UUID;

/**
 * 认证配置
 * {@link EnableMethodSecurity} 开启全局方法认证,启用JSR250注解支持,启用注解 {@link Secured} 支持,
 * 在Spring Security 6.0版本中将@Configuration注解从@EnableWebSecurity, @EnableMethodSecurity, @EnableGlobalMethodSecurity
 * 和 @EnableGlobalAuthentication 中移除,使用这些注解需手动添加 @Configuration 注解
 * {@link EnableWebSecurity} 注解有两个作用:
 * 1. 加载了WebSecurityConfiguration配置类, 配置安全认证策略。
 * 2. 加载了AuthenticationConfiguration, 配置了认证信息。
 *
 * @author vains
 */
@Configuration
@EnableWebSecurity
@EnableMethodSecurity(jsr250Enabled = true, securedEnabled = true)
public class AuthorizationConfig {

    private static final String CUSTOM_CONSENT_PAGE_URI = "/oauth2/consent";

    /**
     * 配置端点的过滤器链
     *
     * @param http spring security核心配置类
     * @return 过滤器链
     * @throws Exception 抛出
     */
    @Bean
    public SecurityFilterChain authorizationServerSecurityFilterChain(HttpSecurity http) throws Exception {
        // 配置默认的设置,忽略认证端点的csrf校验
        OAuth2AuthorizationServerConfiguration.applyDefaultSecurity(http);
        http.getConfigurer(OAuth2AuthorizationServerConfigurer.class)
                // 开启OpenID Connect 1.0协议相关端点
                .oidc(Customizer.withDefaults())
                // 设置自定义用户确认授权页
                .authorizationEndpoint(authorizationEndpoint -> authorizationEndpoint.consentPage(CUSTOM_CONSENT_PAGE_URI));
        http
                // 当未登录时访问认证端点时重定向至login页面
                .exceptionHandling((exceptions) -> exceptions
                        .defaultAuthenticationEntryPointFor(
                                new LoginUrlAuthenticationEntryPoint("/login"),
                                new MediaTypeRequestMatcher(MediaType.TEXT_HTML)
                        )
                )
                // 处理使用access token访问用户信息端点和客户端注册端点
                .oauth2ResourceServer((resourceServer) -> resourceServer
                        .jwt(Customizer.withDefaults()));

        return http.build();
    }

    /**
     * 配置认证相关的过滤器链
     *
     * @param http spring security核心配置类
     * @return 过滤器链
     * @throws Exception 抛出
     */
    @Bean
    public SecurityFilterChain defaultSecurityFilterChain(HttpSecurity http) throws Exception {
        http.authorizeHttpRequests((authorize) -> authorize
                        // 放行静态资源
                        .requestMatchers("/assets/**", "/webjars/**", "/login").permitAll()
                        .anyRequest().authenticated()
                )
                // 指定登录页面
                .formLogin(formLogin ->
                        formLogin.loginPage("/login")
                );
        // 添加BearerTokenAuthenticationFilter,将认证服务当做一个资源服务,解析请求头中的token
        http.oauth2ResourceServer((resourceServer) -> resourceServer
                .jwt(Customizer.withDefaults()));

        return http.build();
    }

    /**
     * 配置密码解析器,使用BCrypt的方式对密码进行加密和验证
     *
     * @return BCryptPasswordEncoder
     */
    @Bean
    public PasswordEncoder passwordEncoder() {
        return new BCryptPasswordEncoder();
    }

    /**
     * 配置客户端Repository
     *
     * @param jdbcTemplate    db 数据源信息
     * @param passwordEncoder 密码解析器
     * @return 基于数据库的repository
     */
    @Bean
    public RegisteredClientRepository registeredClientRepository(JdbcTemplate jdbcTemplate, PasswordEncoder passwordEncoder) {
        RegisteredClient registeredClient = RegisteredClient.withId(UUID.randomUUID().toString())
                // 客户端id
                .clientId("messaging-client")
                // 客户端秘钥,使用密码解析器加密
                .clientSecret(passwordEncoder.encode("123456"))
                // 客户端认证方式,基于请求头的认证
                .clientAuthenticationMethod(ClientAuthenticationMethod.CLIENT_SECRET_BASIC)
                // 配置资源服务器使用该客户端获取授权时支持的方式
                .authorizationGrantType(AuthorizationGrantType.AUTHORIZATION_CODE)
                .authorizationGrantType(AuthorizationGrantType.REFRESH_TOKEN)
                .authorizationGrantType(AuthorizationGrantType.CLIENT_CREDENTIALS)
                // 授权码模式回调地址,oauth2.1已改为精准匹配,不能只设置域名,并且屏蔽了localhost,本机使用127.0.0.1访问
                .redirectUri("http://127.0.0.1:8080/login/oauth2/code/messaging-client-oidc")
                .redirectUri("https://www.baidu.com")
                // 该客户端的授权范围,OPENID与PROFILE是IdToken的scope,获取授权时请求OPENID的scope时认证服务会返回IdToken
                .scope(OidcScopes.OPENID)
                .scope(OidcScopes.PROFILE)
                // 自定scope
                .scope("message.read")
                .scope("message.write")
                // 客户端设置,设置用户需要确认授权
                .clientSettings(ClientSettings.builder().requireAuthorizationConsent(true).build())
                .build();

        // 基于db存储客户端,还有一个基于内存的实现 InMemoryRegisteredClientRepository
        JdbcRegisteredClientRepository registeredClientRepository = new JdbcRegisteredClientRepository(jdbcTemplate);

        // 初始化客户端
        RegisteredClient repositoryByClientId = registeredClientRepository.findByClientId(registeredClient.getClientId());
        if (repositoryByClientId == null) {
            registeredClientRepository.save(registeredClient);
        }
        // 设备码授权客户端
        RegisteredClient deviceClient = RegisteredClient.withId(UUID.randomUUID().toString())
                .clientId("device-message-client")
                // 公共客户端
                .clientAuthenticationMethod(ClientAuthenticationMethod.NONE)
                // 设备码授权
                .authorizationGrantType(AuthorizationGrantType.DEVICE_CODE)
                .authorizationGrantType(AuthorizationGrantType.REFRESH_TOKEN)
                // 自定scope
                .scope("message.read")
                .scope("message.write")
                .build();
        RegisteredClient byClientId = registeredClientRepository.findByClientId(deviceClient.getClientId());
        if (byClientId == null) {
            registeredClientRepository.save(deviceClient);
        }
        return registeredClientRepository;
    }

    /**
     * 配置基于db的oauth2的授权管理服务
     *
     * @param jdbcTemplate               db数据源信息
     * @param registeredClientRepository 上边注入的客户端repository
     * @return JdbcOAuth2AuthorizationService
     */
    @Bean
    public OAuth2AuthorizationService authorizationService(JdbcTemplate jdbcTemplate, RegisteredClientRepository registeredClientRepository) {
        // 基于db的oauth2认证服务,还有一个基于内存的服务实现InMemoryOAuth2AuthorizationService
        return new JdbcOAuth2AuthorizationService(jdbcTemplate, registeredClientRepository);
    }

    /**
     * 配置基于db的授权确认管理服务
     *
     * @param jdbcTemplate               db数据源信息
     * @param registeredClientRepository 客户端repository
     * @return JdbcOAuth2AuthorizationConsentService
     */
    @Bean
    public OAuth2AuthorizationConsentService authorizationConsentService(JdbcTemplate jdbcTemplate, RegisteredClientRepository registeredClientRepository) {
        // 基于db的授权确认管理服务,还有一个基于内存的服务实现InMemoryOAuth2AuthorizationConsentService
        return new JdbcOAuth2AuthorizationConsentService(jdbcTemplate, registeredClientRepository);
    }

    /**
     * 配置jwk源,使用非对称加密,公开用于检索匹配指定选择器的JWK的方法
     *
     * @return JWKSource
     */
    @Bean
    public JWKSource<SecurityContext> jwkSource() {
        KeyPair keyPair = generateRsaKey();
        RSAPublicKey publicKey = (RSAPublicKey) keyPair.getPublic();
        RSAPrivateKey privateKey = (RSAPrivateKey) keyPair.getPrivate();
        RSAKey rsaKey = new RSAKey.Builder(publicKey)
                .privateKey(privateKey)
                .keyID(UUID.randomUUID().toString())
                .build();
        JWKSet jwkSet = new JWKSet(rsaKey);
        return new ImmutableJWKSet<>(jwkSet);
    }

    /**
     * 生成rsa密钥对,提供给jwk
     *
     * @return 密钥对
     */
    private static KeyPair generateRsaKey() {
        KeyPair keyPair;
        try {
            KeyPairGenerator keyPairGenerator = KeyPairGenerator.getInstance("RSA");
            keyPairGenerator.initialize(2048);
            keyPair = keyPairGenerator.generateKeyPair();
        } catch (Exception ex) {
            throw new IllegalStateException(ex);
        }
        return keyPair;
    }

    /**
     * 配置jwt解析器
     *
     * @param jwkSource jwk源
     * @return JwtDecoder
     */
    @Bean
    public JwtDecoder jwtDecoder(JWKSource<SecurityContext> jwkSource) {
        return OAuth2AuthorizationServerConfiguration.jwtDecoder(jwkSource);
    }

    /**
     * 添加认证服务器配置,设置jwt签发者、默认端点请求地址等
     *
     * @return AuthorizationServerSettings
     */
    @Bean
    public AuthorizationServerSettings authorizationServerSettings() {
        return AuthorizationServerSettings.builder().build();
    }

    /**
     * 先暂时配置一个基于内存的用户,框架在用户认证时会默认调用
     * {@link UserDetailsService#loadUserByUsername(String)} 方法根据
     * 账号查询用户信息,一般是重写该方法实现自己的逻辑
     *
     * @param passwordEncoder 密码解析器
     * @return UserDetailsService
     */
    @Bean
    public UserDetailsService users(PasswordEncoder passwordEncoder) {
        UserDetails user = User.withUsername("admin")
                .password(passwordEncoder.encode("123456"))
                .roles("admin", "normal", "unAuthentication")
                .authorities("app", "web", "/test2", "/test3")
                .build();
        return new InMemoryUserDetailsManager(user);
    }

}
注意,配置类中提到的基于内存存储的类禁止用于生产环境
3. 添加AuthorizationController,将请求转发至自定义的登录页面和用户确认授权页面
以下代码摘抄自官方示例
使用thymeleaf框架渲染页面
package com.example.controller;

import lombok.Data;
import lombok.RequiredArgsConstructor;
import org.springframework.security.oauth2.core.endpoint.OAuth2ParameterNames;
import org.springframework.security.oauth2.core.oidc.OidcScopes;
import org.springframework.security.oauth2.server.authorization.OAuth2AuthorizationConsent;
import org.springframework.security.oauth2.server.authorization.OAuth2AuthorizationConsentService;
import org.springframework.security.oauth2.server.authorization.client.RegisteredClient;
import org.springframework.security.oauth2.server.authorization.client.RegisteredClientRepository;
import org.springframework.stereotype.Controller;
import org.springframework.ui.Model;
import org.springframework.util.StringUtils;
import org.springframework.web.bind.annotation.GetMapping;
import org.springframework.web.bind.annotation.RequestParam;

import java.security.Principal;
import java.util.Collections;
import java.util.HashMap;
import java.util.HashSet;
import java.util.Map;
import java.util.Set;

/**
 * 认证服务器相关自定接口
 *
 * @author vains
 */
@Controller
@RequiredArgsConstructor
public class AuthorizationController {

    private final RegisteredClientRepository registeredClientRepository;

    private final OAuth2AuthorizationConsentService authorizationConsentService;


    @GetMapping("/login")
    public String login() {
        return "login";
    }

    @GetMapping(value = "/oauth2/consent")
    public String consent(Principal principal, Model model,
                          @RequestParam(OAuth2ParameterNames.CLIENT_ID) String clientId,
                          @RequestParam(OAuth2ParameterNames.SCOPE) String scope,
                          @RequestParam(OAuth2ParameterNames.STATE) String state,
                          @RequestParam(name = OAuth2ParameterNames.USER_CODE, required = false) String userCode) {

        // Remove scopes that were already approved
        Set<String> scopesToApprove = new HashSet<>();
        Set<String> previouslyApprovedScopes = new HashSet<>();
        RegisteredClient registeredClient = this.registeredClientRepository.findByClientId(clientId);
        if (registeredClient == null) {
            throw new RuntimeException("客户端不存在");
        }
        OAuth2AuthorizationConsent currentAuthorizationConsent =
                this.authorizationConsentService.findById(registeredClient.getId(), principal.getName());
        Set<String> authorizedScopes;
        if (currentAuthorizationConsent != null) {
            authorizedScopes = currentAuthorizationConsent.getScopes();
        } else {
            authorizedScopes = Collections.emptySet();
        }
        for (String requestedScope : StringUtils.delimitedListToStringArray(scope, " ")) {
            if (OidcScopes.OPENID.equals(requestedScope)) {
                continue;
            }
            if (authorizedScopes.contains(requestedScope)) {
                previouslyApprovedScopes.add(requestedScope);
            } else {
                scopesToApprove.add(requestedScope);
            }
        }

        model.addAttribute("clientId", clientId);
        model.addAttribute("state", state);
        model.addAttribute("scopes", withDescription(scopesToApprove));
        model.addAttribute("previouslyApprovedScopes", withDescription(previouslyApprovedScopes));
        model.addAttribute("principalName", principal.getName());
        model.addAttribute("userCode", userCode);
        if (StringUtils.hasText(userCode)) {
            model.addAttribute("requestURI", "/oauth2/device_verification");
        } else {
            model.addAttribute("requestURI", "/oauth2/authorize");
        }

        return "consent";
    }

    private static Set<ScopeWithDescription> withDescription(Set<String> scopes) {
        Set<ScopeWithDescription> scopeWithDescriptions = new HashSet<>();
        for (String scope : scopes) {
            scopeWithDescriptions.add(new ScopeWithDescription(scope));

        }
        return scopeWithDescriptions;
    }

    @Data
    public static class ScopeWithDescription {
        private static final String DEFAULT_DESCRIPTION = "UNKNOWN SCOPE - We cannot provide information about this permission, use caution when granting this.";
        private static final Map<String, String> scopeDescriptions = new HashMap<>();
        static {
            scopeDescriptions.put(
                    OidcScopes.PROFILE,
                    "This application will be able to read your profile information."
            );
            scopeDescriptions.put(
                    "message.read",
                    "This application will be able to read your message."
            );
            scopeDescriptions.put(
                    "message.write",
                    "This application will be able to add new messages. It will also be able to edit and delete existing messages."
            );
            scopeDescriptions.put(
                    "other.scope",
                    "This is another scope example of a scope description."
            );
        }

        public final String scope;
        public final String description;

        ScopeWithDescription(String scope) {
            this.scope = scope;
            this.description = scopeDescriptions.getOrDefault(scope, DEFAULT_DESCRIPTION);
        }
    }

}
4. 在application.yml中配置db数据源
spring:
  datasource:
    driver-class-name: com.mysql.cj.jdbc.Driver
    url: jdbc:mysql://localhost:3306/authorization-example?serverTimezone=UTC&userUnicode=true&characterEncoding=utf-8
    username: root
    password: root
5. 编写登录页面和用户授权确认页面
以下代码摘抄自官方示例
登录页面 login.html
<!DOCTYPE html>
<html lang="en" xmlns="http://www.w3.org/1999/xhtml" xmlns:th="https://www.thymeleaf.org">
<head>
    <meta charset="utf-8" />
    <meta name="viewport" content="width=device-width, initial-scale=1">
    <title>Spring Authorization Server sample</title>
    <link rel="stylesheet" href="/webjars/bootstrap/css/bootstrap.css" th:href="@{/webjars/bootstrap/css/bootstrap.css}" />
    <link rel="stylesheet" href="/assets/css/signin.css" th:href="@{/assets/css/signin.css}" />
</head>
<body>
<div class="container">
    <form class="form-signin w-100 m-auto" method="post" th:action="@{/login}">
        <div th:if="${param.error}" class="alert alert-danger" role="alert">
            Invalid username or password.
        </div>
        <div th:if="${param.logout}" class="alert alert-success" role="alert">
            You have been logged out.
        </div>
        <h1 class="h3 mb-3 fw-normal">Please sign in</h1>
        <div class="form-floating">
            <input type="text" id="username" name="username" class="form-control" required autofocus>
            <label for="username">Username</label>
        </div>
        <div class="form-floating">
            <input type="password" id="password" name="password" class="form-control" required>
            <label for="password">Password</label>
        </div>
        <div>
            <button class="w-100 btn btn-lg btn-primary btn-block" type="submit">Sign in</button>
        </div>
    </form>
</div>
</body>
</html>
登录页面css, signin.css
html,
body {
    height: 100%;
}

body {
    display: flex;
    align-items: start;
    padding-top: 100px;
    background-color: #f5f5f5;
}

.form-signin {
    max-width: 330px;
    padding: 15px;
}

.form-signin .form-floating:focus-within {
    z-index: 2;
}

.form-signin input[type="username"] {
    margin-bottom: -1px;
    border-bottom-right-radius: 0;
    border-bottom-left-radius: 0;
}

.form-signin input[type="password"] {
    margin-bottom: 10px;
    border-top-left-radius: 0;
    border-top-right-radius: 0;
}
用户授权确认页面consent.html
<!DOCTYPE html>
<html lang="en" xmlns="http://www.w3.org/1999/xhtml" xmlns:th="https://www.thymeleaf.org">
<head>
    <meta charset="utf-8" />
    <meta name="viewport" content="width=device-width, initial-scale=1">
    <title>Custom consent page - Consent required</title>
    <link rel="stylesheet" href="/webjars/bootstrap/css/bootstrap.css" th:href="@{/webjars/bootstrap/css/bootstrap.css}" />
    <script>
        function cancelConsent() {
            document.consent_form.reset();
            document.consent_form.submit();
        }
    </script>
</head>
<body>
<div class="container">
    <div class="row py-5">
        <h1 class="text-center text-primary">App permissions</h1>
    </div>
    <div class="row">
        <div class="col text-center">
            <p>
                The application
                <span class="fw-bold text-primary" th:text="${clientId}"></span>
                wants to access your account
                <span class="fw-bold" th:text="${principalName}"></span>
            </p>
        </div>
    </div>
    <div th:if="${userCode}" class="row">
        <div class="col text-center">
            <p class="alert alert-warning">
                You have provided the code
                <span class="fw-bold" th:text="${userCode}"></span>.
                Verify that this code matches what is shown on your device.
            </p>
        </div>
    </div>
    <div class="row pb-3">
        <div class="col text-center">
            <p>
                The following permissions are requested by the above app.<br/>
                Please review these and consent if you approve.
            </p>
        </div>
    </div>
    <div class="row">
        <div class="col text-center">
            <form name="consent_form" method="post" th:action="${requestURI}">
                <input type="hidden" name="client_id" th:value="${clientId}">
                <input type="hidden" name="state" th:value="${state}">
                <input th:if="${userCode}" type="hidden" name="user_code" th:value="${userCode}">

                <div th:each="scope: ${scopes}" class="form-check py-1">
                    <input class="form-check-input"
                           style="float: none"
                           type="checkbox"
                           name="scope"
                           th:value="${scope.scope}"
                           th:id="${scope.scope}">
                    <label class="form-check-label fw-bold px-2" th:for="${scope.scope}" th:text="${scope.scope}"></label>
                    <p class="text-primary" th:text="${scope.description}"></p>
                </div>

                <p th:if="${not #lists.isEmpty(previouslyApprovedScopes)}">
                    You have already granted the following permissions to the above app:
                </p>
                <div th:each="scope: ${previouslyApprovedScopes}" class="form-check py-1">
                    <input class="form-check-input"
                           style="float: none"
                           type="checkbox"
                           th:id="${scope.scope}"
                           disabled
                           checked>
                    <label class="form-check-label fw-bold px-2" th:for="${scope.scope}" th:text="${scope.scope}"></label>
                    <p class="text-primary" th:text="${scope.description}"></p>
                </div>

                <div class="pt-3">
                    <button class="btn btn-primary btn-lg" type="submit" id="submit-consent">
                        Submit Consent
                    </button>
                </div>
                <div class="pt-3">
                    <button class="btn btn-link regular" type="button" id="cancel-consent" onclick="cancelConsent();">
                        Cancel
                    </button>
                </div>
            </form>
        </div>
    </div>
    <div class="row pt-4">
        <div class="col text-center">
            <p>
                <small>
                    Your consent to provide access is required.<br/>
                    If you do not approve, click Cancel, in which case no information will be shared with the app.
                </small>
            </p>
        </div>
    </div>
</div>
</body>
</html>
至此,一个简单的认证服务就搭建成功了。
本来不想设置自定义页面的,但是不知道是本人的网络问题,还是默认的页面里的css相关cdn无法访问,页面加载巨慢还丑,只能从官方示例中拿一下登录页面和用户授权确认页面,css改为从项目的webjars中引入
最后放一下项目结构图

6. 简单测试
1. 拼接url,访问授权接口
http://127.0.0.1:8080/oauth2/authorize?client_id=messaging-client&response_type=code&scope=message.read&redirect_uri=https%3A%2F%2Fwww.baidu.com
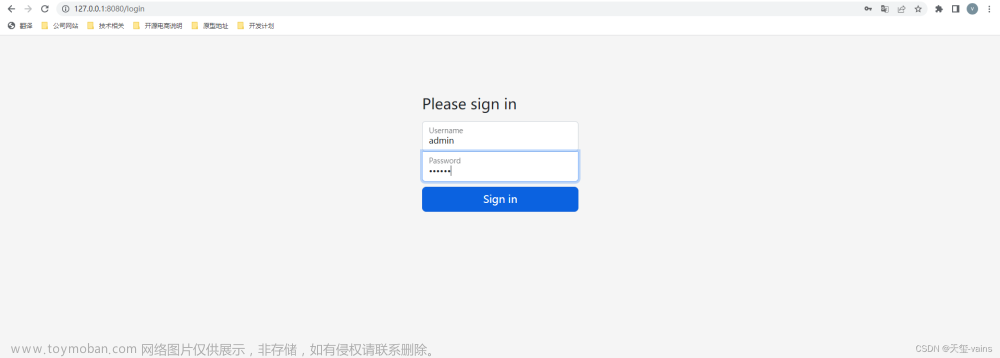
2. 授权接口检测到未登录,重定向至登录页面

3. 输入AuthorizationConfig中配置的账号密码
账号:admin, 密码:123456
4. 登录成功后跳转至授权确认页面
登录成功跳转至第1步的授权接口,授权接口检测到用户未确认授权,跳转至授权确认页面

选择对应的scope并提交确认权限
5. 提交后重定向至第1步的授权接口
授权接口生成code并重定向至第1步请求授权接口时携带的redirectUri地址,重定向时携带上参数code和state,我这里省略掉了state参数,重定向之后只会携带code参数;state用来防止CSRF攻击,正式请求需生成并携带state参数。
6. 用户确认授权后携带code跳转至redirectUri
一般来说配置的回调地址都是客户端的接口,接口在接收到回调时根据code去换取accessToken,接下来我会用postman模拟客户端发起一个http请求去换取token
不知道为什么在手机浏览器上看回调至百度的图片在平台显示违规,这里我放一张另一个回调地址的图片替代
7. 根据code换取AccessToken
请求/oauth2/token接口
1. 设置Basic Auth
之前客户端设置的认证方式是CLIENT_SECRET_BASIC,所以需将客户端信息添加至请求头

2. 添加表单数据,发起POST请求
下列表单数据可添加至form-data也可添加至url params
参数中的code就是第6步回调时携带的code注意:添加url params时redirect_uri参数要经过encodeURIComponent函数对回调地址进行编码
在新版本的sas(1.2.1)中获取token更新了授权码校验逻辑,只能用form-data传递参数,使用url-params会失败,原因见issue1451
对应的 commit 在这里: Fix to ensure endpoints distinguish between form and query parameters文章来源:https://www.toymoban.com/news/detail-538734.html
8. 参数解释
1. client_id: 客户端的id
2. client_secret: 客户端秘钥
3. redirect_uri:申请授权成功后的回调地址
4. response_type:授权码模式固定参数code
5. code_verifier:一段随机字符串
6. code_challenge:根据指定的加密方式将code_verifier加密后得到的字符串
7. code_challenge_method:加密方式
8. scope:客户端申请的授权范围
9. state:跟随authCode原样返回,防止CSRF攻击
10. grant_type:指定获取token 的方式:
	1. refresh_token:刷新token
    2. authorization_code:根据授权码模式的授权码获取
    3. client_credentials:客户端模式获取
总结
本篇文章从0到1搭建了一个简单认证服务,解释了认证服务的各项配置用意,如何设置自己的登录页和授权确认页,如何让认证服务解析请求时携带的token,文章过长难免有遗漏的地方,如果文章中有遗漏或错误的地方请各位读者在评论区指出。文章来源地址https://www.toymoban.com/news/detail-538734.html
到了这里,关于Spring Authorization Server入门 (二) springboot整合Spring Authorization Server的文章就介绍完了。如果您还想了解更多内容,请在右上角搜索TOY模板网以前的文章或继续浏览下面的相关文章,希望大家以后多多支持TOY模板网!