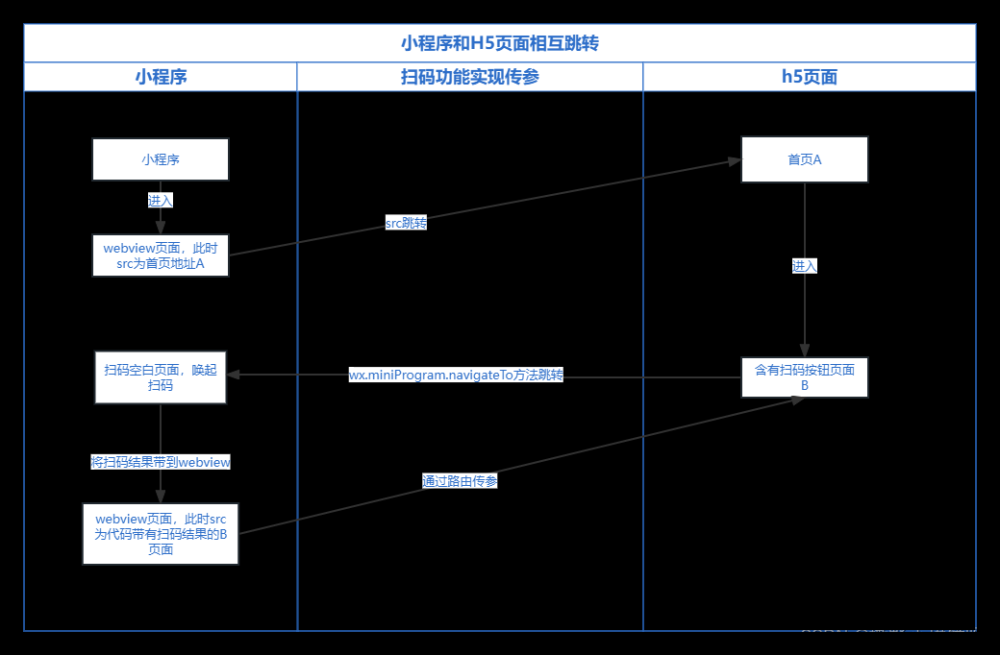
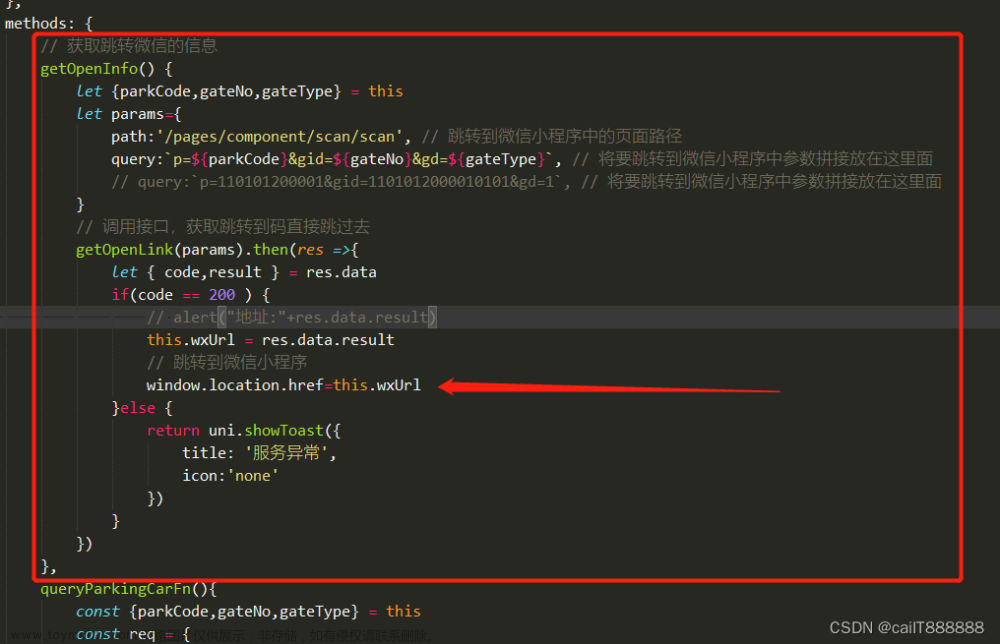
vue2 H5 网页扫码(线上需要在https服务器部署) vue3 h5扫码插件点这里
1.首先uniapp初始化(需要引入npm包已经初始化就忽略吧)
在项目中打开cmd窗口

npm init -y

根目录会多出一个 package.json 文件。
2.终端执行(需要引入vue-qrcode-reader)//只适用于vue2版本
npm install --save vue-qrcode-reader
3 创建一个扫码页面(用于其他页面往此页面跳转)
<template>
	<view>
		<text>{{ result }}</text>
		<qrcode-stream @decode="onDecode" @init="onInit" />
	</view>
</template>

<script>
	//引入
	import {
		QrcodeStream
	} from 'vue-qrcode-reader';
	export default {
		data() {
			return {
				result: '', //扫码结果信息
			}
		},
		methods: {
			onDecode(result) {
				this.result = result;
				//这是是要扫码后要带参数跳转其他页面
				//uni.redirectTo({
				//	url: `../msg/msg?code=${this.result}`
				//})
			},


			async onInit(promise) {
				try {
					await promise
				} catch (error) {
					if (error.name === 'NotAllowedError') {
						this.error = "ERROR: 您需要授予相机访问权限"
					} else if (error.name === 'NotFoundError') {
						this.error = "ERROR: 这个设备上没有摄像头"
					} else if (error.name === 'NotSupportedError') {
						this.error = "ERROR: 所需的安全上下文(HTTPS、本地主机)"
					} else if (error.name === 'NotReadableError') {
						this.error = "ERROR: 相机被占用"
					} else if (error.name === 'OverconstrainedError') {
						this.error = "ERROR: 安装摄像头不合适"
					} else if (error.name === 'StreamApiNotSupportedError') {
						this.error = "ERROR: 此浏览器不支持流API"
					}
				}
			}
		},
		components: {
			QrcodeStream
		}
	}
</script>
4.manifest.json配置H5
    "h5" : {
        "devServer" : {
            "https" : true,  //加这个本地可以用,线上需要在https服务器部署
          }
    },
app扫码
1.直接创建扫码页面(用于其他页面往此页面跳转)文章来源:https://www.toymoban.com/news/detail-539403.html
<template>
	<view>
		<!-- 扫码页面 -->
		<!-- #ifndef APP-PLUS -->
		<view class="wrap">
			<view class="u-tips-color">
				请在app中打开
			</view>
		</view>
		<!-- #endif -->
	</view>
</template>

<script>
	export default {
		data() {
			return {
				barcode: null,
				flash: false,
				tip: '将二维码放入框中,即可自动扫描',
			}
		},
		onShow() {
			// 页面展示时,重新启动扫描检测
			if (this.barcode) {
				this.barcode.start()
			}
		},
		onLoad(params) {
			const {
				tip
			} = params
			if (tip) {
				this.tip = tip
			}
			// #ifdef APP-PLUS
			plus.navigator.setFullscreen(true); //全屏
			let currentWebview = this.$scope.$getAppWebview();
			this.createBarcode(currentWebview)
			this.createTipInfoView(currentWebview)
			this.createFlashBarView(currentWebview)
			// #endif
		},
		mounted() {

		},
		methods: {
			/**
			 * 创建二维码
			 * @param {Object} currentWebview
			 */
			createBarcode(currentWebview) {
				if (!this.barcode) {
					this.barcode = plus.barcode.create('barcode', [plus.barcode.QR], {
						top: `0px`,
						left: '0px',
						height: `100%`,
						width: '100%',
						position: 'absolute',
						background: '#FFCC00',
						frameColor: '#FFCC33',
						scanbarColor: '#FFCC33',
					});
					this.barcode.onmarked = this.onmarked;
					this.barcode.setFlash(this.flash);
					//此处未演示扫码成功回调的地址设置,实际请参考HTML5Plus API自行处理
					//注意扫码区域需为正方形,否则影响扫码识别率
					currentWebview.append(this.barcode);
				}
				this.barcode.start()
			},

			/**
			 * 创建提示信息
			 * @param {Object} currentWebview
			 */
			createTipInfoView(currentWebview) {
				const content = new plus.nativeObj.View('content', {
						top: '0px',
						left: '0px',
						height: '100%',
						width: '100%'
					},
					[{
						tag: 'font',
						id: 'scanTips',
						text: this.tip,
						textStyles: {
							size: '14px',
							color: '#ffffff',
							whiteSpace: 'normal'
						},
						position: {
							top: '90px',
							left: '10%',
							width: '80%',
							height: 'wrap_content'
						}
					}]);
				currentWebview.append(content);

			},
			// 创建 开关灯按钮
			createFlashBarView(currentWebview) {

				const openImg = this.crtFlashImg('static/yellow-scanBar.png')
				const closeImg = this.crtFlashImg('static/scanBar.png')
				const scanBarVew = new plus.nativeObj.View('scanBarVew', {
						top: '65%',
						left: '40%',
						height: '10%',
						width: '20%',
					},
					closeImg);
				scanBarVew.interceptTouchEvent(true);

				currentWebview.append(scanBarVew);

				scanBarVew.addEventListener("click", (e) => { //点亮手电筒
					this.flash = !this.flash;
					if (this.flash) {
						scanBarVew.draw(openImg);
					} else {
						scanBarVew.draw(closeImg)
					}
					if (this.barcode) {
						this.barcode.setFlash(this.flash);
					}
				}, false)
			},
			crtFlashImg(imgsrc) {
				return [{
					tag: 'img',
					id: 'scanBar',
					src: imgsrc,
					position: {
						width: '28%',
						left: '36%',
						height: '30%'
					}
				}, {
					tag: 'font',
					id: 'font',
					text: '轻触照亮',
					textStyles: {
						size: '10px',
						color: '#ffffff'
					},
					position: {
						width: '80%',
						left: '10%'
					}
				}]
			},
			// 扫码成功回调
			onmarked(type, result) {
				console.log('条码类型:' + type);
				console.log('条码内容:' + result);
				uni.redirectTo({
					url: `../msg/msg?code=${result}`
				})
				// 业务代码
				// 核对扫描结果
				// 判断是否是正确的格式
				// 不正确则跳转到 错误页面

			}

		}
	}
</script>

<style scoped>
	.wrap {
		height: calc(100vh);
		/* #ifdef H5 */
		height: calc(100vh - var(--window-top));
		/* #endif */
		display: flex;
		flex-direction: column;
		justify-content: center;
		align-items: center;
	}
</style>
wx小程序文章来源地址https://www.toymoban.com/news/detail-539403.html
			// 扫码
			scanCode() {
				// #ifdef MP-WEIXIN
				// 允许从相机和相册扫码
				uni.scanCode({
					scanType: ["qrCode"],
					success: (res) => {
						if (res.result) {
							const val = res.result;
							console.log(val)
							uni.navigateTo({
								url: `../msg/msg?code=${val}`
							})

						} else {
							console.log('请重新扫描');
							return false;
						}
					},
					fail: (res) => {
						console.log('未识别到二维码');
					}
				})
				// #endif

			},
到了这里,关于uniapp实现扫码功能H5+APP+wx小程序的文章就介绍完了。如果您还想了解更多内容,请在右上角搜索TOY模板网以前的文章或继续浏览下面的相关文章,希望大家以后多多支持TOY模板网!


