一、说明
通过python的selenium模块,自动化执行一些网页上的重复的无聊的工作。文章来源:https://www.toymoban.com/news/detail-545482.html
二、代码
#! /usr/bin/python3.6
from time import sleep
import csv
import os
import tarfile
import shutil
from selenium import webdriver
from selenium.webdriver.support.ui import Select
from selenium.webdriver.support.wait import WebDriverWait

usr_name = "****"
usr_pwd = "****"
login_url = '****'
checkid = '*****'
# 左上角coverity cid,用于查询页面是否加载成功
cover_cid_xpath = '//*[@id="table-details-grid"]/div[1]/div[5]/div/div/div[1]/div'
# 分类历史记录xpath,用于查询应用是否成功
change_history_xpath = '//*[@id="source-browser-defect-history"]/div/div/div[2]'

# 选择项目的xpath,搜索cid时的异常处理
exec_xpath = '//*[@id="defect-summaries"]/div[5]'
# chromedriver路径
chrome_path = ""  # /media/vdb1/tools/pytoolpath/chromedriver

# 分析人和评审人
owner_name = ""
work_num = ''
warn_path = '/media/vdb1/workspace/告警'
download_path = '/media/vdb1/download/google'
owner_leader_name = ""
# 存储Excel属性的几个list
err_index_list = []  # cid
err_url_list = []
err_intro_list = []


def move_untar_file():
    files = os.listdir(download_path)
    for file in files:
        if 'result' in file and '.gz' in file:
            src = os.path.join(download_path, file)
            dst = os.path.join(warn_path, file)
            print('src:', src)
            print('dst:', dst)
            shutil.move(src, dst)
            t = tarfile.open(dst)
            t.extractall(path=warn_path)
        elif '2022' in file and '.gz' in file:
            src = os.path.join(download_path, file)
            dst = os.path.join(warn_path, file)
            print('src:', src)
            print('dst:', dst)
            shutil.move(src, dst)
            t = tarfile.open(dst)
            t.extractall(path=warn_path)


# 从表格中导入数据
def import_excel(filepath):
    with open(filepath, newline='') as csvfile:
        reader = csv.reader(csvfile)
        for line in reader:
            err_index_list.append(line[0])
            err_url_list.append(line[1])
            err_intro_list.append(line[2])
    print('open file success!!!')


# 根据工号自动定位告警文件并导入
def find_and_import_excel():
    global work_num
    dirs_hit = []
    files = os.listdir(warn_path)
    for file in files:
        if '2022' in file and '.gz' not in file:
            dirs_hit.append(warn_path + '/' + file)
    for dir in dirs_hit:
        files = os.listdir(dir)
        for file in files:
            owner_path = dir + '/' + file
            if '***_Low' in file and os.path.getsize(owner_path) != 0:
                import_excel(owner_path)


def auto_init():
    global chrome_path, owner_name, owner_leader_name, work_num
    chrome_path = '/media/vdb1/tools/pytoolpath/chromedriver'
    work_num = '****'
    owner_name = '****'
    owner_leader_name = '***'
    move_untar_file()
    find_and_import_excel()


def manual_init():
    global chrome_path, owner_name, owner_leader_name, work_num
    file_path = input('请输入excel文件路径:')
    if len(file_path) == 0:
        work_num = input('请输入工号:')
        if len(work_num) == 0:
            work_num = '****'
        find_and_import_excel()
    else:
        print('excel filepath: ' + file_path)
        import_excel(file_path)

    chrome_path = input('请输入chromedriver文件路径:')
    if len(chrome_path) == 0:
        chrome_path = '/media/vdb1/tools/pytoolpath/chromedriver'
    print('chrome filepath: ' + chrome_path)

    owner_name = input('请输入分析人姓名:')
    if len(owner_name) == 0:
        owner_name = '****'
    print('分析人: ' + owner_name)

    owner_leader_name = input('请输入评审人姓名:')
    if len(owner_leader_name) == 0:
        owner_leader_name = '****'
    print('评审人: ' + owner_leader_name)


# 环境初始化
def init_env():
    global chrome_path, owner_name, owner_leader_name, work_num
    init_mode = input('选择模式:0、手动输入路径  1、自动处理 \n')
    if len(init_mode) == 0 or init_mode != '0':
        auto_init()
    else:
        manual_init()


# 页面登录
def chrome_login():
    chrome_options = webdriver.ChromeOptions()
    driver = webdriver.Chrome(executable_path=chrome_path, chrome_options=chrome_options)
    driver.get(login_url)  # 打开页面
    driver.find_element_by_name('username').send_keys(usr_name)
    driver.find_element_by_name('password').send_keys(usr_pwd)
    driver.find_element_by_id('login-button').click()  # 输入用户名和密码,登录

    # 判断是否登录成功
    WebDriverWait(driver, 20).until(lambda x: x.find_element_by_xpath(cover_cid_xpath).is_displayed())
    while 1:
        index_value = driver.find_elements_by_xpath(cover_cid_xpath)
        if len(index_value) > 0:
            if index_value[0].text == checkid:
                print('login success!!!')
                break
        sleep(1)

    # 打开分类历史记录
    left_cid_xpath = '//*[@id="table-details-grid"]/div[1]/div[5]/div/div'
    driver.find_element_by_xpath(left_cid_xpath).click()
    history_button = '//*[@id="source-browser-defect-history"]/h3/span'
    WebDriverWait(driver, 20).until(lambda x: x.find_element_by_xpath(history_button).is_displayed())
    driver.find_element_by_xpath(history_button).click()
    return driver


def select_project(driver):
    print('项目选择异常处理')
    WebDriverWait(driver, 2).until(lambda x: x.find_element_by_xpath(exec_xpath).is_displayed())
    search_res_lists = driver.find_elements_by_class_name('project-name')
    for search_res in search_res_lists:
        if 'ZXUBP' in search_res.text:
            print(search_res.text)
            search_res.click()
            break
    return driver


# 输入cid并查询
def err_id_search(driver, err_id):
    val_list = []
    time_count = 0
    driver.find_element_by_id('search').send_keys(err_id)
    driver.find_element_by_id('search-button').click()

    # 判断是否加载新的cid成功
    WebDriverWait(driver, 20).until(lambda x: x.find_element_by_xpath(cover_cid_xpath).is_displayed())

    while 1:
        index_value = driver.find_elements_by_xpath(cover_cid_xpath)
        if len(index_value) > 0:
            for val in index_value:
                val_list.append(val.text)
            if str(err_id) in val_list:
                print(str(err_id) + ' load success!!!')
                break
        sleep(1)
        time_count += 1

        # 超时未打开,可能是需要选择项目组
        if time_count > 5:
            try:
                # 判断是否需要选择项目组
                index_value = driver.find_elements_by_class_name('project-name')
                driver = select_project(driver)
                break
            except:
                index_value = driver.find_elements_by_xpath(cover_cid_xpath)
            time_count = 0
    return driver


# 告警处理
def err_handle(driver, err_id, err_intro):
    delay_count = 0
    selected_str = ''
    while 1:
        sleep(1)
        WebDriverWait(driver, 20).until(lambda x: x.find_element_by_name('classification').is_displayed())

        # index_value = driver.find_elements_by_xpath('//*[@id="source-browser-defect-history"]/div/div/div[2]/h4/span')
        # if len(index_value) > 0:
        #     print(index_value[0].text)

        try:
            selectTag = Select(driver.find_element_by_name('classification'))  # 分类下拉框
            selected_str = selectTag.first_selected_option.text
        except:
            print('get selected_str failed')

        if selected_str == '未分类' or delay_count >= 10:
            break
        delay_count += 1

    selectTag = Select(driver.find_element_by_name('classification'))
    # selectTag.select_by_value('22')  # 选择误报
    selectTag.select_by_visible_text('误报')

    selectTag = Select(driver.find_element_by_name('severity'))
    selectTag.select_by_visible_text('未指定')  # 严重性选择未指定

    selectTag = Select(driver.find_element_by_name('action'))  # 操作下拉框
    selectTag.select_by_visible_text('忽略')  # 选择忽略

    # 填写处理意见
    err_comment = '【概述】: ' + err_intro
    err_comment = err_comment + '\n【技术分析】:无影响'
    err_comment = err_comment + '\n【技术影响】:无影响'
    err_comment = err_comment + '\n【分析人】:' + owner_name
    err_comment = err_comment + '\n【评审意见】:分析合理'
    err_comment = err_comment + '\n【评审人】:' + owner_leader_name
    driver.find_element_by_id("comment").clear()
    driver.find_element_by_id("comment").send_keys(err_comment)

    # 点击应用
    driver.find_element_by_id('source-browser-defect-triage-apply').click()
    # 查询应用是否成功
    WebDriverWait(driver, 20).until(lambda x: x.find_element_by_xpath(change_history_xpath).is_displayed())
    while 1:
        index_value = driver.find_elements_by_xpath(change_history_xpath)
        if len(index_value) > 0:
            if err_intro in index_value[0].text:
                print(str(err_id) + ' handle success!!!')
                break
        sleep(1)
    return driver


if __name__ == '__main__':
    init_env()
    start_index = 0
    if len(err_index_list) > 0:
        driver = chrome_login()
        for i in range(start_index, len(err_index_list)):
            driver = err_id_search(driver, err_index_list[i])
            driver = err_handle(driver, err_index_list[i], err_intro_list[i])
            print(str(i + 1) + '/' + str(len(err_index_list)) + ':' + err_index_list[i] + ' handle end')
        print('handle end!!')
    else:
        print('handle end!!')
三、用法总结
driver.find_element_by_name
driver.find_element_by_id
driver.find_element_by_xpath
WebDriverWait(driver, 20).until(lambda x: x.find_element_by_xpath(change_history_xpath).is_displayed())
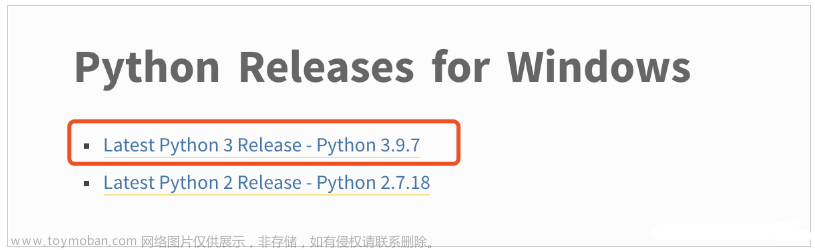
chromdriver下载地址文章来源地址https://www.toymoban.com/news/detail-545482.html
到了这里,关于python脚本——selenium自动化执行一些网页上的操作的文章就介绍完了。如果您还想了解更多内容,请在右上角搜索TOY模板网以前的文章或继续浏览下面的相关文章,希望大家以后多多支持TOY模板网!