1.首先进入阿里云服务器,搜索ssl证书,免费申请,dns会自动解析该证书,所以不用设置

2.下载tomcat和nginx服务器类型的证书

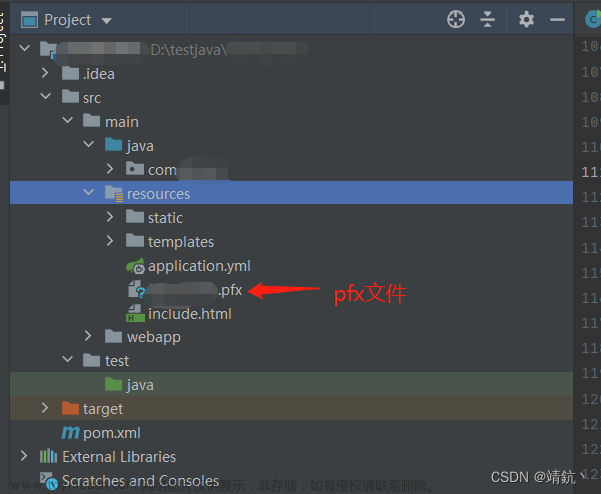
3.将tomcat服务器类型的文件解压,打开,获得pfx文件,放入项目的resources文件中


4.打开yml配置文件,进行SSL配置,并将http重定向到https
custom:
  http:
    port: 8002 # 自定义http启动端口

server: # https端口
  port: 8443
  ssl:
    key-store: classpath:8002091_suqiqaq.cn.pfx # pfk存放路径
    key-store-type: PKCS12  # tomcat服务器类型默认
    key-store-password: 1TFM7IpB # txt密码粘贴即可
这里注意,server.port必须是https的端口,不然会出现https和http占用同一个端口
5.添加配置类,让http重定向到https
package com.guigusuqi.commonutils.config;

import org.apache.catalina.Context;
import org.apache.catalina.connector.Connector;
import org.apache.tomcat.util.descriptor.web.SecurityCollection;
import org.apache.tomcat.util.descriptor.web.SecurityConstraint;
import org.springframework.beans.factory.annotation.Value;
import org.springframework.boot.web.embedded.tomcat.TomcatServletWebServerFactory;
import org.springframework.context.annotation.Bean;
import org.springframework.context.annotation.Configuration;

/**
 * https配置,将http请求全部转发到https
 */
@Configuration
public class HttpsConfig
{

    @Value("${custom.http.port}")
    private Integer httpPort;

    @Value("${server.port}")
    private Integer httpsPort;

    @Bean
    public TomcatServletWebServerFactory servletContainer() {
        // 将http请求转换为https请求
        TomcatServletWebServerFactory tomcat = new TomcatServletWebServerFactory() {
            @Override
            protected void postProcessContext(Context context) {
                SecurityConstraint constraint = new SecurityConstraint();
                // 默认为NONE
                constraint.setUserConstraint("CONFIDENTIAL");
                SecurityCollection collection = new SecurityCollection();
                // 所有的东西都https
                collection.addPattern("/*");
                constraint.addCollection(collection);
                context.addConstraint(constraint);
            }
        };
        tomcat.addAdditionalTomcatConnectors(httpConnector());
        return tomcat;
    }

    /**
     * 强制将所有的http请求转发到https
     * @return httpConnector
     */
    @Bean
    public Connector httpConnector() {
        Connector connector = new Connector("org.apache.coyote.http11.Http11NioProtocol");
        connector.setScheme("http");
        // connector监听的http端口号
        connector.setPort(httpPort);
        connector.setSecure(false);
        // 监听到http的端口号后转向到的https的端口号
        connector.setRedirectPort(httpsPort);
        return connector;
    }
}
如果我们不想强制所有的请求都重定向到https或者某些功能接口需要http的支持等等,我们也可以同时开启http协议和https协议。
package cn.zlc.servicehttps.config;

import org.apache.catalina.Context;
import org.apache.catalina.connector.Connector;
import org.apache.tomcat.util.descriptor.web.SecurityCollection;
import org.apache.tomcat.util.descriptor.web.SecurityConstraint;
import org.springframework.beans.factory.annotation.Value;
import org.springframework.boot.web.embedded.tomcat.TomcatServletWebServerFactory;
import org.springframework.context.annotation.Bean;
import org.springframework.context.annotation.Configuration;

@Configuration
public class HttpsConfig {

    @Value("${server.port}")
    private Integer httpPort;

    @Bean
    public TomcatServletWebServerFactory servletContainer() {
        TomcatServletWebServerFactory tomcat = new TomcatServletWebServerFactory();
        tomcat.addAdditionalTomcatConnectors(httpConnector());
        return tomcat;
    }

    @Bean
    public Connector httpConnector() {
        Connector connector = new Connector("org.apache.coyote.http11.Http11NioProtocol");
        connector.setPort(httpPort);
        return connector;
    }

}
如果我们通过http端口请求的话,不会自动重定向到https端口,而且也不会提示需要TLS端口请求。而使用https请求的时候就会提示不安全,如果是放到服务器上访问https就正常了;
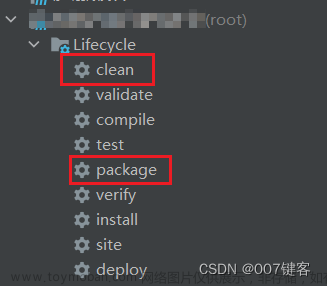
6.将SpringBoot项目打为Jar包放置到Linux服务器下

如果是宝塔 记得把--server.port=8002删掉,这里yaml配置的是8443端口,不然会覆盖掉yaml的配置,导致https和http又公用了一个端口
访问后端接口文档成功

7. 开始配置前端的https,首先安全组放行443端口,这个端口类似于http的80端口


8.配置 nginx ,使用域名进行访问
将前端的http协议,重定向到https协议,https协议默认是443端口,所以还需要在443端口进行配置,这里需要配置ssl证书路径
server
{
    listen 80;
    server_name suqiqaq.cn;
    index index.php index.html index.htm default.php default.htm default.html;
    # ssl证书路径
    ssl_certificate     /home/cert/8002091_suqiqaq.cn.pem;
    ssl_certificate_key /home/cert/8002091_suqiqaq.cn.key;
    root /home/hospital/app-api/dist;

    # $request_uri #包含请求参数的原始URI,不包含主机名
    # 如:”/foo/bar/arg”
    # $server_name #服务器名称
    # 将请求转成https,https协议默认是443端口,所以还需要在443端口进行配置
    return 301 https://$server_name$request_uri;
}
在nginx主配置文件中监听443端口,并将请求反向代理到https协议的8443端口
注意,这里需要把前端项目路径加上,不然宝塔一直提示没有该站点
server
{
  listen 443 ssl;
  root /home/hospital/app-api/dist;
  index index.php index.html index.htm default.php default.htm default.html;
  server_name suqiqaq.cn;
  ssl_certificate     /home/cert/8002091_suqiqaq.cn.pem;
  ssl_certificate_key /home/cert/8002091_suqiqaq.cn.key;
 location ^~ /hospitalApi/
  {
      proxy_pass   https://127.0.0.1:8443/;
      # 这里是重点,如果上面的proxy_pass写成https的话这段是必须要配置的,不然只能访问页面,而页面调用端口不行
    proxy_ssl_certificate     /home/cert/8002091_suqiqaq.cn.pem;
    proxy_ssl_certificate_key /home/cert/8002091_suqiqaq.cn.key;
    proxy_ssl_protocols       TLSv1 TLSV1.1 TLSv1.2;
    proxy_ssl_ciphers ECDHE-RSA-AES128-GCM-SHA256:HIGH:!aNULL:!MD5:!RC4:!DHE;
    proxy_ssl_session_reuse  on;
    proxy_redirect off;
    proxy_set_header Host $proxy_host;
    proxy_set_header X-Real-IP $remote_addr;
    proxy_set_header X-Forwarded-For $proxy_add_x_forwarded_for;
    proxy_set_header X-Nginx-Proxt true;
    proxy_set_header HTTP_X_FORWORDED_FOR $remote_addr;
   }
}
9.将前端的baseURL改为/hospitalApi,并把前端vue.config.js改为https协议,打包上线
vue.config.js:文章来源:https://www.toymoban.com/news/detail-551101.html
'use strict'
const path = require('path')
const defaultSettings = require('./src/settings.js')

function resolve(dir) {
  return path.join(__dirname, dir)
}

const name = defaultSettings.title; // page title

// If your port is set to 80,
// use administrator privileges to execute the command line.
// For example, Mac: sudo npm run
// You can change the port by the following methods:
// port = 9528 npm run dev OR npm run dev --port = 9528
const port = 8080 // dev port

// All configuration item explanations can be find in https://cli.vuejs.org/config/
module.exports = {
  /**
   * You will need to set publicPath if you plan to deploy your site under a sub path,
   * for example GitHub Pages. If you plan to deploy your site to https://foo.github.io/bar/,
   * then publicPath should be set to "/bar/".
   * In most cases please use '/' !!!
   * Detail: https://cli.vuejs.org/config/#publicpath
   */
  publicPath: '/',
  outputDir: 'dist',
  assetsDir: 'static',
  lintOnSave: process.env.NODE_ENV === 'development',
  productionSourceMap: false,
  devServer: {
    port: port,
    open: true,
    overlay: {
      warnings: false,
      errors: true
    },
    https: true // 开启https协议
    // before: require('./mock/mock-server.js')
  },
  configureWebpack: {
    // provide the app's title in webpack's name field, so that
    // it can be accessed in index.html to inject the correct title.
    name: name,
    resolve: {
      alias: {
        '@': resolve('src')
      }
    }
  },
  chainWebpack(config) {
    // it can improve the speed of the first screen, it is recommended to turn on preload
    config.plugin('preload').tap(() => [
      {
        rel: 'preload',
        // to ignore runtime.js
        // https://github.com/vuejs/vue-cli/blob/dev/packages/@vue/cli-service/lib/config/app.js#L171
        fileBlacklist: [/\.map$/, /hot-update\.js$/, /runtime\..*\.js$/],
        include: 'initial'
      }
    ])

    // when there are many pages, it will cause too many meaningless requests
    config.plugins.delete('prefetch')

    // set svg-sprite-loader
    config.module
      .rule('svg')
      .exclude.add(resolve('src/icons'))
      .end()
    config.module
      .rule('icons')
      .test(/\.svg$/)
      .include.add(resolve('src/icons'))
      .end()
      .use('svg-sprite-loader')
      .loader('svg-sprite-loader')
      .options({
        symbolId: 'icon-[name]'
      })
      .end()

    config
      .when(process.env.NODE_ENV !== 'development',
        config => {
          config
            .plugin('ScriptExtHtmlWebpackPlugin')
            .after('html')
            .use('script-ext-html-webpack-plugin', [{
            // `runtime` must same as runtimeChunk name. default is `runtime`
              inline: /runtime\..*\.js$/
            }])
            .end()
          config
            .optimization.splitChunks({
              chunks: 'all',
              cacheGroups: {
                libs: {
                  name: 'chunk-libs',
                  test: /[\\/]node_modules[\\/]/,
                  priority: 10,
                  chunks: 'initial' // only package third parties that are initially dependent
                },
                elementUI: {
                  name: 'chunk-elementUI', // split elementUI into a single package
                  priority: 20, // the weight needs to be larger than libs and app or it will be packaged into libs or app
                  test: /[\\/]node_modules[\\/]_?element-ui(.*)/ // in order to adapt to cnpm
                },
                commons: {
                  name: 'chunk-commons',
                  test: resolve('src/components'), // can customize your rules
                  minChunks: 3, //  minimum common number
                  priority: 5,
                  reuseExistingChunk: true
                }
              }
            })
          // https:// webpack.js.org/configuration/optimization/#optimizationruntimechunk
          config.optimization.runtimeChunk('single')
        }
      )
  }
}
request.js:文章来源地址https://www.toymoban.com/news/detail-551101.html
import axios from 'axios'
import { Message, MessageBox } from 'element-ui'
import store from '../store'
import { getToken } from '@/utils/auth'
import {config} from "@vue/test-utils";

// 创建axios实例
const service = axios.create({
  // baseURL:process.env.VUE_APP_BASE_API,
  baseURL: "/hospitalApi", // api 的 base_url
  // baseURL: "http://suqiqaq.cn:8002", // api 的 base_url
  timeout: 10000000 // 请求超时时间
})
// http://suqiqaq.cn:8002/doc.html#/%E8%8B%8F%E4%B8%83/%E7%99%BB%E5%BD%95%E7%AE%A1%E7%90%86/loginUsingPOST
// request拦截器
service.interceptors.request.use(
  config => {
    config.headers['Content-Type'] = "application/json;charset=utf-8";
    if (store.getters.token) {
      config.headers['Authorization'] = getToken() // 让每个请求携带token
    }
    return config
  },
  error => {
    // Do something with request error
    console.log(error); // for debug
    Promise.reject(error)
  }
)

// response 拦截器
service.interceptors.response.use(
  response => {
    /**
     * code为非200是抛错 可结合自己业务进行修改
     */
    const res = response.data;
    if (res.code !== 200)
    {
      Message({
        message: res.message,
        type: 'response error',
        duration: 5 * 1000
      });
      // 408:非法的token; 400:其他客户端登录了;  401:Token 过期了;
      if (res.code === 408 || res.code === 400 || res.code === 401)
      {
        if (getToken())
        {
          MessageBox.confirm(
            '你已被登出,可以取消继续留在该页面,或者重新登录',
            '确定登出',
            {
              confirmButtonText: '重新登录',
              cancelButtonText: '取消',
              type: 'warning',
              duration: 5 * 1000
            }
          ).then(() => {
            store.dispatch('FedLogOut').then(() => {
              location.reload() // 为了重新实例化vue-router对象 避免bug
            })
          })
        }
      }
      return Promise.reject('error')
    } else
    {
      return response.data
    }
  },
  error => {
    console.log('err' + error) // for debug
    Message({
      message: error.message,
      type: 'error',
      duration: 5 * 1000
    })
    return Promise.reject(error)
  }
)

export default service
10.把前端项目上传到服务器之后即可,搞定!
到了这里,关于SpringBoot+vue2前后端项目配置ssl证书的文章就介绍完了。如果您还想了解更多内容,请在右上角搜索TOY模板网以前的文章或继续浏览下面的相关文章,希望大家以后多多支持TOY模板网!


