简介
准备写个系列博客介绍机器学习实战中的部分公开项目。首先从初级项目开始。
本文为初级项目第二篇:利用MNIST数据集训练手写数字分类。
项目原网址为:Deep Learning Project – Handwritten Digit Recognition using Python。
第一篇为:机器学习实战 | emojify 使用Python创建自己的表情符号(深度学习初级)
技术流程
项目构想:
MNIST数字分类项目,使机器能够识别手写数字。该Python项目对于计算机视觉可能非常有用。在这里,我们将使用MNIST数据集使用卷积神经网络训练模型。
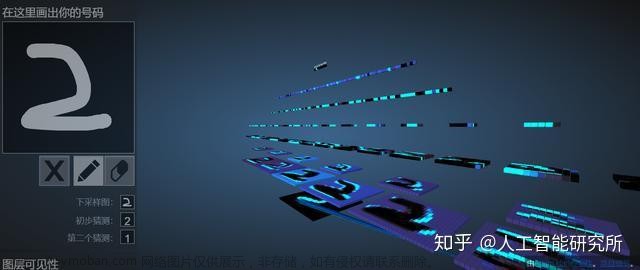
经过训练后,在GUI页面(gui.py程序)显示效果如下:左边是手写数字,通过鼠标手写键入;右边点击recognise会提示训练结果以及识别置信度。
1. 载入依赖包和数据集
import keras
from keras.datasets import mnist
from keras.models import Sequential
from keras.layers import Dense, Dropout, Flatten
from keras.layers import Conv2D, MaxPooling2D
from keras import backend as K

import os
os.environ["KMP_DUPLICATE_LIB_OK"]="TRUE"

# the data, split between train and test sets
(x_train, y_train), (x_test, y_test) = mnist.load_data()

print(x_train.shape, y_train.shape)
除了常规包外,同样需要提前配置Keras和TensorFlow,安装命令为:
pip install keras==2.10.0
pip install TensorFlow==2.10.0
这里需要注意MNIST手写数据集导入方法,直接从Keras中加载:keras.datasets.mnist
通过mnist.load获取训练数据和测试数据,训练数据集维度为:
60000
×
28
×
28
60000 \times 28\times28
60000×28×28,测试数据集维度为:
10000
×
28
×
28
10000 \times 28\times28
10000×28×28.
2. 数据预处理
x_train = x_train.reshape(x_train.shape[0], 28, 28, 1)
x_test = x_test.reshape(x_test.shape[0], 28, 28, 1)
input_shape = (28, 28, 1)

# convert class vectors to binary class matrices
num_classes = 10
y_train = keras.utils.to_categorical(y_train, num_classes)
y_test = keras.utils.to_categorical(y_test, num_classes)

x_train = x_train.astype('float32')
x_test = x_test.astype('float32')
x_train /= 255
x_test /= 255
print('x_train shape:', x_train.shape)
print(x_train.shape[0], 'train samples')
print(x_test.shape[0], 'test samples')
- x_train.reshape:将图像数据转换为神经网络输入,图像大小 60000 × 28 × 28 60000 \times 28\times28 60000×28×28,输出大小为 60000 × 28 × 28 × 1 60000 \times 28\times28\times1 60000×28×28×1。
- keras.utils.to_categorical:将阿拉伯数字的0-9共10个数字(类别)转换为
one-shot特征,用二进制表示分类类别,比如数字0用0000表示,数字1用0001表示,数字2用0010表示。 - x_train /= 255:将图像数据归一化,首先将数据类型转换为float32,接着将数据归一化到
0~1范围内。
3. 创建卷积神经网络模型
batch_size = 128
num_classes = 10
epochs = 50

model = Sequential()
model.add(Conv2D(32, kernel_size=(3, 3),activation='relu',input_shape=input_shape))
model.add(Conv2D(64, (3, 3), activation='relu'))
model.add(MaxPooling2D(pool_size=(2, 2)))
model.add(Dropout(0.25))
model.add(Flatten())
model.add(Dense(256, activation='relu'))
model.add(Dropout(0.5))
model.add(Dense(num_classes, activation='softmax'))

model.compile(loss=keras.losses.categorical_crossentropy,optimizer=keras.optimizers.Adadelta(),metrics=['accuracy'])
该项目设计了卷积神经网络(CNN)模型,包括两层卷积层、池化层、全连接层等。
函数分析:
- Sequential:序贯模型,与函数式模型对立。from keras.models import Sequential, 序贯模型通过一层层神经网络连接构建深度神经网络。
- add(): 叠加网络层,参数可为conv2D卷积神经网络层,MaxPooling2D二维最大池化层,Dropout随机失活层(防止过拟合),Dense密集层(全连接FC层,在Keras层中FC层被写作Dense层),下面会详细介绍这几个层的含义和参数设置。
- compile(): 编译神经网络结构,参数包括:loss,字符串结构,指定损失函数(包括MSE等);optimizer,表示优化方式(优化器),用于控制梯度裁剪;metrics,列表,用来衡量模型指标,表示评价指标。
网络结构介绍:
- conv2D: 卷积神经网络层,参数包括:
- filters: 层深度(纵向),一般来说前期数据减少,后期数量逐渐增加,建议选择 2 N 2^N 2N作为深度,比如说:[32,64,128] => [256,512,1024];
- kernel_size: 决定了2D卷积窗口的宽度和高度,一般设置为 ( 1 × 1 ) (1\times1) (1×1), ( 3 × 3 ) (3\times3) (3×3), ( 5 × 5 ) (5\times5) (5×5), ( 7 × 7 ) (7\times7) (7×7).
- activation:激活函数,可选择为:sigmoid,tanh,relu等
- MaxPooling2D: 池化层,本质上是采样,对输入的数据进行压缩,一般用在卷积层后,加快神经网络的训练速度。没有需要学习的参数,数据降维,用来防止过拟合现象。
- Dropout:防过拟合层,在训练时,忽略一定数量的特征检测器,用来增加稀疏性,用伯努利分布(0-1分布)B(1,p)来随机忽略特征数量,输入参数为p的大小
- Flatten:将多维输入数据一维化,用在卷积层到全连接层的过渡,减少参数的使用量,避免过拟合现象,无参。
- Dense:全连接层,将特征非线性变化映射到输出空间上。
4. 训练神经网络
hist = model.fit(x_train, y_train,batch_size=batch_size,epochs=epochs,verbose=1,validation_data=(x_test, y_test))
print("The model has successfully trained")

model.save('mnist.h5')
print("Saving the model as mnist.h5")
- model.fit:在搭建完成后,将数据送入模型进行训练。参数包括:
- x:训练数据输入;
- y:训练数据输出;
- batch_size: batch样本数量,即训练一次网络所用的样本数;
- epochs:迭代次数,即全部样本数据将被“轮”多少次,轮完训练停止;
- verbose:可选训练过程中信息是否输出参数,0表示不输出信息,1表示显示进度条(一般默认为1),2表示每个epoch输出一行记录;
- valdation_data:验证数据集。
- model.save:保存训练模型权重
训练成功后,会在源目录下保存mnist.h5文件,即为权重文件。
5. 评价网络
score = model.evaluate(x_test, y_test, verbose=0)
print('Test loss:', score[0])
print('Test accuracy:', score[1])
- model.evaluate:评价网络,返回值是一个浮点数,表示损失值和评估指标值,输入参数为测试数据,verbose表示测试过程中信息是否输出参数,同样verbose=0表示不输出测试信息。
完整程序
train.py : 完整训练代码。
gui.py: GUI窗口,输出可互动的界面。
train.py 程序
"""
Handwrittern digit recognition
"""

"""
1. Import the libraries and load the dataset
"""
import keras
from keras.datasets import mnist
from keras.models import Sequential
from keras.layers import Dense, Dropout, Flatten
from keras.layers import Conv2D, MaxPooling2D
from keras import backend as K

import os
os.environ["KMP_DUPLICATE_LIB_OK"]="TRUE"

# the data, split between train and test sets
(x_train, y_train), (x_test, y_test) = mnist.load_data()

print(x_train.shape, y_train.shape)

"""
2. Preprocess the data
"""
x_train = x_train.reshape(x_train.shape[0], 28, 28, 1)
x_test = x_test.reshape(x_test.shape[0], 28, 28, 1)
input_shape = (28, 28, 1)

# convert class vectors to binary class matrices
num_classes = 10
y_train = keras.utils.to_categorical(y_train, num_classes)
y_test = keras.utils.to_categorical(y_test, num_classes)

x_train = x_train.astype('float32')
x_test = x_test.astype('float32')
x_train /= 255
x_test /= 255
print('x_train shape:', x_train.shape)
print(x_train.shape[0], 'train samples')
print(x_test.shape[0], 'test samples')

"""
3. Create the model
"""
batch_size = 128
num_classes = 10
epochs = 50

model = Sequential()
model.add(Conv2D(32, kernel_size=(3, 3),activation='relu',input_shape=input_shape))
model.add(Conv2D(64, (3, 3), activation='relu'))
model.add(MaxPooling2D(pool_size=(2, 2)))
model.add(Dropout(0.25))
model.add(Flatten())
model.add(Dense(256, activation='relu'))
model.add(Dropout(0.5))
model.add(Dense(num_classes, activation='softmax'))

model.compile(loss=keras.losses.categorical_crossentropy,optimizer=keras.optimizers.Adadelta(),metrics=['accuracy'])

"""
4. Train the model
"""
hist = model.fit(x_train, y_train,batch_size=batch_size,epochs=epochs,verbose=1,validation_data=(x_test, y_test))
print("The model has successfully trained")

model.save('mnist.h5')
print("Saving the model as mnist.h5")

"""
5. Evaluate the model
"""
score = model.evaluate(x_test, y_test, verbose=0)
print('Test loss:', score[0])
print('Test accuracy:', score[1])
训练结果会保存在源目录下,生成文件名为:mnist.h5。
gui.py程序
from keras.models import load_model
from tkinter import *
import tkinter as tk
import win32gui
from PIL import ImageGrab, Image
import numpy as np

model = load_model('mnist.h5')

def predict_digit(img):
    #resize image to 28x28 pixels
    img = img.resize((28, 28))
    #convert rgb to grayscale
    img = img.convert('L')
    img = np.array(img)
    #reshaping to support our model input and normalizing
    img = img.reshape(1, 28, 28, 1)
    img = img/255.0
    #predicting the class
    res = model.predict([img])[0]
    return np.argmax(res), max(res)

class App(tk.Tk):
    def __init__(self):
        tk.Tk.__init__(self)

        self.x = self.y = 0

        # Creating elements
        self.canvas = tk.Canvas(self, width=300, height=300, bg = "white", cursor="cross")
        self.label = tk.Label(self, text="Thinking..", font=("Helvetica", 48))
        self.classify_btn = tk.Button(self, text = "Recognise", command =self.classify_handwriting)
        self.button_clear = tk.Button(self, text = "Clear", command = self.clear_all)

        # Grid structure
        self.canvas.grid(row=0, column=0, pady=2, sticky=W, )
        self.label.grid(row=0, column=1,pady=2, padx=2)
        self.classify_btn.grid(row=1, column=1, pady=2, padx=2)
        self.button_clear.grid(row=1, column=0, pady=2)

        #self.canvas.bind("<Motion>", self.start_pos)
        self.canvas.bind("<B1-Motion>", self.draw_lines)

    def clear_all(self):
        self.canvas.delete("all")

    def classify_handwriting(self):
        HWND = self.canvas.winfo_id() # get the handle of the canvas
        rect = win32gui.GetWindowRect(HWND) # get the coordinate of the canvas
        im = ImageGrab.grab(rect)

        digit, acc = predict_digit(im)
        self.label.configure(text= str(digit)+', '+ str(int(acc*100))+'%')

    def draw_lines(self, event):
        self.x = event.x
        self.y = event.y
        r=8
        self.canvas.create_oval(self.x-r, self.y-r, self.x + r, self.y + r, fill='black')

app = App()
mainloop()
gui.py程序中用了tkinter包来呈现GUI页面,具体语句这里就不再分析解释了,需要学习的话可以参考以下链接:Python GUI编程(Tkinter)
gui.py运行后,输出页面为:

通过键盘在左侧手写字符,点击recognise输出识别结果。 文章来源:https://www.toymoban.com/news/detail-558426.html
如有问题,欢迎指出和讨论。文章来源地址https://www.toymoban.com/news/detail-558426.html
到了这里,关于机器学习实战 | MNIST手写数字分类项目(深度学习初级)的文章就介绍完了。如果您还想了解更多内容,请在右上角搜索TOY模板网以前的文章或继续浏览下面的相关文章,希望大家以后多多支持TOY模板网!