深度学习(27)——YOLO系列(6)
咱就是说,需要源码请造访:Jane的GitHub:在这里等你哦
嗨,好久不见,昨天结束了yolov7的debug过程,真的在尽力句句理解,我想这应该是我更新的yolo系列的最后一篇,但是仅限于yolo,detect的话题还不会结束,还会继续进行,detect结束以后再说segmentation。和往常以一样的过程,从data开始。
注:在此不会句句讲解,只对我觉得很核心的内容展开,所以你懂吧,我能写进来的都是核心的核心,敲黑板!还有我一边debug一边写的草稿。足足有三页,这我怎么可以不出一篇blog和大家分享我的喜悦呢?
1. 数据
在这篇文章中用到的数据是东北大学发表的表面缺陷数据集(NEU-DET),已上传到资源,有需要自取。这个数据集收集了热轧钢带的六种典型表面缺陷,即轧制氧化皮(RS),斑块(Pa),开裂(Cr),点蚀表面( PS),内含物(In)和划痕(Sc)。该数据库包括1,800个灰度图像:六种不同类型的典型表面缺陷,每一类缺陷包含300个样本。对于缺陷检测任务,数据集提供了注释,指示每个图像中缺陷的类别和位置。对于每个缺陷,黄色框是指示其位置的边框,绿色标签是类别分数。
在training的配置中加载data.yaml 就OK
train: ..\NEU-DET\train.txt
val:..\NEU-DET\val.txt

# number of classes
nc: 6

# class names
names: ['crazing', 'inclusion', 'patches', 'pitted_surface', 'rolled-in_scale', 'scratches']

数据读入很简单,作者巧妙地运用了cache思想,数据只在第一次读入时需要很久,之后使用生成的cache加载数据。这里想说的是在数据增强部分的一个关键的方法mosaic方法。
1.1 mosaic方法
-
核心思想: Mosaic数据增强 是一种在计算机视觉任务中常用的数据增强技术。
它通过将多个不同样本的图像拼接成一个大的合成图像,然后将该合成图像用作训练数据来增加模型的鲁棒性和泛化能力。 -
使用步骤:
- 随机选择四个不同的训练样本图像。【注:可以不是4个,比如9个,或者根据自己的想法拼接,但是一定要注意image和label要一起变化】
- 将这些选定的图像按照一定的比例拼接在一起,形成一个大的合成图像。
- 对合成图像进行随机裁剪,以获得训练样本。
- 对裁剪后的样本进行标签调整,以适应新的图像布局。
- 使用裁剪后的样本作为训练数据,输入到模型中进行训练。
-
使用该方法拟解决问题:引入更多的变化和复杂性,从而提高模型对于不同场景、不同尺度、不同物体相互间关系的识别和理解能力。通过将多个样本进行拼接,模型能够学习到更丰富的特征表示,并且在遇到类似的情况时更加稳定和可靠。
-
适用场景:常用于目标检测、语义分割和图像分类等任务中,可以帮助模型更好地应对复杂场景、小目标、遮挡和视角变化等情况。
# 四个拼接
def load_mosaic(self, index):
    # loads images in a 4-mosaic

    labels4, segments4 = [], []
    s = self.img_size
    yc, xc = [int(random.uniform(-x, 2 * s + x)) for x in self.mosaic_border]  # mosaic center x, y
    indices = [index] + random.choices(self.indices, k=3)  # 3 additional image indices
    for i, index in enumerate(indices):
        # Load image
        img, _, (h, w) = load_image(self, index)

        # place img in img4
        if i == 0:  # top left
            img4 = np.full((s * 2, s * 2, img.shape[2]), 114, dtype=np.uint8)  # base image with 4 tiles
            x1a, y1a, x2a, y2a = max(xc - w, 0), max(yc - h, 0), xc, yc  # xmin, ymin, xmax, ymax (large image)
            x1b, y1b, x2b, y2b = w - (x2a - x1a), h - (y2a - y1a), w, h  # xmin, ymin, xmax, ymax (small image)
        elif i == 1:  # top right
            x1a, y1a, x2a, y2a = xc, max(yc - h, 0), min(xc + w, s * 2), yc
            x1b, y1b, x2b, y2b = 0, h - (y2a - y1a), min(w, x2a - x1a), h
        elif i == 2:  # bottom left
            x1a, y1a, x2a, y2a = max(xc - w, 0), yc, xc, min(s * 2, yc + h)
            x1b, y1b, x2b, y2b = w - (x2a - x1a), 0, w, min(y2a - y1a, h)
        elif i == 3:  # bottom right
            x1a, y1a, x2a, y2a = xc, yc, min(xc + w, s * 2), min(s * 2, yc + h)
            x1b, y1b, x2b, y2b = 0, 0, min(w, x2a - x1a), min(y2a - y1a, h)

        img4[y1a:y2a, x1a:x2a] = img[y1b:y2b, x1b:x2b]  # img4[ymin:ymax, xmin:xmax]
        padw = x1a - x1b
        padh = y1a - y1b

        # Labels
        labels, segments = self.labels[index].copy(), self.segments[index].copy()
        if labels.size:
            labels[:, 1:] = xywhn2xyxy(labels[:, 1:], w, h, padw, padh)  # normalized xywh to pixel xyxy format
            segments = [xyn2xy(x, w, h, padw, padh) for x in segments]
        labels4.append(labels)
        segments4.extend(segments)

    # Concat/clip labels
    labels4 = np.concatenate(labels4, 0)
    for x in (labels4[:, 1:], *segments4):
        np.clip(x, 0, 2 * s, out=x)  # clip when using random_perspective()
    # img4, labels4 = replicate(img4, labels4)  # replicate

    # Augment
    #img4, labels4, segments4 = remove_background(img4, labels4, segments4)
    #sample_segments(img4, labels4, segments4, probability=self.hyp['copy_paste'])
    img4, labels4, segments4 = copy_paste(img4, labels4, segments4, probability=self.hyp['copy_paste'])
    img4, labels4 = random_perspective(img4, labels4, segments4,
                                       degrees=self.hyp['degrees'],
                                       translate=self.hyp['translate'],
                                       scale=self.hyp['scale'],
                                       shear=self.hyp['shear'],
                                       perspective=self.hyp['perspective'],
                                       border=self.mosaic_border)  # border to remove

    return img4, labels4
yolo-v7中使用的将9个拼接在一起
def load_mosaic9(self, index):
    # loads images in a 9-mosaic

    labels9, segments9 = [], []
    s = self.img_size
    indices = [index] + random.choices(self.indices, k=8)  # 8 additional image indices
    for i, index in enumerate(indices):
        # Load image
        img, _, (h, w) = load_image(self, index)

        # place img in img9
        if i == 0:  # center
            img9 = np.full((s * 3, s * 3, img.shape[2]), 114, dtype=np.uint8)  # base image with 4 tiles
            h0, w0 = h, w
            c = s, s, s + w, s + h  # xmin, ymin, xmax, ymax (base) coordinates
        elif i == 1:  # top
            c = s, s - h, s + w, s
        elif i == 2:  # top right
            c = s + wp, s - h, s + wp + w, s
        elif i == 3:  # right
            c = s + w0, s, s + w0 + w, s + h
        elif i == 4:  # bottom right
            c = s + w0, s + hp, s + w0 + w, s + hp + h
        elif i == 5:  # bottom
            c = s + w0 - w, s + h0, s + w0, s + h0 + h
        elif i == 6:  # bottom left
            c = s + w0 - wp - w, s + h0, s + w0 - wp, s + h0 + h
        elif i == 7:  # left
            c = s - w, s + h0 - h, s, s + h0
        elif i == 8:  # top left
            c = s - w, s + h0 - hp - h, s, s + h0 - hp

        padx, pady = c[:2]
        x1, y1, x2, y2 = [max(x, 0) for x in c]  # allocate coords

        # Labels
        labels, segments = self.labels[index].copy(), self.segments[index].copy()
        if labels.size:
            labels[:, 1:] = xywhn2xyxy(labels[:, 1:], w, h, padx, pady)  # normalized xywh to pixel xyxy format
            segments = [xyn2xy(x, w, h, padx, pady) for x in segments]
        labels9.append(labels)
        segments9.extend(segments)

        # Image
        img9[y1:y2, x1:x2] = img[y1 - pady:, x1 - padx:]  # img9[ymin:ymax, xmin:xmax]
        hp, wp = h, w  # height, width previous

    # Offset
    yc, xc = [int(random.uniform(0, s)) for _ in self.mosaic_border]  # mosaic center x, y
    img9 = img9[yc:yc + 2 * s, xc:xc + 2 * s]

    # Concat/clip labels
    labels9 = np.concatenate(labels9, 0)
    labels9[:, [1, 3]] -= xc
    labels9[:, [2, 4]] -= yc
    c = np.array([xc, yc])  # centers
    segments9 = [x - c for x in segments9]

    for x in (labels9[:, 1:], *segments9):
        np.clip(x, 0, 2 * s, out=x)  # clip when using random_perspective()
    # img9, labels9 = replicate(img9, labels9)  # replicate

    # Augment
    #img9, labels9, segments9 = remove_background(img9, labels9, segments9)
    img9, labels9, segments9 = copy_paste(img9, labels9, segments9, probability=self.hyp['copy_paste'])
    img9, labels9 = random_perspective(img9, labels9, segments9,
                                       degrees=self.hyp['degrees'],
                                       translate=self.hyp['translate'],
                                       scale=self.hyp['scale'],
                                       shear=self.hyp['shear'],
                                       perspective=self.hyp['perspective'],
                                       border=self.mosaic_border)  # border to remove

    return img9, labels9
从上面代码可以看到四个的时候是先确定中心点center,然后从左上到右下一次放图片。九个的时候是先将第一张图放在中心位置,然后从其上面逆时针一次是第二张到第八张图片。之后选择中心点进行裁剪。
为什么这样做呢?
- 在数据加载的时候希望图片的大小是640,进入网络的图像希望是1280,如果是四张图片,直接根据center对原图裁剪或padding后就可以使用,并且有更多可能性。九张图片拼接在一起就是1920,随机选择一个中心点裁剪也不妨碍,这里可以自定义,没有必须怎么样,只要注意image和label的变化过程要完全对应,image和label对应即可!
2. 模型
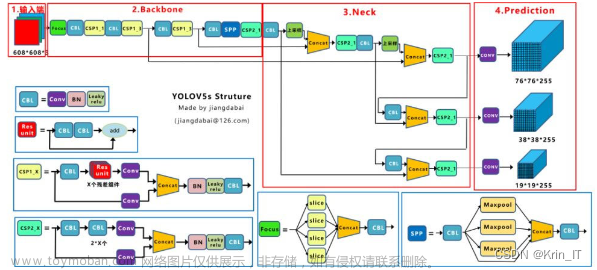
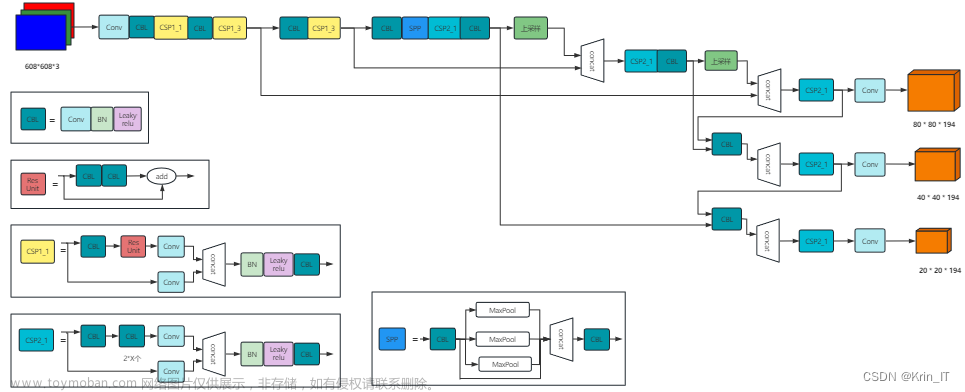
模型的详细构造就不再赘述了,重点关注的是最后的detect,模型主要抽取了三个layer,三个layer是不同的网络深浅,网络结构越靠前学习到特征越是小细节的特征,越靠后越深层学习的特征越是全局特征。对于每一层的特征都会预测三个anchor,最终detect会得到一个长度为3的list,表示每个Layet的结果,其中每个元素的shape为【batch,anchor_no,character_size_width,character_size_height,11】,其中11=【x,y,w,h,置信度,one_hot_6_classes】
class Detect(nn.Module):
    stride = None  # strides computed during build
    export = False  # onnx export
    end2end = False
    include_nms = False
    concat = False

    def __init__(self, nc=80, anchors=(), ch=()):  # detection layer
        super(Detect, self).__init__()
        self.nc = nc  # number of classes
        self.no = nc + 5  # number of outputs per anchor
        self.nl = len(anchors)  # number of detection layers
        self.na = len(anchors[0]) // 2  # number of anchors
        self.grid = [torch.zeros(1)] * self.nl  # init grid
        a = torch.tensor(anchors).float().view(self.nl, -1, 2)
        self.register_buffer('anchors', a)  # shape(nl,na,2)
        self.register_buffer('anchor_grid', a.clone().view(self.nl, 1, -1, 1, 1, 2))  # shape(nl,1,na,1,1,2)
        self.m = nn.ModuleList(nn.Conv2d(x, self.no * self.na, 1) for x in ch)  # output conv

    def forward(self, x):
        # x = x.copy()  # for profiling
        z = []  # inference output
        self.training |= self.export
        for i in range(self.nl):
            x[i] = self.m[i](x[i])  # conv
            bs, _, ny, nx = x[i].shape  # x(bs,255,20,20) to x(bs,3,20,20,85)
            x[i] = x[i].view(bs, self.na, self.no, ny, nx).permute(0, 1, 3, 4, 2).contiguous()

            if not self.training:  # inference
                if self.grid[i].shape[2:4] != x[i].shape[2:4]:
                    self.grid[i] = self._make_grid(nx, ny).to(x[i].device)
                y = x[i].sigmoid()
                if not torch.onnx.is_in_onnx_export():
                    y[..., 0:2] = (y[..., 0:2] * 2. - 0.5 + self.grid[i]) * self.stride[i]  # xy
                    y[..., 2:4] = (y[..., 2:4] * 2) ** 2 * self.anchor_grid[i]  # wh
                else:
                    xy, wh, conf = y.split((2, 2, self.nc + 1), 4)  # y.tensor_split((2, 4, 5), 4)  # torch 1.8.0
                    xy = xy * (2. * self.stride[i]) + (self.stride[i] * (self.grid[i] - 0.5))  # new xy
                    wh = wh ** 2 * (4 * self.anchor_grid[i].data)  # new wh
                    y = torch.cat((xy, wh, conf), 4)
                z.append(y.view(bs, -1, self.no))

        if self.training:
            out = x
        elif self.end2end:
            out = torch.cat(z, 1)
        elif self.include_nms:
            z = self.convert(z)
            out = (z, )
        elif self.concat:
            out = torch.cat(z, 1)
        else:
            out = (torch.cat(z, 1), x)

        return out

    @staticmethod
    def _make_grid(nx=20, ny=20):
        yv, xv = torch.meshgrid([torch.arange(ny), torch.arange(nx)])
        return torch.stack((xv, yv), 2).view((1, 1, ny, nx, 2)).float()

    def convert(self, z):
        z = torch.cat(z, 1)
        box = z[:, :, :4]
        conf = z[:, :, 4:5]
        score = z[:, :, 5:]
        score *= conf
        convert_matrix = torch.tensor([[1, 0, 1, 0], [0, 1, 0, 1], [-0.5, 0, 0.5, 0], [0, -0.5, 0, 0.5]],
                                           dtype=torch.float32,
                                           device=z.device)
        box @= convert_matrix
        return (box, score)
3. 训练
训练过程和以往的以前一样,核心是:模型得到的predict和label之间计算loss。
loss由三部分组成:
1. target与predict的IOU
3. anchor的class label
-
进入loss计算后要先对target进行处理
build_target
-
build target中需要先进行正样本选择find_positive
-
一共三层,每层的预测值都要与target做loss,每层都有三个anchor,三个anchor都有编号,需要先对其其进行编号与target拼接,从原来的(bcxywh)变为(bcxywh+no_anchor)

-
正样本选择中需要先比较groundtruth 和anchor之间的大小,需要两步筛选,第一步是筛除过大的groundtruth或者过小,groundtruth的h和w与anchor的hw比值控制在四分之一到四之间。在这之前要先将原来target还原为真实的坐标和长宽,原来是相对值,都在0-1之间,现在使用
t = target* gain就是还原成这一层特征的位置,不是0-1之间的数了
-
这样就筛除了部分groundtruth,然后为了在原来的基础上增加一些新的点,使用
g=0.5,相当于在原来的基础上增加了两个点对应的框,如果g=1就可以增加四个点对应的框【为了尽可能考虑多一点】
-
计算target和predict的IOU ,根据IOU计算iou的loss,取对数后取负值,IOU(<1)越大,对数值(<0)越大,取负数(>0)越小,使用topk(没有largest参数从小到大排序)取min(10,predict_num),将这些IOU累加确定最终选择每个正样本的anchor个数

-
target的class类别是int,将其转换为one-hot类型,predict的class要和置信度做乘积,相当于加权。乘积后的值做变化与target的值做bce_with_logit损失


-
最终的loss将IOU的loss和class的loss加权相加

-
根据前面确定的anchor个数得到最终target对应的预测值,matching_matrix大小是【target选择正样本个数*预测anchor个数】

-
为了避免一个anchor被预测为多个正样本,对matching_matrix按列求和,大于1的,比较最终损失值cost,选择损失值最小的

复筛主要是根据target与predict的IOU以及预测class做的
4. 推理
在推理过程为了提高效率,速度更快:文章来源:https://www.toymoban.com/news/detail-558430.html
- 将BN与卷积权重参数融合

- 将1* 1卷积转换为3* 3卷积
今天先这样,饿了,去吃饭了,推理的BN和卷积合并下次上代码文章来源地址https://www.toymoban.com/news/detail-558430.html
到了这里,关于深度学习(27)——YOLO系列(6)的文章就介绍完了。如果您还想了解更多内容,请在右上角搜索TOY模板网以前的文章或继续浏览下面的相关文章,希望大家以后多多支持TOY模板网!


