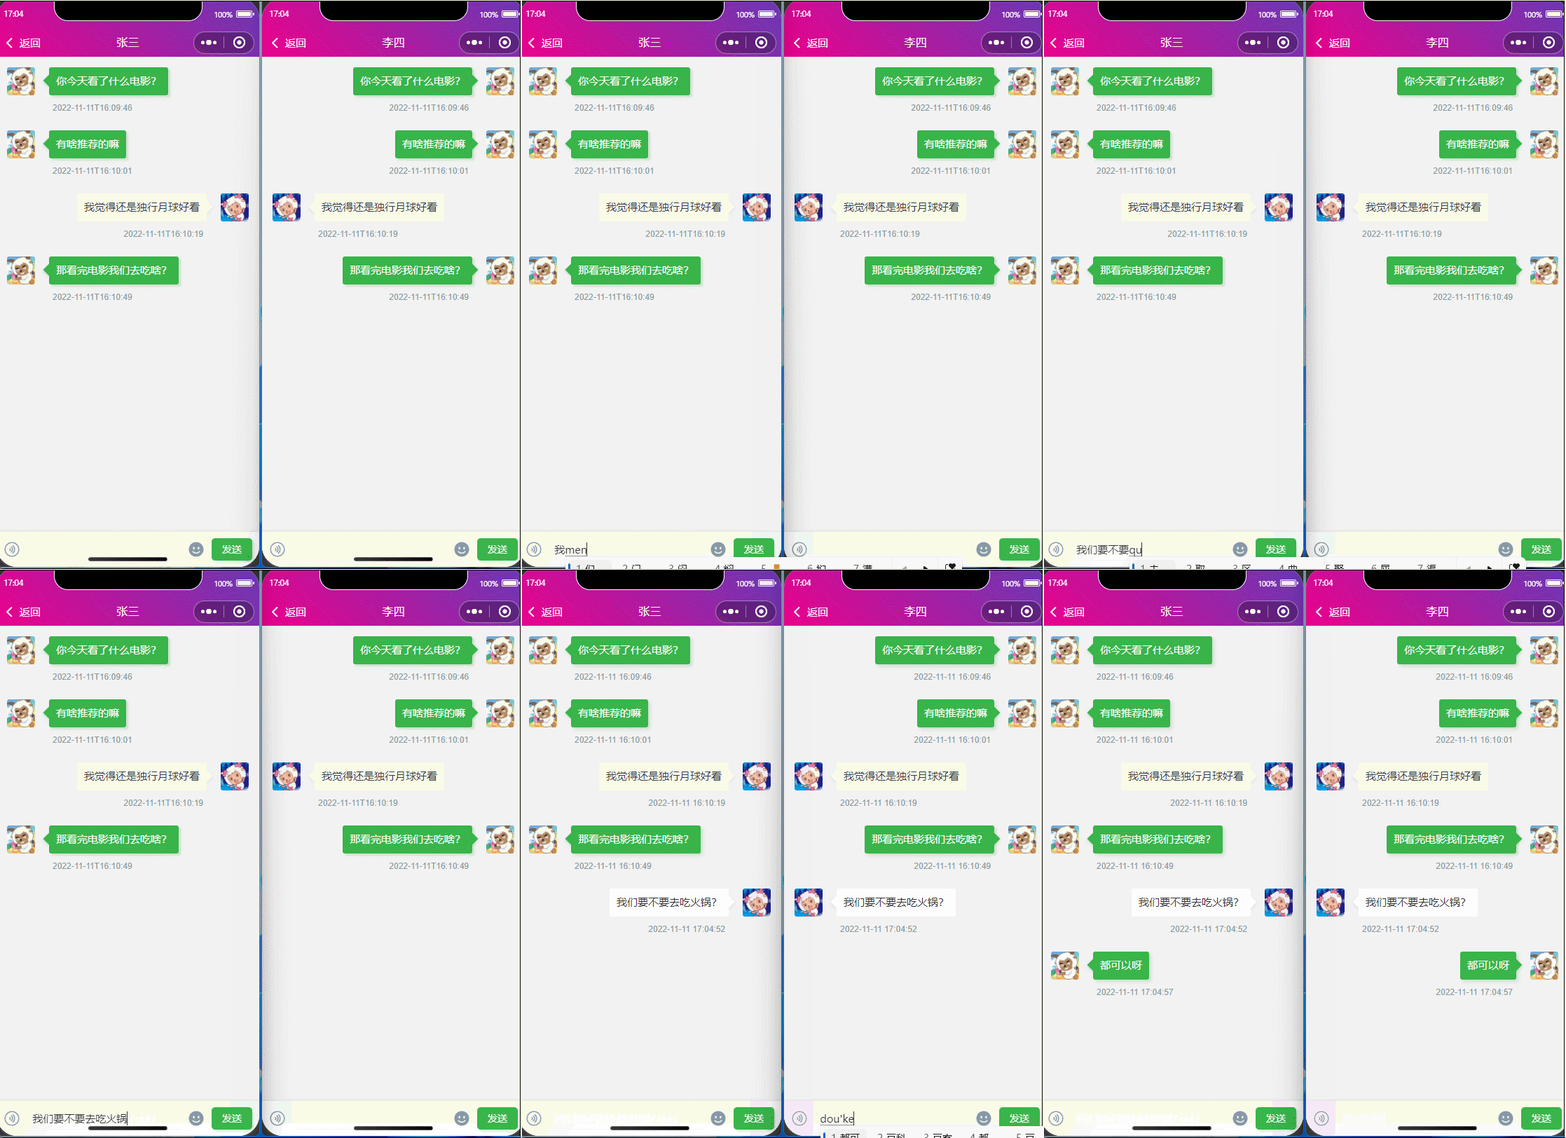
在线体验链接:http://47.242.53.5:888/
项目git地址:https://gitee.com/xiao-ming-1999/websocket-server.git
实现步骤:
-
在前端创建WebSocket连接:在Vue组件中使用
vue-native-websocket库或原生的WebSocketAPI来创建WebSocket连接。确保连接到服务器的WebSocket地址和端口。 -
在前端发送消息:在Vue组件中通过WebSocket连接发送用户输入的消息到服务器。可以通过表单提交、按钮点击等方式触发发送操作,并使用WebSocket的
send方法将消息发送给服务器。 -
在后端处理WebSocket连接:在服务器端使用Node.js和Express或其他后端框架来处理WebSocket连接请求,并维护连接状态。
-
在后端接收和广播消息:在服务器端监听WebSocket连接的
message事件,当接收到一条新消息时,将其广播给所有连接的客户端。 -
在前端接收和显示消息:在Vue组件中监听WebSocket的
message事件,当接收到新消息时,在页面上更新聊天消息列表或对话框。
前端代码:文章来源:https://www.toymoban.com/news/detail-560116.html
<template>
  <div class="chat-box">
    <h2>websocket-chat</h2>
    <ul>
      <li
        v-for="(message, index) in messages"
        :key="index"
        :style="{ background: '#' + message.bgColor }"
        class="message-item"
      >
        <p>{{ message.sender }}:{{ message.text }}</p>
      </li>
    </ul>

    <div class="chat-btn">
      <van-field
        v-model="newMessage"
        center
        clearable
        placeholder="请随意输入信息"
        @keydown.enter="sendMessage"
      >
        <template #button>
          <van-button type="primary" @click="sendMessage">发送</van-button>
        </template>
      </van-field>
    </div>
  </div>
</template>

<script>
const randomColor = Math.floor(Math.random() * 16777215).toString(16);
// const randomColor2 = Math.floor(Math.random() * 16777215).toString(16);
export default {
  name: "clockIn",
  data() {
    return {
      messages: [],
      newMessage: "",
      userId: Date.now(),
      randColor: randomColor,
    };
  },
  mounted() {
    // 监听WebSocket的message事件,当接收到新消息时,在页面上更新聊天消息列表或对话框。
    this.$socket.onmessage = (event) => {
      const message = JSON.parse(event.data);
      this.messages.push(message);
      console.log(this.messages, "this.messages");
    };

    this.$socket.onopen = () => {
      this.$socket.send(JSON.stringify({ action: "getUserId" }));
    };
  },
  methods: {
    sendMessage() {
      const message = {
        id: this.userId,
        text: this.newMessage,
        bgColor: this.randColor,
      };
      // this.messages.push(this.newMessage);
      this.$socket.send(JSON.stringify(message));
      this.newMessage = "";
    },
  },
};
</script>
<style lang="scss" scoped>
.chat-box {
  height: 100vh;
  overflow-y: auto;
  padding: 50px 0;

  h2 {
    position: fixed;
    top: 0;
    background-color: #07c160;
    font-weight: 700;
    text-align: center;
    width: 100%;
    height: 50px;
    line-height: 50px;
    color: #fff;
  }
}

.chat-btn {
  width: 100%;
  height: 50px;
  position: fixed;
  bottom: 0;
  display: flex;
  justify-content: space-between;
  align-items: center;

  ::v-deep .van-cell {
    padding-right: 0;
  }
}

.message-item {
  width: 100%;
  // height: 40px;
  // line-height: 40px;

  // white-space: pre-wrap;
}
</style>
后端代码文章来源地址https://www.toymoban.com/news/detail-560116.html
const express = require("express");
const WebSocket = require("ws");

const app = express();

app.get("/", (req, res) => {
  res.send("Hello, World!"); // 发送响应给客户端
});

const server = app.listen(3008, () => {
  console.log("Server is running on http://47.242.53.5:3008");
});

const wss = new WebSocket.Server({ server });
const clients = [];

wss.on("connection", (ws) => {
  // 服务器端监听WebSocket连接的message事件,当接收到一条新消息时,将其广播给所有连接的客户端。
  ws.on("message", (message) => {
    const parsedMessage = JSON.parse(message);
    console.log(message, "message");
    if (parsedMessage.action === "getUserId") {
      ws.userId = generateUserId(); // 分配用户标识符
      //   ws.send(JSON.stringify({ userId: ws.userId }));
      return;
    }

    parsedMessage.sender = ws.userId;
    const broadcastMessage = JSON.stringify(parsedMessage);
    // 广播消息给所有连接的客户端
    wss.clients.forEach((client) => {
      if (client.readyState === WebSocket.OPEN) {
        client.send(broadcastMessage);
      }
    });
  });

  ws.on("close", () => {
    // 移除关闭的客户端连接
    clients.splice(clients.indexOf(ws), 1);
  });
});
// 生成用户昵称
function generateUserId() {
  return Math.random().toString(36).substr(2, 9);
}
到了这里,关于极简websocket实时聊天的文章就介绍完了。如果您还想了解更多内容,请在右上角搜索TOY模板网以前的文章或继续浏览下面的相关文章,希望大家以后多多支持TOY模板网!


