1 ControlNet介绍
1.1 ControlNet是什么?
ControlNet是斯坦福大学研究人员开发的Stable Diffusion的扩展,使创作者能够轻松地控制AI图像和视频中的对象。它将根据边缘检测、草图处理或人体姿势等各种条件来控制图像生成。
论坛地址:Adding Conditional Control to Text-to-Image Diffusion Models
ControlNet是一种通过添加额外条件来控制stable diffusion的神经网络结构。它提供了一种增强稳定扩散的方法,在文本到图像生成过程中使用条件输入,如涂鸦、边缘映射、分割映射、pose关键点等。可以让生成的图像将更接近输入图像,这比传统的图像到图像生成方法有了很大的改进。

ControlNet 模型可以在使用小数据集进行训练。然后整合任何预训练的稳定扩散模型来增强模型,来达到微调的目的。
- ControNet 的初始版本带有以下预训练权重。
- Canny edge — 黑色背景上带有白色边缘的单色图像。
- Depth/Shallow areas — 灰度图像,黑色代表深区域,白色代表浅区域。
- Normal map — 法线贴图图像。
- Semantic segmentation map——ADE20K 的分割图像。
- HED edge — 黑色背景上带有白色软边缘的单色图像。
- Scribbles — 黑色背景上带有白色轮廓的手绘单色涂鸦图像。
- OpenPose (姿势关键点)— OpenPose 骨骼图像。
- M-LSD — 仅由黑色背景上的白色直线组成的单色图像。
1.2 ControlNet原理
ControlNet是一种神经网络结构,通过添加额外的条件来控制扩散模型。将网络结构划分为:
- 可训练“trainable”
- 不可训练“locked”
其中可训练的部分针对可控的部分进行学习。而锁定的部分,则保留了stable-diffusion模型的原始数据,因此使用少量数据引导,可以保证能充分学习到前置约束的前提下,同时保留原始扩散模型自身的学习能力

上图的“Zero Convolution”是带有零初始化权重和偏差的1×1卷积。在进行自己的模型训练开始之前,所有零卷积输出都是零,此时模型仍然是原始的Stable Diffusion Model。而在加入自己的训练数据之后,则会对最终数据产生影响,这里的影响,更多是对最终结果的微调,因此不会导致模型出现重大偏离的情况。整体的模型结构如下:

从整体的模型结构上可以看出,ControlNet在Stable Diffusion模型的decode层加入了上述“0卷积层”,以实现对最终模型与训练数据的一致性。
2 ControlNet部署与模型下载
2.1 运行环境构建
git clone https://github.com/lllyasviel/ControlNet.git

cd ControlNet

conda env create -f environment.yaml

conda activate control
2.2 模型下载
(1)sd模型与detectors模型下载
模型地址:huggingface
下载完成后,将模型移动到如下目录下:
- sd模型:models
- detectors模型:annotator/ckpts
模型地址:ControlNetHED.pth
下载完成后,将模型移动到annotator/ckpts目录下
移动完成后,通过命令查看,显示如下:
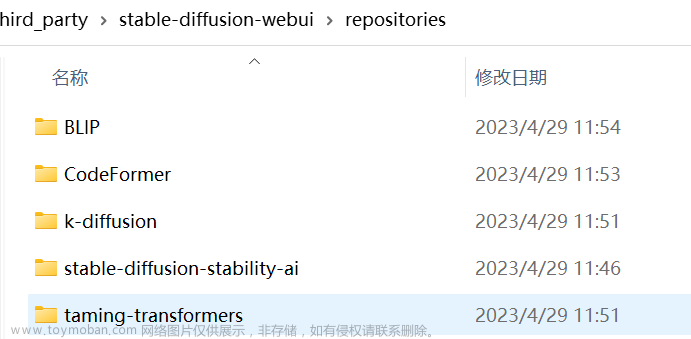
 [root@localhost ControlNet]# ll annotator/ckpts/
总用量 1125948
-rw-r--r-- 1 root root 209267595 7月  14 14:19 body_pose_model.pth
-rw-r--r-- 1 root root        13 7月  13 15:27 ckpts.txt
-rw-r--r-- 1 root root  29444406 7月  14 16:52 ControlNetHED.pth
-rw-r--r-- 1 root root 492757791 7月  14 14:20 dpt_hybrid-midas-501f0c75.pt
-rw-r--r-- 1 root root 147341049 7月  14 14:20 hand_pose_model.pth
-rw-r--r-- 1 root root   6341481 7月  14 14:20 mlsd_large_512_fp32.pth
-rw-r--r-- 1 root root   2613835 7月  14 14:20 mlsd_tiny_512_fp32.pth
-rw-r--r-- 1 root root  58871680 7月  14 14:20 network-bsds500.pth
-rw-r--r-- 1 root root 206313115 7月  14 14:21 upernet_global_small.pth
[root@localhost ControlNet]# ll annotator/ckpts/
总用量 1097192
-rw-r--r-- 1 root root 209267595 7月 14 14:19 body_pose_model.pth
-rw-r--r-- 1 root root 13 7月 13 15:27 ckpts.txt
-rw-r--r-- 1 root root 492757791 7月 14 14:20 dpt_hybrid-midas-501f0c75.pt
-rw-r--r-- 1 root root 147341049 7月 14 14:20 hand_pose_model.pth
-rw-r--r-- 1 root root 6341481 7月 14 14:20 mlsd_large_512_fp32.pth
-rw-r--r-- 1 root root 2613835 7月 14 14:20 mlsd_tiny_512_fp32.pth
-rw-r--r-- 1 root root 58871680 7月 14 14:20 network-bsds500.pth
-rw-r--r-- 1 root root 206313115 7月 14 14:21 upernet_global_small.pth(2) clip-vit模型下载
模型地址:clip-vit-large-patch14
下载完成后,在models目录下创建文件夹clip-vit-large-patch14,将模型移动此文件夹下,通过命令,查看显示如下信息:
[root@localhost ControlNet]# ll models/clip-vit-large-patch14/
总用量 5015648
-rw-r--r-- 1 root root       4519 7月  14 16:18 config.json
-rw-r--r-- 1 root root 1710486359 7月  14 16:21 flax_model.msgpack
-rw-r--r-- 1 root root     524619 7月  14 16:21 merges.txt
-rw-r--r-- 1 root root        316 7月  14 16:21 preprocessor_config.json
-rw-r--r-- 1 root root 1710671599 7月  14 16:23 pytorch_model.bin
-rw-r--r-- 1 root root       7947 7月  14 16:23 README.md
-rw-r--r-- 1 root root        389 7月  14 16:23 special_tokens_map.json
-rw-r--r-- 1 root root 1711114176 7月  14 16:26 tf_model.h5
-rw-r--r-- 1 root root        905 7月  14 16:26 tokenizer_config.json
-rw-r--r-- 1 root root    2224003 7月  14 16:26 tokenizer.json
-rw-r--r-- 1 root root     961143 7月  14 16:26 vocab.json
更待代码,避免通过网络自动下载(下载慢且经常失败)
vi ldm/modules/encoders/modules.py def __init__(self, version="openai/clip-vit-large-patch14", device="cuda", max_length=77,
freeze=True, layer="last", layer_idx=None): # clip-vit-base-patch32
super().__init__()
assert layer in self.LAYERS
self.tokenizer = CLIPTokenizer.from_pretrained('models/clip-vit-large-patch14')
self.transformer = CLIPTextModel.from_pretrained('models/clip-vit-large-patch14')
self.device = device
self.max_length = max_length3 ControlNet运行与效果展示
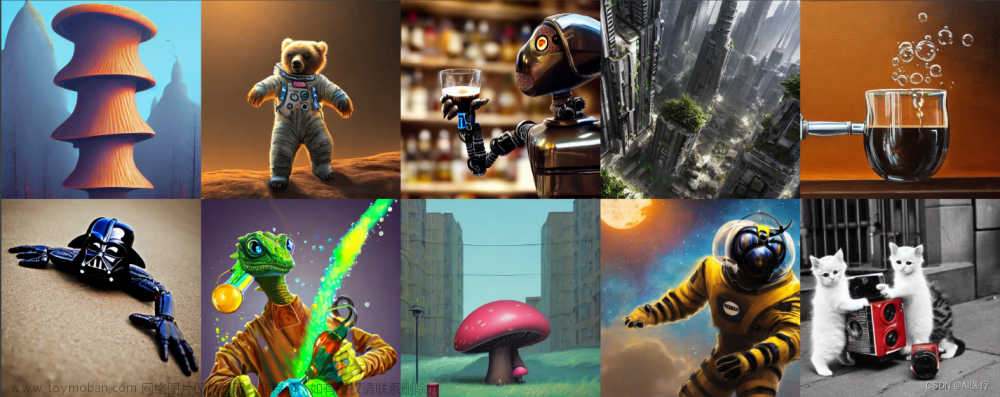
3.1 运行canny2image
python gradio_canny2image.py效果展示:

3.2 运行hough2image
python gradio_hough2image.py效果展示:

3.3 运行hed2image
python gradio_hed2image.py效果展示:

3.4 运行scribble2image
python gradio_scribble2image.py效果展示:

3.5 运行交互scribble2image
python gradio_scribble2image_interactive.py效果展示:

3.6 运行伪造scribble2image
python gradio_fake_scribble2image.py效果展示:

3.7 运行pose2image
python gradio_pose2image.py效果展示:

3.8 运行seg2image
python gradio_seg2image.py效果展示:

3.9 运行depth2image
python gradio_depth2image.py效果展示:

3.10 运行normal2image
python gradio_normal2image.py效果展示:

4 问题解决
4.1 “No module 'xformers'. Proceeding without it”问题解决
错误输出:
[root@localhost ControlNet]# python gradio_normal2image.py
logging improved.
No module 'xformers'. Proceeding without it.
ControlLDM: Running in eps-prediction mode
DiffusionWrapper has 859.52 M params.
making attention of type 'vanilla' with 512 in_channels
Working with z of shape (1, 4, 32, 32) = 4096 dimensions.
making attention of type 'vanilla' with 512 in_channels
Loaded model config from [./models/cldm_v15.yaml]
Loaded state_dict from [./models/control_sd15_normal.pth]
Running on local URL:  http://0.0.0.0:7860

To create a public link, set `share=True` in `launch()`.解决方法:文章来源:https://www.toymoban.com/news/detail-563381.html
pip install xformers==0.0.205 总结
ControlNet是一个非常强大的神经网络结构,通过添加额外的条件来控制扩散模型。目前还不支持Multi-ControlNet,开源社区有消息说正在积极开发中。这个新功能提供了可以使用多个控制网络,并将他们的输出一起用于图像生成,允许更好地控制整个图像。文章来源地址https://www.toymoban.com/news/detail-563381.html
到了这里,关于AIGC文生图:使用ControlNet 控制 Stable Diffusion的文章就介绍完了。如果您还想了解更多内容,请在右上角搜索TOY模板网以前的文章或继续浏览下面的相关文章,希望大家以后多多支持TOY模板网!