最近项目中,甲方要求实现小程序签名功能,功能已经实现,趁着空闲把代码记录一下。其实签名的实现就是使用canvas,把手指经过的路径画出来,然后保存成图片
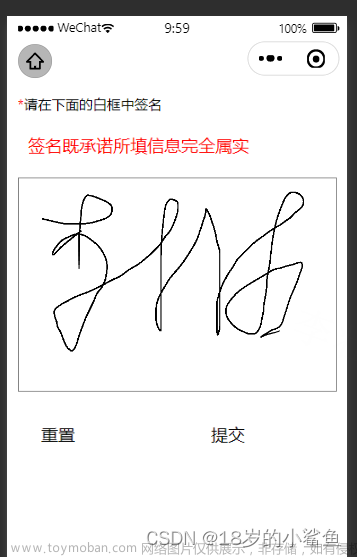
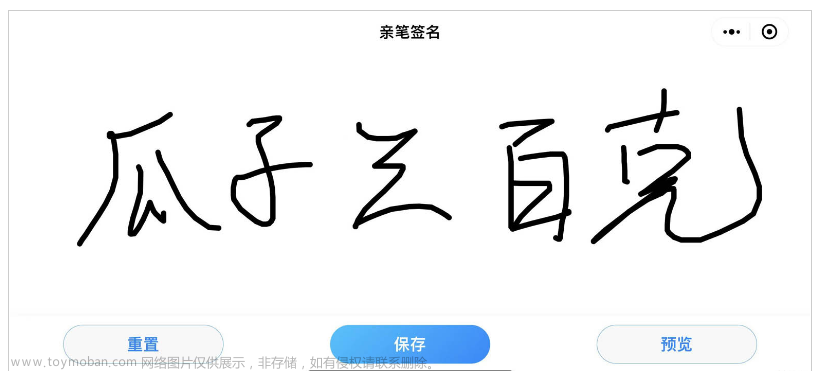
先来看一下效果图

我只实现了横屏,毕竟竖屏签字也不怎么方便("pageOrientation":"landscape")
1、先来看一下html,对宽度做了适配,防止手机底部栏遮挡签字区
<template>
	<view class="container" :style="'width:calc(100vh - '+'screen_bottom'+')'">
		<view class="canvas_box">
			<view class="canvas_tips">
				签字区
			</view>
			<canvas canvas-id="canvas_id" class="canvas_content" disable-scroll="true" @touchstart="touchStart"
				@touchmove="touchMove" @touchend="touchEnd" @touchcancel="touchEnd"
				@error="canvasIdErrorCallback"></canvas>
		</view>
		<view class="bottom_view">
			<view class="view_tips">
				请在上方书写你的签名
			</view>
			<view class="view_btns">
				<view class="btns_clear" @click="handleClearSign">
					清除重写
				</view>
				<view class="btns_config" @click="handleSubmitSign">
					确认签名,提交核验
				</view>
			</view>
		</view>
	</view>
</template>
2、js 实现方法
let context;//
	export default {
		data() {
			return {
				screen_bottom: getApp().globalData.screenBottom + 'px',//这里缓存了手机底部栏高度
				beginDraw: false, //开始绘画
				startX: 0,//屏幕点x坐标
				startY: 0,//屏幕点y坐标
			};
		},
		mounted() {
			context = uni.createCanvasContext('canvas_id')
			context.setLineWidth(4)//设置线宽
			context.setLineCap('round')//设置线末端样式
			context.setLineJoin('round')//设置线条的结束交点样式
		},
		methods: {
			//清除签名
			handleClearSign() {
				context.draw() //true 接着上次的继续画图,false 取消上次的画图 默认值
				context.setLineWidth(4)
				context.setLineCap('round')
				context.setLineJoin('round')
			},
			//提交签名
			handleSubmitSign() {
				if (this.startX == 0) {
					uni.showToast({
						title: '请书写签名',
						icon: 'none'
					})
					return
				}
				uni.canvasToTempFilePath({
					canvasId: 'canvas_id',
					success: (res) => {
						this.getImageInfo(res.tempFilePath)
					},
					fail: (err) => {
						uni.showToast({
							title: '保存报错,请稍后重试',
							icon: 'none'
						})
					}
				})
			},
			//获取图片信息上传图片
			getImageInfo(fileUrl){
				var base64 = uni.getFileSystemManager().readFileSync(fileUrl,'base64').replace(/\s/g,'');
				//获取到图片的base64
			},
			//开始
			touchStart(e) {
				this.lineBegin(e.touches[0].x, e.touches[0].y)
			},
			// 移动
			touchMove(e) {
				if (this.beginDraw) {
					this.addPointInLine(e.touches[0].x, e.touches[0].y)
					context.draw(true) //true 本次绘制接着上一次绘制  false 清除上次绘制
				}
			},
			//结束
			touchEnd(e) {
				this.lineEnd()
			},
			//错误返回
			canvasErrorBack(e) {
				uni.showToast({
					title: '签名失败,请稍后重试',
					icon: 'none'
				})
			},
			//开始划线
			lineBegin(x, y) {
				this.beginDraw = true
				context.beginPath()
				this.startX = x;
				this.startY = y
				this.addPointInLine(x, y)
			},
			//增加点
			addPointInLine(x, y) {
				context.moveTo(this.startX, this.startY);
				context.lineTo(x, y);
				context.stroke() //划弧线
				this.startX = x
				this.startY = y
			},
			lineEnd() {
				context.closePath() //关闭当前路径
				this.beginDraw = false
			}
		}
	}
方法实现都很简单,主要是使用canvas画线,然后保存图片
3、css文章来源:https://www.toymoban.com/news/detail-571571.html
.container {
		background-color: #F6F7F8;
		height: calc(100vh - 32rpx);
		padding: 16rpx 30rpx;
	}

	.canvas_box {
		width: 100%;
		height: calc(100% - 54px);
		background-color: #E8E9EC;
		position: relative;

		.canvas_tips {
			position: absolute;
			left: 0;
			top: 0;
			width: 100%;
			height: 100%;
			font-size: 80px;
			color: #E2E2E2;
			font-weight: bold;
			display: flex;
			align-items: center;
			justify-content: center;
		}

		.canvas_content {
			width: 100%;
			height: 100%;
		}
	}

	.bottom_view {
		width: 100%;
		margin-top: 10px;
		position: relative;
		display: flex;
		align-items: center;
		justify-content: space-between;

		.view_tips {
			color: #363A44;
			font-size: 16px;
		}

		.view_btns {
			display: flex;
			align-items: center;
			font-size: 16px;

			.btns_clear {
				height: 36px;
				width: 94px;
				text-align: center;
				line-height: 36px;
				color: #FF5C5C;
				border: 1rpx solid #FF5C5C;
				border-radius: 36px;
			}

			.btns_config {
				height: 36px;
				padding: 0 16px;
				text-align: center;
				line-height: 36px;
				color: #ffffff;
				background-color: #006AFF;
				border-radius: 36px;
				margin-left: 8px;
			}
		}
}整体来说,小程序实现签名还是比较简单的,主要是要熟系canvas,小程序现在canvas升级后,很多方法不维护了,我用的uni-app,这里还是使用的旧方法文章来源地址https://www.toymoban.com/news/detail-571571.html
到了这里,关于微信小程序签名的文章就介绍完了。如果您还想了解更多内容,请在右上角搜索TOY模板网以前的文章或继续浏览下面的相关文章,希望大家以后多多支持TOY模板网!


