目录
1、安装依赖
2、实现代码
3、测试
源码等资料获取方法
1、安装依赖
pip install flask
pip install pycryptodome
2、实现代码
import random
import string
import time
import base64

from functools import wraps

from flask import Flask, jsonify, session, request, make_response, g
from cryptography.hazmat.primitives.ciphers.aead import AESGCM


SECRET_KEY = "DnKRYZbvVzdhPlF01rtcxmi5Cj36AbCd"


app = Flask(__name__)
app.config["SECRET_KEY"] = SECRET_KEY


# ========================= 数据加密解密方法 ==============================================
def encrypt_aes_gcm(key, data, nonce_len=32):
    """
    AES-GCM加密
    :param key: 密钥。16, 24 or 32字符长度的字符串
    :param data: 待加密字符串
    :param nonce_len: 随机字符串长度
    """
    key = key.encode('utf-8')
    if not isinstance(data, str):
        data = str(data)
    data = data.encode('utf-8')
    # 生成32位长度的随机值,保证相同数据加密后得到不同的加密数据
    nonce = ''.join(random.sample(string.ascii_letters + string.digits, nonce_len))
    nonce = nonce.encode("utf-8")

    # 生成加密器
    cipher = AESGCM(key)
    # 加密数据
    crypt_bytes = cipher.encrypt(nonce, data, associated_data=None)
    return base64.b64encode(nonce + crypt_bytes).decode()


def decrypt_aes_gcm(key, cipher_data, nonce_len=32):
    """
    AES-GCM解密
    :param key: 密钥
    :param cipher_data: encrypt_aes_gcm 方法返回的数据
    :param nonce_len: 随机字符串长度
    :return:
    """
    key = key.encode('utf-8')

    # 进行base64解码
    debase64_cipher_data = base64.b64decode(cipher_data)

    # 提取密文数据
    nonce = debase64_cipher_data[:nonce_len]
    cipher_data = debase64_cipher_data[nonce_len:]

    # 解密数据
    cipher = AESGCM(key)
    plaintext = cipher.decrypt(nonce, cipher_data, associated_data=None)
    return plaintext.decode()


# ========================= 鉴权部分 ==============================================
def generate_token(username, expiration=3600):
    """ 生成token生成token的密钥
    :param username: 生成token的信息
    :param expiration: token有效时间,单位秒
    """
    expiration = int(time.time() + expiration)
    data = {'username': username, "expiration": expiration}
    return encrypt_aes_gcm(SECRET_KEY, data)


def decrypt_token(token):
    """ 解析token """
    data = decrypt_aes_gcm(SECRET_KEY, token)
    return eval(data)


def login_required(func):
    """ 鉴权装饰器 """

    @wraps(func)
    def wrapper(*args, **kwargs):
        # 获取存储的token(如果登录视图使用redis存储的token,这里需要改为从redis获取)
        s_token = session.get("token")

        # 获取请求中带的token
        r_token = request.headers.get("token")

        # 验证请求中是否带有token
        if r_token is None:
            return jsonify(code="4000", msg="鉴权失败")

        # 验证服务器存储的session是否存在
        if s_token is None:
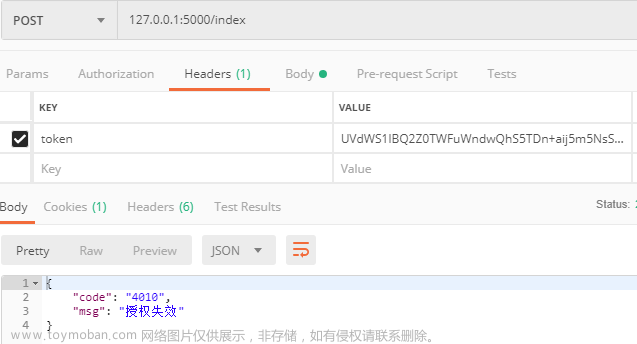
            return jsonify(code="4010", msg="授权失效")

        # 验证token是否匹配
        if s_token != r_token:
            return jsonify(code="4000", msg="鉴权失败")

        # 验证token是否失效
        data = decrypt_token(r_token)
        g.username = data.get("username")     # g变量存储username。(g变量每次请求会重置,可以理解为同一个视图的全局变量)
        expiration = data.get("expiration")
        if expiration < int(time.time()):
            return jsonify(code="4010", msg="授权失效")

        # 还可以继续验证接口签名
        return func(*args, **kwargs)
    return wrapper


# ========================= api接口 ==============================================
@app.post('/login')
def login():
    req = eval(request.data)
    username = req.get('username')
    password = req.get('password')

    # 验证账密
    if username != "admin" and password != "admin":
        return jsonify(code="1000", msg="用户名或密码错误")

    # 账密验证通过,生成token
    token = generate_token(username)

    # 存储token(建议改用redis存储)
    session["token"] = token

    # 定义响应信息
    resp = make_response(jsonify(code="0", data={'token': token}, msg="登录成功"))
    resp.headers["token"] = token
    return resp


@app.post('/index')
@login_required
def index():
    # 视图中使用加密token用到的用户数据
    username = g.username
    return jsonify(code="0", data=f"{username}发起请求", msg="请求成功")


if __name__ == '__main__':
    app.run()
流程图

3、测试
请求接口不传token

请求接口传有效token

请求接口传失效token

源码等资料获取方法


各位想获取源码等教程资料的朋友请点赞 + 评论 + 收藏,三连!文章来源:https://www.toymoban.com/news/detail-584115.html
三连之后我会在评论区挨个私信发给你们~文章来源地址https://www.toymoban.com/news/detail-584115.html
到了这里,关于Flask_实现token鉴权的文章就介绍完了。如果您还想了解更多内容,请在右上角搜索TOY模板网以前的文章或继续浏览下面的相关文章,希望大家以后多多支持TOY模板网!


