1、需求背景:
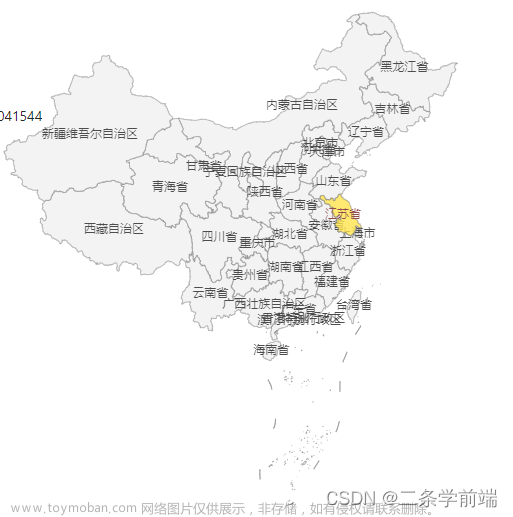
用户提供了某个厂区的底图(就一张静态图片),在底图中,划分了10个不规则区域,给了10个区域的高亮、开灯效果图片(切好了图),鼠标滑过每个区域的时候,要高亮显示,开灯的时候,显示开灯效果;看到这个需求的时候,挺懵的,有点不知从何下手,但是分析后,有2种可以实现的方案,具体方案如下:
2、方案说明
方案1:传统的div去定位,绝对定位,用css实现hover效果,click的时候设置active效果。
这种方案会存在问题。首先,划分的区域是不规则的,如果强行用div去定位,可能会导致区域重叠的问题;其次鼠标划过,鼠标高亮效果要完全和底图贴合,这一点其实不容易实现。而且浏览器全屏后,可能会导致位置出现偏差的问题,基于以上的考虑,我放弃了此方案。
方案2:用Canvas和SVG的方式实现。不规则的区域,手动取点,绘制路径,鼠标划过或鼠标点击的时候,判断鼠标坐标点是否在Path路径内,如果在某个区域内,就显示对应效果。但是要考虑一个问题,因为Path的点,我们是在某个分辨率基准下取点的,这就导致在不同屏幕分辨率下,会导致,无法取到点的问题,所以要重新计算鼠标坐标点。这种方案,全屏后,也不会说出现位置偏差,后面采用了此种方案,具体实现过程如下:
1、找一个容器,放背景图
<template>
  <div ref="container" class="canvas-container">
    <canvas
      ref="canvas"
      width="980px"
      height="675px"
      @mousemove.stop="handleMouseEnter"
      @click.stop="handleCanvasClick"
      @mouseout.stop="renderCanvas"
    ></canvas>
  </div>
</template>
2、 绘制canvas区域,并且在每个区域写上文字标识,绘制10个区域
    drawImage(cb) {
      const that = this
      const img = new Image()
      img.src = backImg
      img.onload = function() {
        // 在Canvas中绘制图像
        ctx.drawImage(img, 0, 0, canvas.width, canvas.height)
        for (let i = 0; i < that.svgShapeList.length; i++) {
          const shape = that.svgShapeList[i]
          ctx.fillStyle = '#ffff33' // 设置填充颜色
          ctx.font = 'bold 14px Arial'
          ctx.textBaseline = 'middle'
          ctx.fillText(shape.name, shape.textX, shape.textY) // 绘制文本
        }
        if (cb) {
          cb()
        }
      }
    }
/**
* @description 鼠标移出,移除效果,如果存在开灯效果继续显示开灯效果
*/
renderCanvas() {
this.drawImage(() => {
for (let i = 0; i < this.svgShapeList.length; i++) {
// 保存绘图状态
ctx.save()
const shape = this.svgShapeList[i]
if (shape.switchState) {
this.fetchFile(shape)
}
// 恢复到之前保存的绘图状态
ctx.restore()
}
})
},
/**
* @description 获取外部文件
*/
fetchFile(shape) {
// ctx.fillStyle = 'rgb(255, 255, 0,0.2)'
// ctx.fill(shape.path)
var image = new Image()
image.src = baseImg
image.onload = async () => {
var pattern = await ctx.createPattern(image, 'repeat')
ctx.fillStyle = pattern
ctx.fill(shape.path)
}
},问题点:通过mousemove实现图片渲染的时候,由于会不断的onload图片,导致页面闪烁的问题
解决方法:把pattern 缓存起来,不要一致onload,可以在给ctx赋值后,同时给pattern赋值,那么fetchFile函数中,只需要做以下的操作即可:
/**
     * @description 获取外部文件
     */
    fetchFile(shape) {
        ctx.fillStyle = pattern
        ctx.fill(shape.path)
    },
完美!!
3、接下来就是处理鼠标滑过、鼠标点击的问题了
判断坐标点位置的核心代码
const isInArea = ctx.isPointInPath(shape.path, mouseX, mouseY)4、重新计算坐标点位:
  setRatio() {
      const initialWidth = 1920
      const initialHeight = 937
      const targetWidth = window.innerWidth || document.documentElement.clientWidth || document.body.clientWidth
      const targetHeight = window.innerHeight || document.documentElement.clientHeight || document.body.clientHeight
      this.ratioX = initialWidth / targetWidth
      this.ratioY = initialHeight / targetHeight
    },
说明1920,937为绘制路径时,屏幕可视区域的基准值,这个根据自己的情况来定
然后再鼠标划过,鼠标点击的时候,要注意用当前坐标点乘以一个系数ratioX,ratioY
基本上就这样子了
反正就是要注意导入图片时,不要用路径,否则会出现闪烁的问题,因为一直从服务器请求资源,建议用base64。文章来源:https://www.toymoban.com/news/detail-590884.html
完整代码就不粘了,有疑问或者有更好的方案,欢迎留言!文章来源地址https://www.toymoban.com/news/detail-590884.html
到了这里,关于Canvas、SVG实现鼠标滑过某个区域高亮显示的方案说明的文章就介绍完了。如果您还想了解更多内容,请在右上角搜索TOY模板网以前的文章或继续浏览下面的相关文章,希望大家以后多多支持TOY模板网!


