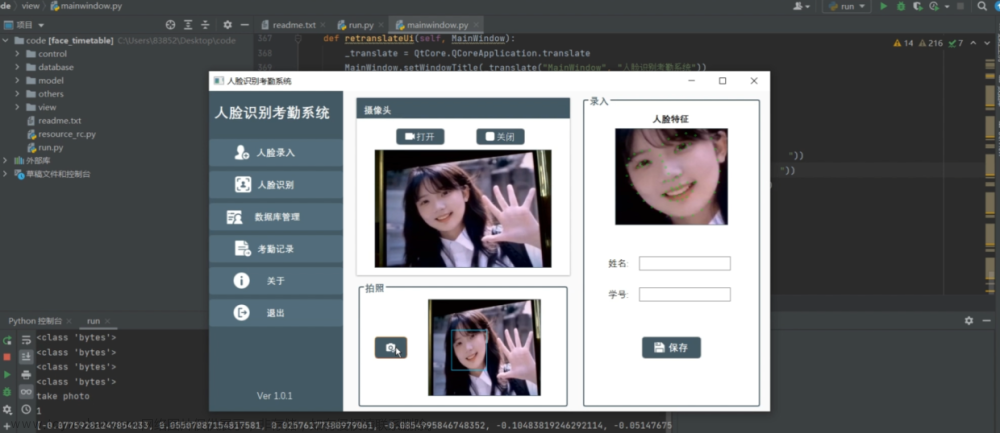
所有涉及的配置文件(xml,dat)存储在这里:
https://jhc001.lanzoub.com/iyaeo0w8jkgb
密码:JDBC
所有 sdk 包下内容均为自定义,跑不了直接自己改输入就行文章来源:https://www.toymoban.com/news/detail-595050.html
代码功能描述:
识别图像中的人面部位置,并将面部裁切下来,存储到excel里(excel里最多存储8张,按照从左到右顺序存储)文章来源地址https://www.toymoban.com/news/detail-595050.html
# !/usr/bin/env python3
# -*- coding: UTF-8 -*-
"""
@author  : v_jiaohaicheng@baidu.com
@des     :基于opencv实现

"""
import os
import cv2
import xlsxwriter
from io import BytesIO


class CVFaceCheck():

    def get_img_name(self,imgfile):
        return os.path.split(imgfile)[0],os.path.split(imgfile)[-1].split(".")[0]

    def get_img_date(self,img_file):
        image_file = open(img_file, 'rb')
        image_data = BytesIO(image_file.read())
        image_file.close()
        return image_data

    def read_img(self,imgfile):
        return cv2.imread(imgfile)

    def tran_gray(self,img):
        return cv2.cvtColor(img, cv2.COLOR_BGR2GRAY)

    def get_face_opt(self,gray):
        # face_cascade = cv2.CascadeClassifier('haarcascade_frontalface_alt.xml')
        face_cascade = cv2.CascadeClassifier('haarcascade_frontalface_default.xml')
        # Detect faces
        faces = face_cascade.detectMultiScale(gray, 1.1, 4)
        # Draw rectangle around the faces and crop the faces
        for (x, y, w, h) in faces:
            yield x, y, w, h

    def cut_face(self,gray,img,imgfile):
        map = {}
        for index,value in enumerate(self.get_face_opt(gray)):
            x, y, w, h = value
            faces = img[y:y + h,x:x + w]
            save_face_name = os.path.join(self.get_img_name(imgfile)[0],'face_{}.jpg'.format(index))

            cv2.imwrite(save_face_name, cv2.resize(faces,[100,100]))
            map[x] = {
                "img_name":save_face_name,
                "face_opt":[y,y + h, x,x + w],
            }
        return map

    def remove_face_cut(self,res_sort):
        for _,value in res_sort.items():
            img_name = value["img_name"]
            os.remove(img_name)

    def write_excel(self,imgfile,face_map,save_path = "./",sheet="Sheet1"):
        save_excel_file = os.path.join(save_path,self.get_img_name(imgfile)[-1])+".xlsx"
        workbook = xlsxwriter.Workbook(save_excel_file)
        worksheet = workbook.add_worksheet(sheet)
        lis = ["人物ID","0","1","2","3","4","5","6","7"]
        style = {
                'font_name': '微软雅黑',
                'font_size': 15,
                'color':"red",
                'bold': True,
                'border': 0,
                'align': 'center',
                'valign': 'vcenter',
                'text_wrap': False,
        }
        cell_format = workbook.add_format(style)
        worksheet.merge_range(0,0,0,9,"人物关系矩阵",cell_format=cell_format)
        for col,value in enumerate(lis):
            worksheet.write_string(
                row=1,
                col=col+1,
                string=str(value),
            )

        for row,value in enumerate(lis):
            worksheet.write_string(
                row=row+2,
                col=0,
                string=str(value),
            )
        worksheet.write_string(
            row=2,
            col=1,
            string="人物图片",
        )
        num = 0
        for _,val in face_map.items():
            num += 1
            img_file = val["img_name"]
            image_data = self.get_img_date(img_file)
            if num <= 8:
                worksheet.insert_image(
                    row = 2,
                    col = num+1,
                    filename = img_file,
                    options={"image_data":image_data},
                )

                worksheet.insert_image(
                    row=num+2,
                    col=1,
                    filename=img_file,
                    options={"image_data": image_data},
                )
                worksheet.set_column(1, num + 1, 14)
                worksheet.set_row(2, 100)
                worksheet.set_row(num+2, 100)

        workbook.close()


    def process(self,imgfile,out_path):
        # Read the input image
        img = self.read_img(imgfile)
        # cv2.imshow("test",img)
        # cv2.waitKey(0)
        # Convert into grayscale
        gray = self.tran_gray(img)

        res = self.cut_face(gray,img,imgfile)
        res_sort = dict(sorted(res.items(),key=lambda x:x[0]))
        print(res_sort)
        self.write_excel(imgfile,res_sort,save_path=out_path)
        # self.remove_face_cut(res_sort)

if __name__ == '__main__':
    # file = input("输入图片位置:")
    # out_path = input("输入excel存储路径:(默认为当前路径下)")
    # if out_path == "":
    #     out_path = "./"
    cfc = CVFaceCheck()
    # file = R"D:\PythonDevelopmentTools\tests\cv_test\face_check_cut\npw1.jpg"
    # out_file = R"D:\PythonDevelopmentTools\tests\cv_test\face_check_cut\res"

    from sdk.utils.util_folder import FolderPath

    out_path = R"D:\Desktop\res"
    os.makedirs(out_path, exist_ok=True)
    for file in FolderPath.get_absfiles(R"D:\Desktop\111111"):
        # os.makedirs(out_path,exist_ok=True)
        _file = file["filepath"]
        print(_file)
        cfc.process(_file,out_path)
        input("回车继续")
# !/usr/bin/env python3
# -*- coding: UTF-8 -*-
"""
@author  : v_jiaohaicheng@baidu.com
@des     :基于dblib实现

"""
import os
import cv2
import dlib
import numpy as np
import xlsxwriter
from io import BytesIO


class DlibFaceCheck():
    def read_img(self,imgfile):
        return cv2.imread(imgfile)

    def get_img_name(self,imgfile):
        return os.path.split(imgfile)[0],os.path.split(imgfile)[-1].split(".")[0]

    def get_img_date(self,img_file):
        image_file = open(img_file, 'rb')
        image_data = BytesIO(image_file.read())
        image_file.close()
        return image_data

    def get_face_opt(self,img):
        predictor_path = 'shape_predictor_68_face_landmarks.dat'
        detector = dlib.get_frontal_face_detector()
        predictor = dlib.shape_predictor(predictor_path)

        faces = detector(img, 0)
        if len(faces):
            print('==> Found %d face in this image.' % len(faces))
            for i in range(len(faces)):
                landmarks = np.matrix([[p.x, p.y] for p in predictor(img, faces[i]).parts()])
                lis = landmarks.tolist()
                opt1 = (min([i[0] for i in lis]), min([i[1] for i in lis]))
                opt2 = (max([i[0] for i in lis]), max([i[1] for i in lis]))
                # print(opt1,opt2)
                yield opt1,opt2
        else:
            print('Face not found!')

    def get_map(self,imgfile,save_path):
        map = {}
        img = self.read_img(imgfile)
        for index, value in enumerate(self.get_face_opt(img)):
            opt1, opt2 = value
            faces = img[opt1[-1]:opt2[-1], opt1[0]:opt2[0]]
            save_img_file = os.path.join(save_path,"res_{}.jpg".format(index))
            cv2.imwrite(save_img_file, cv2.resize(faces,(100,100)))
            map[index] = {
                "img_name": save_img_file,
                "face_opt": [[opt1[0], opt1[-1]], [opt2[-1], opt2[0]]]
            }
        return map


    def write_excel(self,imgfile,face_map,save_path = "./",sheet="Sheet1"):
        save_excel_file = os.path.join(save_path,self.get_img_name(imgfile)[-1])+".xlsx"
        workbook = xlsxwriter.Workbook(save_excel_file)
        worksheet = workbook.add_worksheet(sheet)
        lis = ["人物ID","0","1","2","3","4","5","6","7"]
        style = {
                'font_name': '微软雅黑',
                'font_size': 15,
                'color':"red",
                'bold': True,
                'border': 0,
                'align': 'center',
                'valign': 'vcenter',
                'text_wrap': False,
        }
        cell_format = workbook.add_format(style)
        worksheet.merge_range(0,0,0,9,"人物关系矩阵",cell_format=cell_format)
        for col,value in enumerate(lis):
            worksheet.write_string(
                row=1,
                col=col+1,
                string=str(value),
            )

        for row,value in enumerate(lis):
            worksheet.write_string(
                row=row+2,
                col=0,
                string=str(value),
            )
        worksheet.write_string(
            row=2,
            col=1,
            string="人物图片",
        )
        num = 0
        for _,val in face_map.items():
            num += 1
            img_file = val["img_name"]
            image_data = self.get_img_date(img_file)
            if num <= 8:
                worksheet.insert_image(
                    row = 2,
                    col = num+1,
                    filename = img_file,
                    options={"image_data":image_data},
                )

                worksheet.insert_image(
                    row=num+2,
                    col=1,
                    filename=img_file,
                    options={"image_data": image_data},
                )
                worksheet.set_column(1, num + 1, 14)
                worksheet.set_row(2, 100)
                worksheet.set_row(num+2, 100)

        workbook.close()

    def remove_face_cut(self,res_sort):
        for _,value in res_sort.items():
            img_name = value["img_name"]
            os.remove(img_name)


    def process(self,imgfile,save_path):
        map = self.get_map(imgfile,save_path)
        sort_map = dict(sorted(map.items(),key=lambda x:x[0]))
        self.write_excel(imgfile, sort_map, save_path=save_path)
        self.remove_face_cut(sort_map)


if __name__ == '__main__':
    file = input("输入图片位置:")
    out_path = input("输入excel存储路径:(默认为当前路径下)")
    if out_path == "":
        out_path = "./"
    else:
        os.makedirs(out_path,exist_ok=True)

    dfc = DlibFaceCheck()
    dfc.process(file,out_path)
# !/usr/bin/env python3
# -*- coding: UTF-8 -*-
"""
@author  : v_jiaohaicheng@baidu.com
@des     :基于百度api实现

"""
import requests
# 自己注册后填在这
APP_ID = ""
API_KEY = ""
SECRET_KEY= ""


class ApiFaceCheck():

    def get_access_token(self,ak,sk):
        url = "https://aip.baidubce.com/oauth/2.0/token?grant_type=client_credentials&client_id={}&client_secret={}".format(
                  ak,sk
              )
        headers = {
            'Content-Type': 'application/json',
            'Accept': 'application/json'
        }
        payload = ""
        response = requests.request("POST", url, headers=headers, data=payload)
        return response.json()["access_token"]

    def get_face_opt(self,up_url,ak=API_KEY,sk=SECRET_KEY):
        request_url = "https://aip.baidubce.com/rest/2.0/face/v3/detect"
        params = {
                    "image":"{}".format(up_url),
                    "image_type":"URL",
                    "max_face_num":8,
                    "face_type":"LIVE"
                  }
        access_token = self.get_access_token(ak,sk)
        request_url = request_url + "?access_token=" + access_token
        headers = {'content-type': 'application/json'}
        response = requests.post(request_url, data=params, headers=headers)
        return response.json()
到了这里,关于Python 人脸识别实现(三种方式)的文章就介绍完了。如果您还想了解更多内容,请在右上角搜索TOY模板网以前的文章或继续浏览下面的相关文章,希望大家以后多多支持TOY模板网!


