1、推流介绍
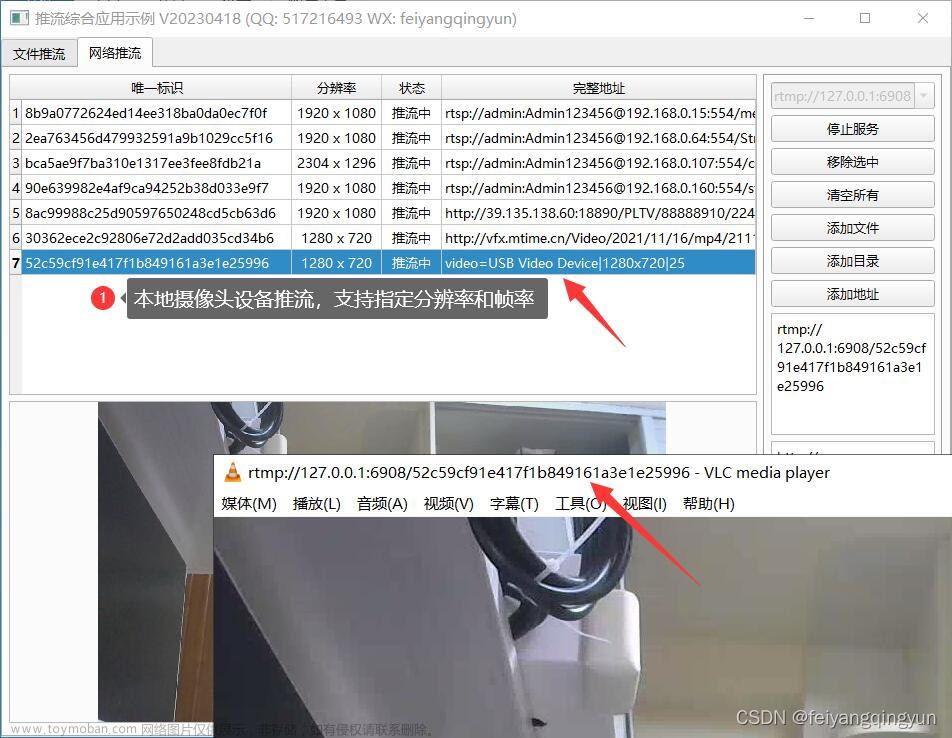
推流是将输入视频数据推送至流媒体服务器, 输入视频数据可以是本地视频文件(avi,mp4,flv......),也可以是内存视频数据,或者摄像头等系统设备,也可以是网络流URL。本篇介绍将本地视频文件通过FFmpeg编程以RTMP直播流的形式推送至RTMP流媒体服务器的方法。
推流的网络拓扑结构如下:

RTMP流媒体服务器: 采用nginx+rtmp module实现
RTMP拉流器:
RTMP推流器:采用ffmpeg实现
需要注意的是,RTMP采用的封装格式是FLV。在指定输出流媒体格式的时候需要指定其封装格式为“flv”。同理,其他流媒体协议也需要指定其封装格式。例如采用UDP推送流媒体的时候,可以指定其封装格式为“mpegts”。
2、FFmpeg推流
FFMpeg处理RTMP流有两种方式:
一个是使用自带的RTMP代码功能;
一个是使用第三方库librtmp;
这两种方式是有些区别的
1. FFmpeg自带的RTMP代码功能
FFmpeg自带的RTMP代码只支持RTMP协议,不支持rtmpt,rtmpe,rtmpte和rtmps协议;
命令行设置如下:
\1. 将RTMP流原样保存成文件
# ./ffmpeg -i rtmp://192.168.1.11:1935/live/teststream -acodec copy -vcodec copy -f flv -y test.flv
\2. 将RTMP流转码保存成文件
# ./ffmpeg -i rtmp://192.168.1.11:1935/live/teststream -acodec ... -vcodec ... -f mp4 -y test.mp4
\3. 将RTMP流转码后再以RTMP流的方式推送到RTMP流服务器
# ./ffmpeg -i rtmp://192.168.1.11:1935/live/teststream -acodec ... -vcodec ... -f flv rtmp://10.2.11.111/live/newstream
2. 第三方库librtmp
如何让FFMpeg链接该库(后续更新)
FFMpeg可以支持rtmp://, rtmpt://, rtmpe://, rtmpte://,以及 rtmps://协议。
链接了librtmp的FFMpeg接受一个字符串的输入方式,
如:"rtmp://server:port/app/playpath/stream_name live=1 playpath=xxx ..."
NOTE:引号是必须的;
\1. 保存RTMP直播流原样保存成文件:
# ./ffmpeg -i "rtmp://http://pub1.guoshi.com/live/newcetv1 live=1" -vcodec copy -acodec copy -y cetv1.flv
\2. 将RTMP流转码后再以RTMP流的方式推送到RTMP流服务器
# ./ffmpeg -i "rtmp://192.168.1.11:1935/live/app/teststream live=1" -acodec ... -vcodec ... -f flv rtmp://10.2.11.111/live/newstream
\3. 用ffplay播放RTMP直播流:
ffplay "rtmp://http://pub1.guoshi.com/live/newcetv1 live=1"
\4. 在使用FFMPEG类库进行编程的时候,也是一样的,
只需要将字符串传递给avformat_open_input()就行了,形如:
ffplay "rtmp://http://pub1.guoshi.com/live/newcetv1 live=1"
char url[]="rtmp://http://live.hkstv.hk.lxdns.com/live/hks live=1";
avformat_open_input(&pFormatCtx,url,NULL,&avdic)
3、推流器函数流程图

4、代码
int main(int argc, char * argv[])
{
AVFormatContext *pInFmtContext = NULL;
AVStream *in_stream;
AVCodecContext *pInCodecCtx;
AVCodec *pInCodec;
AVPacket *in_packet;
AVFormatContext * pOutFmtContext;
AVOutputFormat *outputFmt;
AVStream * out_stream;
//AVCodecContext * pOutCodecCtx;
//AVCodec *pOutCodec;
//AVPacket *out_packet;
//AVFrame *pOutFrame;
AVRational frame_rate;
double duration;
//int picture_size = 0;
//FILE *fp;
int ret;
const char * default_url = "rtmp://localhost:1935/live/tuiliu1";
char in_file[128] = {0};
char out_file[256] = {0};
int videoindex = -1;
int audioindex = -1;
int video_frame_count = 0;
int audio_frame_count = 0;
int video_frame_size = 0;
int audio_frame_size = 0;
int i;
int got_picture;
if(argc < 2){
printf("Usage: a.out <in_filename> <url>\n");
return -1;
}
memcpy(in_file, argv[1], strlen(argv[1]));
if( argc == 2){
memcpy(out_file, default_url, strlen(default_url));
}else{
memcpy(out_file, argv[2], strlen(argv[2]));
}
//av_register_all();
//avformat_network_init();
// Open an input stream and read the header,
if (avformat_open_input ( &pInFmtContext, in_file, NULL, NULL) < 0){
printf("avformat_open_input failed\n");
return -1;
}
//查询输入流中的所有流信息
if( avformat_find_stream_info(pInFmtContext, NULL) < 0){
printf("avformat_find_stream_info failed\n");
return -1;
}
av_dump_format(pInFmtContext, 0, in_file, 0);
ret = avformat_alloc_output_context2(&pOutFmtContext, NULL, "flv", out_file);
if(ret < 0){
printf("avformat_alloc_output_context2 failed\n");
return -1;
}
//outputFmt = pOutFmtContext->oformat;
for(i=0; i < pInFmtContext->nb_streams; i++){
in_stream = pInFmtContext->streams[i];
if( in_stream->codecpar->codec_type == AVMEDIA_TYPE_AUDIO){
audioindex = i;
}
if( in_stream->codecpar->codec_type == AVMEDIA_TYPE_VIDEO){
videoindex = i;
frame_rate = av_guess_frame_rate(pInFmtContext, in_stream, NULL);
printf("video: frame_rate:%d/%d\n", frame_rate.num, frame_rate.den);
printf("video: frame_rate:%d/%d\n", frame_rate.den, frame_rate.num);
duration = av_q2d((AVRational){frame_rate.den, frame_rate.num});
}
pInCodec = avcodec_find_decoder(in_stream->codecpar->codec_id);
printf("%x, %d\n", pInCodec, in_stream->codecpar->codec_id);
//printf("-----%s,%s\n", pInCodec->name, in_stream->codec->codec->name);
out_stream = avformat_new_stream(pOutFmtContext, pInCodec);//in_stream->codec->codec);
if( out_stream == NULL){
printf("avformat_new_stream failed:%d\n",i);
}
ret = avcodec_parameters_copy(out_stream->codecpar, in_stream->codecpar);
if( ret < 0){
printf("avcodec_parameters_copy failed:%d\n", i);
}
out_stream->codecpar->codec_tag = 0;
if( pOutFmtContext->oformat->flags & AVFMT_GLOBALHEADER){//AVFMT_GLOBALHEADER代表封装格式包含“全局头”(即整个文件的文件头),大部分封装格式是这样的。一些封装格式没有“全局头”,比如MPEG2TS
out_stream->codec->flags |= AV_CODEC_FLAG_GLOBAL_HEADER;
}
}
av_dump_format(pOutFmtContext, 0, out_file, 1);
ret = avio_open(&pOutFmtContext->pb, out_file, AVIO_FLAG_WRITE);
if(ret < 0){
printf("avio_open failed:%d\n", ret);
return -1;
}
int64_t start_time = av_gettime();
ret = avformat_write_header(pOutFmtContext, NULL);
in_packet = av_packet_alloc();
while(1){
ret = av_read_frame(pInFmtContext, in_packet);
if(ret < 0){
printf("read frame end\n");
break;
}
in_stream = pInFmtContext->streams[in_packet->stream_index];
if(in_packet->stream_index == videoindex){
video_frame_size += in_packet->size;
printf("recv %5d video frame %5d-%5d\n", ++video_frame_count, in_packet->size, video_frame_size);
}
if(in_packet->stream_index == audioindex){
audio_frame_size += in_packet->size;
printf("recv %5d audio frame %5d-%5d\n", ++audio_frame_count, in_packet->size, audio_frame_size);
}
int codec_type = in_stream->codecpar->codec_type;
if( codec_type == AVMEDIA_TYPE_VIDEO){
#if 0
//延时方案1: 根据 1/帧率 来计算延时时间
av_usleep((int64_t)(duration * AV_TIME_BASE));
//av_usleep(10);
printf("%d\n", (int)(duration * AV_TIME_BASE));
#else
// 延时方案2: 根据pts时间与系统时间的关系来计算延时时间, 该方案更优
AVRational dst_time_base = {1, AV_TIME_BASE};
int64_t pts_time = av_rescale_q(in_packet->pts, in_stream->time_base, dst_time_base);
int64_t now_time = av_gettime() - start_time;
if( pts_time > now_time)
av_usleep(pts_time - now_time);
//printf("%d\n", pts_time - now_time);
#endif
}
out_stream = pOutFmtContext->streams[in_packet->stream_index];
av_packet_rescale_ts(in_packet,in_stream->time_base, out_stream->time_base);
in_packet->pos = -1;
ret = av_interleaved_write_frame(pOutFmtContext, in_packet);
if( ret < 0){
printf("av_interleaved_write_frame failed\n");
break;
}
av_packet_unref(in_packet);
}
//
av_write_trailer(pOutFmtContext);
av_packet_free(&in_packet);
avformat_close_input(&pInFmtContext);
avio_close( pOutFmtContext->pb);
avformat_free_context(pOutFmtContext);
return 0;
}
有两点需要注意的地方
\1. 推流的速度
不能一下子将数据全推到服务器,这样流媒体服务器承受不住,实际中音频流的数据量相比视频要小很多,可以不必管它, 只按视频播放速度(帧率)来推流即可满足需要。因此每推送一个视频帧,要延时一个视频帧的时长。视频帧的时长可根据帧率计算得出,即 1/帧率。
上述代码中采用的是av_usleep()直接延时等待的方式, , 等待时间为‘1/帧率’, 由于存在程序处理的时间,系统延时等, 这种方式控制时间是不准确的,但是上述代码却很直观的表现了推流延时的实现。 实际中,我们需要考虑系统执行的时间以及延时, 可以结合系统当前时间与视频帧pts时间之间的差距,来决定延时的时间,这样计算的延时时间相对更准确, 计算公式如下:
delay_time = pts_time - now_time
= av_rescale_q(pkt.dts, ifmt_ctx->streams[videoindex]->time_base, (AVRational){1,AV_TIME_BASE}) - (av_gettime() - start_time)
\2. 推流的类型
上述代码采用的推流协议是rtmp, rtmp推流必须推送flv封装格式,而其他的协议也有相应的格式要求(udp推流必须推送mpegts封装格式)。 如果要将上述代码修改为适配多种推流协议,则可根据推流协议自动选择相应的封装格式。
编译
gcc tuiliu1.c -lavformat -lavcodec -lavutil
验证
要验证推流程序是否正确,我们需要搭建一个nginx+rtmp流媒体服务器(搭建nginx+rtmp服务器),而拉流端可以使用ffplay,参考以下过程:
1. 启动nginx服务器
nginx
2. 启动拉流
ffplay rtmp://localhost:1935/live/tuiliu1
3. 启动推流:
./a.out test.flv
接下来,就能看视频了
遗留问题
\1. 无论使用ffplay命令播放视频还是使用SDL编程播放视频,都会导致compiz占用cpu过高

也尝试过网上的多种解决方式,均无法解决,怀疑是compiz的bug
\2. 无论使用ffmpeg命令推流还是使用以上代码推流,都会在推流结束调用av_write_trailer时打印
[flv @ 0x858c440] Failed to update header with correct duration.
[flv @ 0x858c440] Failed to update header with correct filesize.
使用以下推流命令依然会打印以上信息。
ffmpeg -re -i test.mp4 -c copy -f flv rtmp://localhost:1935/live/tuiliu1
原文https://zhuanlan.zhihu.com/p/436334751
★文末名片可以免费领取音视频开发学习资料,内容包括(FFmpeg ,webRTC ,rtmp ,hls ,rtsp ,ffplay ,srs)以及音视频学习路线图等等。文章来源:https://www.toymoban.com/news/detail-597306.html
见下方!↓↓↓↓↓↓↓↓↓↓↓↓↓↓↓↓↓↓↓↓↓↓↓↓↓↓↓↓↓↓↓↓↓↓↓↓↓文章来源地址https://www.toymoban.com/news/detail-597306.html
到了这里,关于音视频开发---ffmpeg rtmp推流的文章就介绍完了。如果您还想了解更多内容,请在右上角搜索TOY模板网以前的文章或继续浏览下面的相关文章,希望大家以后多多支持TOY模板网!


