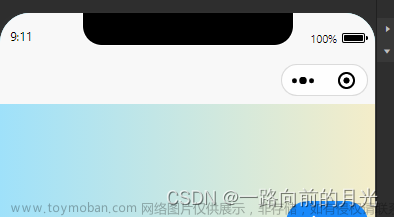
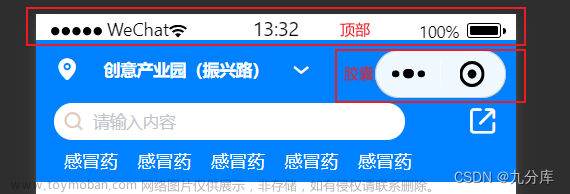
效果图

代码
app.json文件下
"window":{
    "navigationStyle": "custom" //增加此属性
  },
app.js文件
//计算高度
App({
  onLaunch() {
    wx.getSystemInfo({ // 获取设备信息
      success: (res) => {
        this.globalData.systeminfo = res
        //导航栏
        let statusBarHeight = res.statusBarHeight // 状态栏高度
        let headerPosi = wx.getMenuButtonBoundingClientRect()  // 胶囊位置信息
        let btnPosi = { // 胶囊实际位置,坐标信息不是左上角原点
          height: headerPosi.height,
          width: headerPosi.width,
          // 胶囊top - 状态栏高度
          top: headerPosi.top - statusBarHeight,
          // 胶囊bottom - 胶囊height - 状态栏height (现胶囊bottom 为距离导航栏底部的长度)
          bottom: headerPosi.bottom - headerPosi.height - statusBarHeight,
          // 屏幕宽度 - 胶囊right
          right: res.screenWidth - headerPosi.right
        }
        // 原胶囊bottom + 现胶囊bottom
        this.globalData.navbarHeight = headerPosi.bottom + btnPosi.bottom
        this.globalData.statusBarHeight = statusBarHeight
        this.globalData.navbarBtn = btnPosi
        wx.setStorageSync('navbarHeight', this.globalData.navbarHeight)

      },
    })
    // 获得胶囊按钮位置信息
    this.globalData.headerBtnPosi = wx.getMenuButtonBoundingClientRect()
  },
  globalData: {
    headerBtnPosi: {} ,// 胶囊按钮位置信息
    navbarHeight: 0,
    statusBarHeight: 0,
    navbarBtn: 0
  }
})
组件文件components文件夹下新增navBar文件
index.js
// components/navBar/index.js
const app = getApp();
Component({
  /**
   * 组件的属性列表
   */
  properties: {
    navbarData: { // 由父页面传递的数据
      type: Object,
      value: {
        position:'true'
      },
      observer: function (newVal, oldVal) { }
    }
  },

  /**
   * 组件的初始数据
   */
  data: {
    navbarHeight: app.globalData.navbarHeight, // 顶部导航栏高度
    navbarBtn: app.globalData.navbarBtn,
    statusBarHeight: app.globalData.statusBarHeight ,// 状态栏高度
    imgStatus: true
  },

  /**
   * 生命周期函数--监听页面加载
   */
  onLoad(options) {
    console.log("nav",this.data.navbarHeight, this.data);
    let statusBarHeight = app.globalData.systeminfo.statusBarHeight // 状态栏高度
    let headerPosi = app.globalData.headerBtnPosi // 胶囊位置信息

    let btnPosi = { // 胶囊实际位置,坐标信息不是左上角原点
      height: headerPosi.height,
      width: headerPosi.width,
      // 胶囊top - 状态栏高度
      top: headerPosi.top - statusBarHeight,
      // 胶囊bottom - 胶囊height - 状态栏height (现胶囊bottom 为距离导航栏底部的长度)
      bottom: headerPosi.bottom - headerPosi.height - statusBarHeight,
      // 屏幕宽度 - 胶囊right
      right: app.globalData.systeminfo.screenWidth - headerPosi.right
    }

    this.setData({
      navbarHeight: headerPosi.bottom + btnPosi.bottom, // 原胶囊bottom + 现胶囊bottom
      statusBarHeight: statusBarHeight,
      navbarBtn: btnPosi,
    })
    console.log("nav",this.data.navbarHeight);
    // this.triggerEvent('updateData',{cardIssuersCode:this.data.navbarHeight})
    console.log("navbarHeight",this.data.navbarHeight)
    console.log("navbarBtn-top",this.data.navbarBtn.height)
    console.log("navbarBtn-height",this.data.navbarBtn.top)

    console.log('jksjdfkjkfsf')
  },

  lifetimes: {
    attached: function(options) {
      // 在组件实例进入页面节点树时执行
    }
  },

  /**
   * 组件的方法列表
   */
  methods: {
    _goBack: function () {
      let pages = getCurrentPages();
      if(pages.length==1) {
        wx.switchTab({
          url: '/pages/index/index',
        });
        return;
      }
      wx.navigateBack({
        delta: 1
      });
    }
  }
})
index.wxss
.container {
  width: 100%;
  height: 100px;
  z-index: 1000;
}
.navBar {
  display: flex;
  align-items: flex-start;
  justify-content: center;
  width: 100%;
}
.navBar .navImg {
  position: absolute;
  left: 33rpx;
  display: flex;
  align-items: center;
  z-index: 10;
}
.navBar .navImg .img {
  width: 50rpx;
  height: 50rpx;
}
.navBar text {
  font-size: 35rpx;
}
.textTitle {
  font-weight: bold;
}
.navBarPosition {
  width: 100%;
  height: 100px;
  position: fixed;
  z-index: 1000;
}
.img {
  width: 100%;
  height: 100%;
  object-fit: cover;
}
.textColor {
  color: white;
  position: absolute;
  width: 672rpx;
  text-align: center;
  font-weight: bold;
}
.navText {
  position: absolute;
  width: 672rpx;
  text-align: center;
  font-weight: bold;
}
index.wxml
<view class="navBar {{navbarData.position?'navBarPosition':''}}" style="height: {{navbarHeight}}px;">
  <view class="navImg" style='margin-top: {{statusBarHeight}}px;top: 18rpx' >
   //左箭头图标自己更换本地文件
    <image src="/assets/images/make/back.png" bindtap="_goBack" wx:if="{{imgStatus}}" class="img"></image>
    <image src="http://res.ctmus.cn/festival-h5.v19/resource/2022/11/29/580c1edc-cb7d-4726-b3bc-aabdc397820b.png" bindtap="_goBack" style="width: 40rpx; height: 40rpx;" wx:else=""></image>
  </view>
  <view  style='line-height:{{navbarBtn.height + navbarBtn.top}}px;margin-top: {{statusBarHeight}}px; top: 8rpx' class="{{imgStatus ? 'navText' : 'textColor'}}" >
    <text class="textTitle">{{navbarData.title }}</text>
  </view>

  <!-- <view style="background-color: pink; height: 500rpx;"></view> -->
</view>
使用文章来源:https://www.toymoban.com/news/detail-599707.html
<navBar navbarData="{{navbarData}}"></navBar>
js文章来源地址https://www.toymoban.com/news/detail-599707.html
Page({
  data: {
    navbarData: {
      // 是否显示左上角胶囊按钮 1 显示 0 不显示
      title: '选择视频模板' // 导航栏 中间的标题
    },
  },

})
到了这里,关于小程序自定义导航栏的文章就介绍完了。如果您还想了解更多内容,请在右上角搜索TOY模板网以前的文章或继续浏览下面的相关文章,希望大家以后多多支持TOY模板网!


