目录
ES6 模块化
1、什么是 ES6 模块化规范
2、在 node.js 中体验 ES6 模块化
3、ES6 模块化的基本语法
Promise
1. 回调地狱
2、Promise 的基本概念
3、基于回调函数按顺序读取文件内容
4.、基于 then-fs 读取文件内容
4.1 then-fs 的基本使用
4.2 .then() 方法的特性
4.3 基于 Promise 按顺序读取文件的内容
4.4 通过 .catch 捕获错误
4.5 Promise.all() 方法
4.6 Promise.race() 方法
5. 基于 Promise 封装读文件的方法
1 getFile 方法的基本定义
2 创建具体的异步操作
3 获取 .then 的两个实参
4 调用 resolve 和 reject 回调函数
async/await
1. 什么是 async/await
2. async/await 的基本使用
3. async/await 的使用注意事项
EventLoop
1. JavaScript 是单线程的语言
2. 同步任务和异步任务
3. 同步任务和异步任务的执行过程
4. EventLoop 的基本概念
5. 结合 EventLoop 分析输出的顺序
宏任务和微任务
1. 什么是宏任务和微任务
2. 宏任务和微任务的执行顺序
API 接口案例
1. 案例需求
2. 主要的实现步骤
3. 搭建项目的基本结构
4. 创建基本的服务器
5. 创建 db 数据库操作模块
6. 创建 user_ctrl 模块
7. 创建 user_router 模块
8. 导入并挂载路由模块
9. 使用 try…catch 捕获异常
ES6 模块化
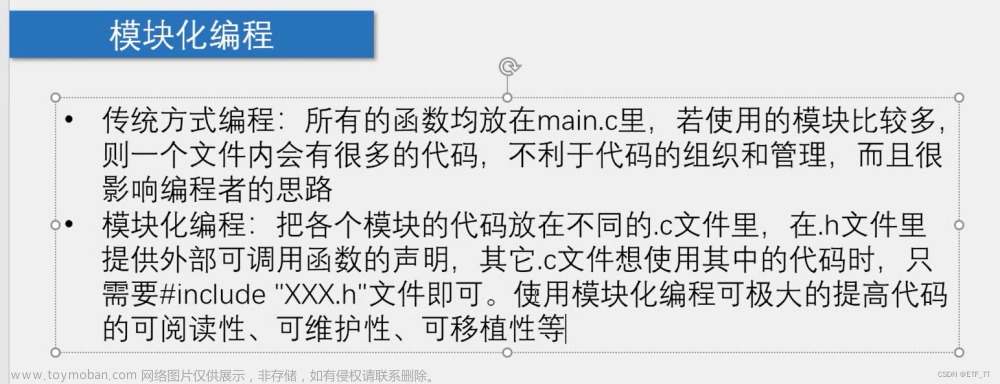
1、什么是 ES6 模块化规范
- 每个 js 文件都是一个独立的模块
- 导入其它模块成员使用 import 关键字
- 向外共享模块成员使用 export 关键字
2、在 node.js 中体验 ES6 模块化
3、ES6 模块化的基本语法
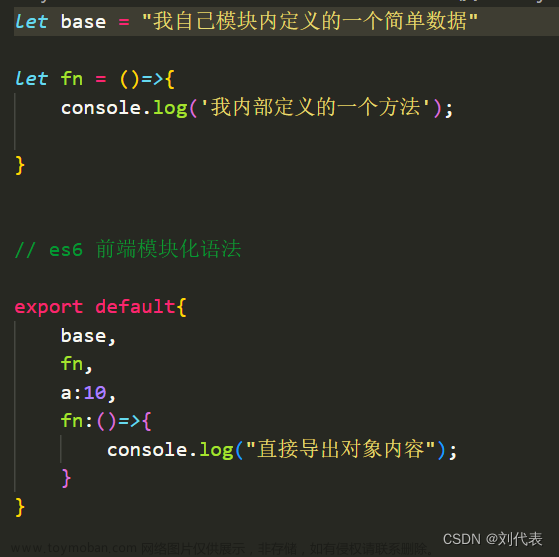
- 默认导出与默认导入
- 按需导出与按需导入
- 直接导入并执行模块中的代码
Promise
1. 回调地狱
2、Promise 的基本概念
- 我们可以创建 Promise 的实例 const p = new Promise()
- new 出来的 Promise 实例对象,代表一个异步操作
- 每一次 new Promise() 构造函数得到的实例对象,
- 都可以通过原型链的方式访问到 .then() 方法,例如 p.then()
- p.then(成功的回调函数,失败的回调函数)
- p.then(result => { }, error => { })
- 调用 .then() 方法时,成功的回调函数是必选的、失败的回调函数是可选的
3、基于回调函数按顺序读取文件内容
4.、基于 then-fs 读取文件内容
npm i then-fs4.1 then-fs 的基本使用
//通过默认导入

import thenFs from 'then-fs'
4.2 .then() 方法的特性
4.3 基于 Promise 按顺序读取文件的内容
import thenFs from 'then-fs'

thenFs
  .readFile('./files/1.txt', 'utf8')
  .then((r1) => {
    console.log(r1)
    return thenFs.readFile('./files/2.txt', 'utf8')
  })
  .then((r2) => {
    console.log(r2)
    return thenFs.readFile('./files/3.txt', 'utf8')
  })
  .then((r3) => {
    console.log(r3)
  })
4.4 通过 .catch 捕获错误
.catch((err) => {
    console.log(err.message)
})4.5 Promise.all() 方法
import thenFs from 'then-fs'

const promiseArr = [
  thenFs.readFile('./files/3.txt', 'utf8'),
  thenFs.readFile('./files/2.txt', 'utf8'),
  thenFs.readFile('./files/1.txt', 'utf8'),
]

Promise.all(promiseArr).then(result => {
  console.log(result)
})
4.6 Promise.race() 方法
Promise.race(promiseArr).then(result => {
  console.log(result)
})
5. 基于 Promise 封装读文件的方法
1 getFile 方法的基本定义
function getFile(fpath) {
return new Promise
}
2 创建具体的异步操作
function getFile(fpath) {
  return new Promise(function () {
    fs.readFile(fpath, 'utf8', (err, dataStr) => {

    })
  })
}
3 获取 .then 的两个实参
通过 .then() 指定的成功和失败的回调函数,可以在 function 的形参中进行接收,
4 调用 resolve 和 reject 回调函数
Promise 异步操作的结果,可以调用 resolve 或 reject 回调函数进行处理。
import fs from 'fs'

function getFile(fpath) {
  return new Promise(function (resolve, reject) {
    fs.readFile(fpath, 'utf8', (err, dataStr) => {
      if (err) return reject(err)
      resolve(dataStr)
    })
  })
}

getFile('./files/11.txt')
  .then((r1) => {
    console.log(r1)
  })
  .catch((err) => console.log(err.message))
async/await
1. 什么是 async/await
2. async/await 的基本使用
import thenFs from 'then-fs'

async function getAllFile() {
  const r1 = await thenFs.readFile('./files/1.txt', 'utf8')
  console.log(r1)
}

getAllFile()
3. async/await 的使用注意事项
- 如果在 function 中使用了 await,则 function 必须被 async 修饰
-
在 async 方法中,第一个 await 之前的代码会同步执行,await 之后的代码会异步执行
console.log('A')
async function getAllFile() {
  console.log('B')
  const r1 = await thenFs.readFile('./files/1.txt', 'utf8')
  console.log(r1)
  const r2 = await thenFs.readFile('./files/2.txt', 'utf8')
  console.log(r2)
  const r3 = await thenFs.readFile('./files/3.txt', 'utf8')
  console.log(r3)
  console.log('D')
}

getAllFile()
console.log('C')


//输出 结果
 A
B
 111、、
D
EventLoop
1. JavaScript 是单线程的语言
JavaScript 是一门单线程执行的编程语言。也就是说,同一时间只能做一件事情。
2. 同步任务和异步任务
- 又叫做非耗时任务,指的是在主线程上排队执行的那些任务
- 只有前一个任务执行完毕,才能执行后一个任务
- 又叫做耗时任务,异步任务由 JavaScript 委托给宿主环境进行执行
- 当异步任务执行完成后,会通知 JavaScript 主线程执行异步任务的回调函数
3. 同步任务和异步任务的执行过程
- 同步任务由 JavaScript 主线程次序执行
- 异步任务委托给宿主环境执行
- 已完成的异步任务对应的回调函数,会被 加入到任务队列中等待执行
- JavaScript 主线程的执行栈被清空后,会 读取任务队列中的回调函数,次序执行
- JavaScript 主线程不断重复上面的第 4 步
4. EventLoop 的基本概念
5. 结合 EventLoop 分析输出的顺序
同步任务。会根据代码的先后顺序依次被执行
宏任务和微任务
1. 什么是宏任务和微任务
- 异步 Ajax 请求、
- setTimeout、setInterval、
- 文件操作
- 其它宏任务
- Promise.then、.catch 和 .finally
- process.nextTick
- 其它微任务
2. 宏任务和微任务的执行顺序
API 接口案例
1. 案例需求
- 第三方包 express 和 mysql2
- ES6 模块化
- Promise
- async/await
2. 主要的实现步骤
- 搭建项目的基本结构
- 创建基本的服务器
- 创建 db 数据库操作模块
- 创建 user_ctrl 业务模块
- 创建 user_router 路由模块
3. 搭建项目的基本结构
创建一个文件目录 用vscode打开
初始包 npm init -y
- 在 package.json 中声明 "type": "module"
- 运行 npm install express@4.17.1 mysql2@2.2.5
4. 创建基本的服务器
新建app.js
import express from 'express'

const app = express()


app.listen(80, () =>{
  console.log('serve run 127.0.0.1')
})
运行 nodemon app.js
5. 创建 db 数据库操作模块
新建 db/index.js
数据库中必须有数据
import mysql from 'mysql2'

const pool = mysql.createPool({
  host: '127.0.0.1',
  port: '3306',
  database: 'test',
  user: 'root',
  password: '123456',
})

export default pool.promise()
6. 创建 user_ctrl 模块
新建 user_ctrl.js 运行 :node user_ctrl.js
import db from '../db/index.js'

export async function getAllUser(req, res){
  const [rows] = await db.query('select id, username, password from user' )
  console.log(rows)
  res.send({
    status: 0,
    message: '获取用户成功',
    data: rows,
  })
}
7. 创建 user_router 模块
新建route /user_router.js 文章来源:https://www.toymoban.com/news/detail-604020.html
import express from 'express'
import { getAllUser } from '../controller/user_ctrl.js'

const router = new express.Router()
router.get('/user', getAllUser)

export default router
8. 导入并挂载路由模块
import express from 'express'
import userRouter  from './router/user_router.js'

const app = express()

app.use('/api', userRouter)

app.listen(80, () =>{
  console.log('serve run 127.0.0.1')
})
9. 使用 try…catch 捕获异常
import db from '../db/index.js'

export async function getAllUser(req, res){
try {
  const [rows] = await db.query('select id, username, password from user' )
  console.log(rows)
  res.send({
    status: 0,
    message: '获取用户成功',
    data: rows,
  })
}catch(err){
  res.send({
    status: 1,
    message: '获取用户失败',
    desc: err.message,
  })
}
}
运行 :nodemon app.js文章来源地址https://www.toymoban.com/news/detail-604020.html
到了这里,关于ES6模块化与异步编程高级用法的文章就介绍完了。如果您还想了解更多内容,请在右上角搜索TOY模板网以前的文章或继续浏览下面的相关文章,希望大家以后多多支持TOY模板网!


