Vue开发中Element是一个比较受欢迎的界面库,实际开发中Vue2搭配Element UI开发,Vue3搭配Element plus开发,今天就用Vue2 + Element来开发登录页面。
目录
1.Element UI介绍
1.1官网
1.2element-ui安装
2.开发环境准备
2.1core-js安装
2.2浏览器自动打开和关闭useEslint校验配置
2.3Element UI全局引入
2.4Element UI按需引入
2.5 SASS: CSS预处理器
2.6 LASS: 另外一个CSS预处理器
2.7 默认CSS重置文件:
2.8 图标库安装
2.9 axios和路由安装
3.登录页面开发
3.1 版本1
3.2 版本2
3.3 版本3
3.4 版本4
4.运行效果
4.1 代码结构
4.2 效果
5.JS中var let const区别
1.Element UI介绍
Element UI是一套为开发者、设计师和产品经理准备的基于Vue 2.0的桌面端元组件库,由饿了么前端团队推出。它并不依赖于Vue,却是一个十分适合Vue项目的框架。可使用Element UI轻松制作出网页,为前端开发人员大大减轻了代码负担。
1.1官网
https://element.eleme.cn/#/en-US/component/installation
1.2element-ui安装
npm i element-ui -S
2.开发环境准备
2.1core-js安装
core-js 它是JavaScript标准库的 polyfill(垫片/补丁), 新功能的es'api'转换为大部分现代浏览器都可以支持运行的一个'api' 补丁包集合。
npm install --save core-js
2.2浏览器自动打开和关闭useEslint校验配置
文件:
config/index.js
设置:
autoOpenBrowser: true
useEslint: false
2.3Element UI全局引入
需要在main.js引入如下模块
import ElementUI from 'element-ui'
import 'element-ui/lib/theme-chalk/index.css'
Vue.use(ElementUI)
2.4Element UI按需引入
参考网址:
https://element.eleme.cn/#/zh-CN/component/quickstart
babel安装:
cnpm install babel-plugin-component -D
babel配置:.babelrc中增加
"plugins": [
[
"component",
{
"libraryName": "element-ui",
"styleLibraryName": "theme-chalk"
}
]
]
2.5 SASS: CSS预处理器
官网
https://www.sass.hk/
安装:
sudo apt install ruby-sass
npm i sass-loader@7 node-sass
node-sass版本过高导致的,卸载重装低版本:
(1) 卸载已安装版本 npm uninstall node-sass
(2) 安装 npm install node-sass@4.14.1
(3) npm run dev
引用:
<style lang="scss">
.hello {
background: yello;
.el-button {
color: red;
}
}
</style>
查看版本:
sass -v
2.6 LASS: 另外一个CSS预处理器
安装:
npm i less@3 less-loader@7 -S --force
引用:
<style lang="less">
.hello {
background: yello;
.el-button {
color: red;
}
}
</style>
2.7 默认CSS重置文件:
https://meyerweb.com/eric/tools/css/reset/
2.8 图标库安装
npm i -D font-awesome
2.9 axios和路由安装
axios:
npm i axios -S
路由:
npm i vue-router@3.5.3 -S
3.登录页面开发
src/main.js
//import '../plugins/element.js'
import Vue from 'vue'
import VueRouter from 'vue-router'
import Home from './components/Home.vue'
//import About from './components/HelloWorld.vue'
import NotFound from './components/MyFirst.vue'
import App from './App'
import 'font-awesome/css/font-awesome.min.css'
import axios from 'axios'/*
//按需加载
import { Button, Tag } from 'element-ui'
Vue.use(Button)
Vue.use(Tag)
*/// 挂载到原型就可以全局使用
Vue.prototype.axios = axios
import ElementUI from 'element-ui'
import 'element-ui/lib/theme-chalk/index.css'
Vue.use(ElementUI)
Vue.use(VueRouter)const routes = [
{ path: '/', redirect: '/login', component: () => import('@/components/Login') },
{ path: '/login', name: 'Login', component: () => import('@/components/Login') },
{ path: '/home', component: Home },
//{ path: '/about', component: About },
//使用懒加载,官方推荐
//{ path: '/about', component: () => import('@/components/HelloWorld.vue') },
//{ path: '/about', component: () => import('@/components/HelloWorld') },
//异步组件加载
{ path: '/about', component: resolve => require(['@/components/HelloWorld'], resolve)},
{ path: '*', component: NotFound }
]const router = new VueRouter({
mode: 'history',
routes
})new Vue({
router,
render: h => h(App)
}).$mount('#app2')index.html
<!DOCTYPE html>
<html>
<head>
<meta charset="utf-8">
<meta name="viewport" content="width=device-width,initial-scale=1.0">
<title>demo</title>
</head>
<body>
<div id="app2"></div>
<!-- built files will be auto injected -->
</body>
</html>
src/App.vue
<template>
<div id="myapp1111" class="hello">
<router-link to="/">Home</router-link>
<router-link to="/about">About</router-link>
<router-view></router-view>
<h1>hello</h1>
<el-button>你好</el-button>
<el-button type="primary">你好</el-button>
<el-button type="info">你好</el-button>
<el-button type="danger">你好</el-button>
<el-button type="success">你好</el-button>
<el-tag> fsfsd dsd dsfv</el-tag>
<i class="fa fa-user"></i>
<i class="fa fa-users"></i>
</div>
</template><style lang="scss">
.hello {
background: yello;
.el-button {
color: red;
}
}
@import url('./assets/css/reset.css')
</style>
src/assets/css/reset.css
/* http://meyerweb.com/eric/tools/css/reset/
v2.0 | 20110126
License: none (public domain)
*/html, body, div, span, applet, object, iframe,
h1, h2, h3, h4, h5, h6, p, blockquote, pre,
a, abbr, acronym, address, big, cite, code,
del, dfn, em, img, ins, kbd, q, s, samp,
small, strike, strong, sub, sup, tt, var,
b, u, i, center,
dl, dt, dd, ol, ul, li,
fieldset, form, label, legend,
table, caption, tbody, tfoot, thead, tr, th, td,
article, aside, canvas, details, embed,
figure, figcaption, footer, header, hgroup,
menu, nav, output, ruby, section, summary,
time, mark, audio, video {
margin: 0;
padding: 0;
border: 0;
font-size: 100%;
font: inherit;
vertical-align: baseline;
}
/* HTML5 display-role reset for older browsers */
article, aside, details, figcaption, figure,
footer, header, hgroup, menu, nav, section {
display: block;
}
body {
line-height: 1;
}
ol, ul {
list-style: none;
}
blockquote, q {
quotes: none;
}
blockquote:before, blockquote:after,
q:before, q:after {
content: '';
content: none;
}
table {
border-collapse: collapse;
border-spacing: 0;
}
src/components/Home.vue
<template>
<div>
<h1>Home Page</h1>
<button @click="goToAbout">Go to About</button>
</div>
</template><script>
export default {
methods: {
goToAbout () {
this.$router.push('/about')
}
}
}
</script>
3.1 版本1
src/components/Login_V1.vue
<template>
<div class="login">
<el-card class="box-card">
<div slot="header" class="clearfix">
<span>后台管理系统</span>
</div><el-form label-width="100px" :model="form" ref="form">
<el-form-item label="用户名" prop='username'
:rules="[
{ required: true, message: '请输入用户名', trigger: 'blur'},
{
min: 4,
max: 10,
message: '长度在4-10位之间',
trigger: 'blur'
}
]"
>
<el-input v-model="form.username"></el-input>
</el-form-item>
<el-form-item label="密码" prop='password'
:rules="[
{ required: true, message: '请输入密码', trigger: 'blur'},
{
min: 6,
max: 12,
message: '长度在6-12位字符',
trigger: 'blur'
}
]"
>
<el-input type='password' v-model="form.password"></el-input>
</el-form-item>
<el-form-item>
<el-button type='primary' @click="login('form')">登录</el-button>
</el-form-item>
</el-form>
</el-card>
</div>
</template><script>
export default {
data () {
return {
form: {
username: '',
password: ''
}
}
},
methods: {
login(form) {
this.$refs[form].validate((valid) => {
if (valid) {
console.log(this.form)
} else {
console.error(this.form)
}
})
}
}
}
</script><style lang='scss'>
.login {
width: 100%;
height: 100%;
position: absolute;
background: #409EFF;
.box-card {
width: 450px;
margin: 200px auto;
.el-card_header {
font-size: 34px;
}
.el-button {
width: 100%;
}
}
}
</style>
3.2 版本2
src/components/Login_V2.vue
<template>
<div class="login">
<el-card class="box-card">
<div slot="header" class="clearfix">
<span>后台管理系统</span>
</div><el-form label-width="100px" :model="form" ref="form">
<el-form-item label="用户名" prop='username'
:rules="[
{ required: true, message: '请输入用户名', trigger: 'blur'},
{
min: 4,
max: 10,
message: '长度在4-10位之间',
trigger: 'blur'
}
]"
>
<el-input v-model="form.username"></el-input>
</el-form-item>
<el-form-item label="密码" prop='password'
:rules="[
{ required: true, message: '请输入密码', trigger: 'blur'},
{
min: 6,
max: 12,
message: '长度在6-12位字符',
trigger: 'blur'
}
]"
>
<el-input type='password' v-model="form.password"></el-input>
</el-form-item>
<el-form-item>
<el-button type='primary' @click="login('form')">登录</el-button>
</el-form-item>
</el-form>
</el-card>
</div>
</template><script>
export default {
data () {
return {
form: {
username: '',
password: ''
}
}
},
methods: {
login(form) {
this.$refs[form].validate((valid) => {
if (valid) {
console.log(this.form)
//this.$router.push('/about')
this.axios.post('https://www.baidu.com/', this.form).then(res => {
console.log(res)
if (res.data.status === 200) {
localStorage.setItem('username', res.data.username)
this.$message({message: res.data.message, type: 'success'})
this.$router.push('/home')
}
})
} else {
console.error(this.form)
}
})
}
}
}
</script><style lang='scss'>
.login {
width: 100%;
height: 100%;
position: absolute;
background: #409EFF;
.box-card {
width: 450px;
margin: 200px auto;
.el-card_header {
font-size: 34px;
}
.el-button {
width: 100%;
}
}
}
</style>
3.3 版本3
src/components/Login_V3.vue
<template>
<div class="login">
<el-card class="box-card">
<div slot="header" class="clearfix">
<span>后台管理系统</span>
</div><el-form label-width="100px" :model="form" ref="form" :rules='rules'>
<el-form-item label="用户名" prop='username'>
<el-input v-model="form.username"></el-input>
</el-form-item>
<el-form-item label="密码" prop='password'>
<el-input type='password' v-model="form.password"></el-input>
</el-form-item>
<el-form-item>
<el-button type='primary' @click="login('form')">登录</el-button>
</el-form-item>
</el-form>
</el-card>
</div>
</template><script>
export default {
data () {
const validateName = (rule, value, callback) => {
let reg = /(^[a-zA-Z0-9]{4,10}$)/;
if (value === "") {
callback(new Error("请输入用户名"));
} else if (!reg.test(value)) {
callback(new Error("请输入4-10用户名"));
} else {
callback();
}
};const validatePass = (rule, value, callback) => {
let pass = /^\S*(?=\S{6,12})(?=\S*\d)(?=\S*[A-Z])(?=\S*[a-z])(?=\S*[!@#$%^&*? ])\S*$/;
if (value === "") {
callback(new Error("请输入密码"));
} else if (!pass.test(value)) {
callback(new Error("请输入6-12位密码需要包含大小写和数字及特殊字符"));
} else {
callback();
}
};return {
form: {
username: "",
password: "",
},
rules: {
username: [{validator: validateName, required: true, trigger: "blur"}],
password: [{validator: validatePass, required: true, trigger: "blur"}],
},
}
},
methods: {
login(form) {
this.$refs[form].validate((valid) => {
if (valid) {
console.log(this.form)
//this.$router.push('/about')
this.axios.post('https://www.baidu.com/', this.form).then(res => {
console.log(res)
if (res.data.status === 200) {
localStorage.setItem('username', res.data.username)
this.$message({message: res.data.message, type: 'success'})
this.$router.push('/home')
}
})
} else {
console.error(this.form)
}
})
}
}
}
</script><style lang='scss'>
.login {
width: 100%;
height: 100%;
position: absolute;
background: #409EFF;
.box-card {
width: 450px;
margin: 200px auto;
.el-card_header {
font-size: 34px;
}
.el-button {
width: 100%;
}
}
}
</style>
3.4 版本4
src/components/Login.vue
<template>
<div class="login">
<el-card class="box-card">
<div slot="header" class="clearfix">
<span>业务后台管理系统</span>
</div><el-form label-width="100px" :model="form" ref="form" :rules='rules'>
<el-form-item label="用户名" prop='username'>
<el-input v-model="form.username"></el-input>
</el-form-item>
<el-form-item label="密码" prop='password'>
<el-input type='password' v-model="form.password"></el-input>
</el-form-item>
<el-form-item>
<el-button type='primary' @click="login('form')">登录</el-button>
</el-form-item>
</el-form>
</el-card>
</div>
</template><script>
//登录验证的封装
import {nameRule, passRule} from '../utils/validate.js'import {setToken} from '@/utils/dealtoken.js'
export default {
data () {
return {
form: {
username: "",
password: ""
},
rules: {
username: [{validator: nameRule, required: true, trigger: "blur"}],
password: [{validator: passRule, required: true, trigger: "blur"}]
}
}
},
methods: {
login(form) {
this.$refs[form].validate((valid) => {
if (valid) {
console.log(this.form)
//this.$router.push('/about')
this.axios.post('https://www.baidu.com/', this.form).then(res => {
console.log(res)
if (res.data.status === 200) {
//localStorage.setItem('username', res.data.username)
setToken('username', res.data.username)
this.$message({message: res.data.message, type: 'success'})
this.$router.push('/home')
}
})
} else {
console.error(this.form)
}
})
}
}
}
</script><style lang='scss'>
.login {
width: 100%;
height: 100%;
position: absolute;
background: #409EFF;
.box-card {
width: 450px;
margin: 200px auto;
.el-card_header {
font-size: 34px;
}
.el-button {
width: 100%;
}
}
}
</style>
src/utils/validate.js
//用户名匹配
export function nameRule (rule, value, callback) {
let reg = /(^[a-zA-Z0-9]{4,10}$)/;
if (value === "") {
callback(new Error("请输入用户名"));
} else if (!reg.test(value)) {
callback(new Error("请输入4-10用户名"));
} else {
callback();
}
}//密码匹配
export function passRule (rule, value, callback) {
let pass = /^\S*(?=\S{6,12})(?=\S*\d)(?=\S*[A-Z])(?=\S*[a-z])(?=\S*[!@#$%^&*? ])\S*$/;
if (value === "") {
callback(new Error("请输入密码"));
} else if (!pass.test(value)) {
callback(new Error("请输入6-12位密码需要包含大小写和数字及特殊字符"));
} else {
callback();
}
}
src/utils/dealtoken.js
// Token的封装 Token存放在localStorage
export function setToken(tokenkey, token) {
return localStorage.setItem(tokenkey, token)
}export function getToken(tokenkey) {
return localStorage.getItem(tokenkey)
}export function removeToken(tokenkey) {
return localStorage.removeItem(tokenkey)
}
4.运行效果
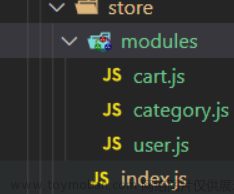
4.1 代码结构


4.2 效果

5.JS中var let const区别
1.var
使用关键字 var 声明的所有变量和函数都被提升到其作用域的顶部。
(1) var在函数内声明变量时。该变量在该函数之外无法访问,因为在这种情况下它具有函数作用域。
(2) var在函数外声明变量时,它将具有全局作用域。这意味着它可以在你的代码中的任何地方访问。
(3) var 的变量是可声明和可重新分配的。这意味着您可以重新声明相同的变量并重新分配它,而不会出现任何问题。
例如:
var name = 'zhangsan';
var name = 'lisi';
// 'lisi'
console.log(name) 文章来源:https://www.toymoban.com/news/detail-604668.html
2.let & const
ES6 中引入了关键字 let 和 const 作为 var 的替代。
与关键字 var 不同,这两个关键字具有块作用域。这意味着当你在块中声明它们时,它们只能在该块 {} 内访问。
使用 let 和 const 声明的变量和函数不会被提升。
用关键字let声明的变量是可重新分配的,而不是可重新声明的。虽然使用关键字const声明的变量不可重新分配且不可重新声明。
举例:
const name = "zhangsan";
//Error
const name = lisi;
let x = 1;
x = 2;
//"zhangsan"
console.log(name);
// 2
console.log(x); 文章来源地址https://www.toymoban.com/news/detail-604668.html
到了这里,关于Vue系列第四篇:Vue2 + Element开发登录页面的文章就介绍完了。如果您还想了解更多内容,请在右上角搜索TOY模板网以前的文章或继续浏览下面的相关文章,希望大家以后多多支持TOY模板网!