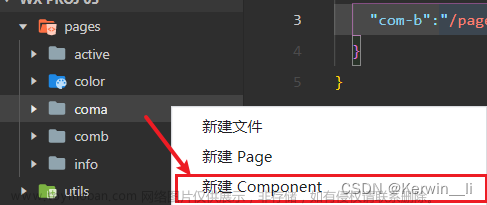
这个uniapp的微信小程序项目使用的是 VUE2
首页
首页只提供了一个跳转按钮。
<template>
	<view>
		<navigator url="/pages/myPage/myPage?name=jerry" hover-class="navigator-hover">
			<button type="default">跳转到新页面</button>
		</navigator>
	</view>
</template>

<script>
	export default {
		data() {return { }},
	}
</script>

<style>
</style>
页面
<template>
	<view> 页面 <parent-component>parent-component</parent-component> </view>
</template>

<script>
	export default {
		data() {return { }},
		onInit(option){console.log(`页面 onInit: ${JSON.stringify(option)}`)},
		onLoad(option){console.log(`页面 onLoad: ${JSON.stringify(option)}`)},
		onShow(option){console.log(`页面 onShow: ${JSON.stringify(option)}`)},
		onReady(option){console.log(`页面 onReady: ${JSON.stringify(option)}`)},
		onHide(option){console.log(`页面 onHide: ${JSON.stringify(option)}`)},
		onUnload(option){console.log(`页面 onUnload: ${JSON.stringify(option)}`)},
		onResize(option){console.log(`页面 onResize: ${JSON.stringify(option)}`)},
		onPullDownRefresh(option){console.log(`页面 onPullDownRefresh: ${JSON.stringify(option)}`)},
		onReachBottom(option){console.log(`页面 onReachBottom: ${JSON.stringify(option)}`)},
		onTabItemTap(option){console.log(`页面 onTabItemTap: ${JSON.stringify(option)}`)},
		onShareAppMessage(option){console.log(`页面 onShareAppMessage: ${JSON.stringify(option)}`)},
		onPageScroll(option){console.log(`页面 onPageScroll: ${JSON.stringify(option)}`)},
		onShareTimeline(option){console.log(`页面 onShareTimeline: ${JSON.stringify(option)}`)},
		onAddToFavorites(option){console.log(`页面 onAddToFavorites: ${JSON.stringify(option)}`)},
	}
</script>

<style>
</style>
父组件
<template>
	<view> 父组件 <child-component>child-component</child-component> </view>
</template>

<script>
	export default {
		data() {return {};},
		beforeCreate(option){console.log(`父组件 beforeCreate: ${option}`)},
		created(option){console.log(`父组件 created: ${option}`)},
		beforeMount(option){console.log(`父组件 beforeMount: ${option}`)},
		mounted(option){console.log(`父组件 mounted: ${option}`)},
		beforeDestroy(option){console.log(`父组件 beforeDestroy: ${option}`)},
		destroyed(option){console.log(`父组件 destroyed: ${option}`)},
	}
</script>

<style>
</style>
子组件
<template>
	<view> 子组件 </view>
</template>

<script>
	export default {
		data() {return {};},
		beforeCreate(option){console.log(`子组件 beforeCreate: ${option}`)},
		created(option){console.log(`子组件 created: ${option}`)},
		beforeMount(option){console.log(`子组件 beforeMount: ${option}`)},
		mounted(option){console.log(`子组件 mounted: ${option}`)},
		beforeDestroy(option){console.log(`子组件 beforeDestroy: ${option}`)},
		destroyed(option){console.log(`子组件 destroyed: ${option}`)},
	}
</script>

<style>
</style>
完整顺序

// 进入
父组件 beforeCreate: undefined
父组件 created: undefined
父组件 beforeMount: undefined
子组件 beforeCreate: undefined
子组件 created: undefined
子组件 beforeMount: undefined
页面 onLoad: {"name":"jerry"}
页面 onShow: undefined
子组件 mounted: undefined
父组件 mounted: undefined
页面 onReady: undefined

// 退出
页面 onUnload: undefined
子组件 beforeDestroy: undefined
子组件 destroyed: undefined
父组件 beforeDestroy: undefined
父组件 destroyed: undefined
混合一下
虽然文档中将页面与组件的生命周期分开罗列,但是我们在页面和组件中所有的生命周期函数都加上,看下效果:文章来源:https://www.toymoban.com/news/detail-609839.html
// 进入
页面的组件生命周期 beforeCreate: undefined
页面的组件生命周期 created: undefined
页面的组件生命周期 beforeMount: undefined
父组件 beforeCreate: undefined
父组件 created: undefined
父组件 beforeMount: undefined
子组件 beforeCreate: undefined
子组件 created: undefined
子组件 beforeMount: undefined
页面 onLoad: {"name":"jerry"}
页面 onShow: undefined
子组件 mounted: undefined
子组件的页面生命周期 onReady: undefined
父组件 mounted: undefined
父组件的页面生命周期 onReady: undefined
页面的组件lifecycle mounted: undefined
页面 onReady: undefined

// 退出
页面 onUnload: undefined
子组件 beforeDestroy: undefined
子组件 destroyed: undefined
父组件 beforeDestroy: undefined
父组件 destroyed: undefined
页面的组件生命周期 beforeDestroy: undefined
页面的组件生命周期 destroyed: undefined
参考资料
uniap 页面生命周期
uniapp 组件生命周期文章来源地址https://www.toymoban.com/news/detail-609839.html
到了这里,关于uniapp 微信小程序:页面+组件的生命周期顺序的文章就介绍完了。如果您还想了解更多内容,请在右上角搜索TOY模板网以前的文章或继续浏览下面的相关文章,希望大家以后多多支持TOY模板网!


