1. 下载安装包
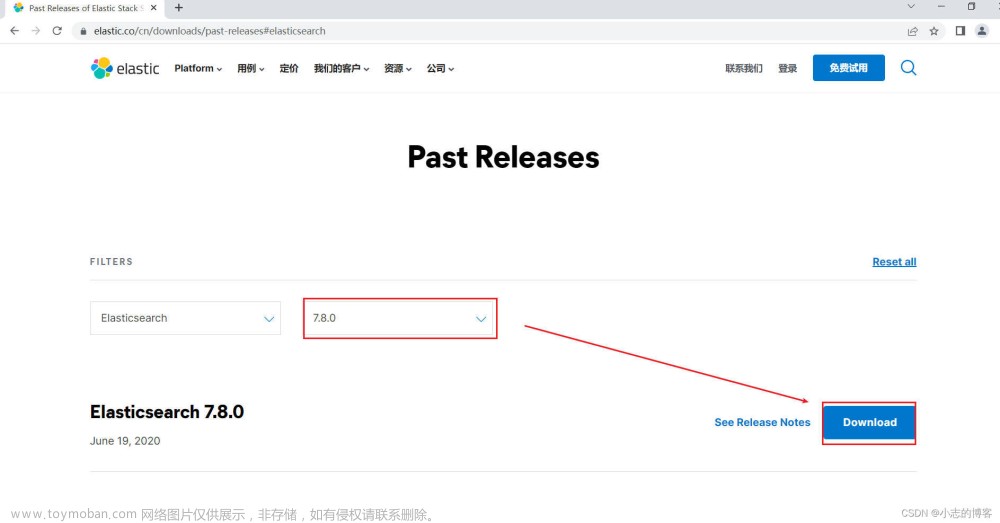
https://www.elastic.co/cn/downloads/elasticsearch选择下载linux版本,elasticsearch-8.0.0-linux-x86_64.tar.gz
2. 系统参数修改
limits.conf和sysctl.conf
vim /etc/security/limits.conf

elastic soft nofile 65536
elastic hard nofile 65536
elastic soft nproc  65536
elastic hard nproc  65536

vim /etc/sysctl.conf
# 添加如下配置

vm.max_map_count=262144

# 执行生效
sysctl -p
3. 新建用户
添加用户并设置密码。
useradd elastic
passwd elastic
如果解压文件是在切换用户以前进行,则可以在创建用户以后,设置目录权限为新建用户。
chown -R elastic:elastic elasticsearch-8.0.0切换用户名:
su - elastic4. 解压文件
tar -zxvf elasticsearch-8.0.0-linux-x86_64.tar.gz5. 配置文件elasticsearch.yml
cluster.name: my-application
node.name: node-1
path.data: /opt/elk/elasticsearch-8.0.0/data
path.logs: /opt/elk/elasticsearch-8.0.0/logs

#开启xpack
xpack.security.enabled:  false
xpack.security.transport.ssl.enabled: false


#开启集群中https传输
#xpack.security.transport.ssl.enabled: true
#xpack.security.transport.ssl.verification_mode: certificate
#xpack.security.transport.ssl.keystore.path: certs/elastic-certificates.p12
#xpack.security.transport.ssl.truststore.path: certs/elastic-certificates.p12

#开启api接口https传输,配置HTTP层TLS/SSL加密传输
#xpack.security.http.ssl.enabled: true
#xpack.security.http.ssl.keystore.path: certs/elastic-certificates.p12
#xpack.security.http.ssl.truststore.path: certs/elastic-certificates.p12

#xpack.security.http.ssl.enabled: true
#xpack.security.http.ssl.keystore.path: "certs/http.p12"


#允许跨域
http.cors.enabled: true
http.cors.allow-origin: "*"
http.cors.allow-headers: Authorization,X-Requested-With,Content-Type,Content-Length
本地测试访问,先不启用https了。
6. 运行服务,浏览器访问
http://localhost:9200/可以看到类似下面的信息,表示安装成功文章来源:https://www.toymoban.com/news/detail-610280.html
{
  "name" : "node-1",
  "cluster_name" : "my-application",
  "cluster_uuid" : "D7re4bfxTpC",
  "version" : {
    "number" : "8.0.0",
    "build_flavor" : "default",
    "build_type" : "tar",
    "build_hash" : "1b6a7ece17463df5ff54",
    "build_date" : "2022-02-03T16:47:57.507843096Z",
    "build_snapshot" : false,
    "lucene_version" : "9.0.0",
    "minimum_wire_compatibility_version" : "7.17.0",
    "minimum_index_compatibility_version" : "7.0.0"
  },
  "tagline" : "You Know, for Search"
}
7. 常见错误,不能以root运行
启动后出现如下提示,表示elasticsearch不能以root运行。文章来源地址https://www.toymoban.com/news/detail-610280.html
[2022-03-08T14:52:15,181][ERROR][o.e.b.ElasticsearchUncaughtExceptionHandler] [bogon] uncaught exception in thread [main]
org.elasticsearch.bootstrap.StartupException: java.lang.RuntimeException: can not run elasticsearch as root
到了这里,关于elasticsearch 8.0 linux安装部署的文章就介绍完了。如果您还想了解更多内容,请在右上角搜索TOY模板网以前的文章或继续浏览下面的相关文章,希望大家以后多多支持TOY模板网!


