前言:
- onnx是microsoft开发的一个中间格式,而onnxruntime简称ort是microsoft为onnx开发的推理引擎。
- 允许使用onnx作为输入进行直接推理得到结果。
py接口的推理过程:
main函数:
if __name__ == "__main__":

    session = onnxruntime.InferenceSession("workspace/yolov5s.onnx", providers=["CPUExecutionProvider"])#建立一个InferenceSession,塞进去的是onnx的路径实际运算

    image = cv2.imread("workspace/car.jpg")
    image_input, M, IM = preprocess(image)
    pred = session.run(["output"], {"images": image_input})[0]
    boxes = post_process(pred, IM)

    for obj in boxes:
        left, top, right, bottom = map(int, obj[:4])
        confidence = obj[4]
        label = int(obj[6])
        cv2.rectangle(image, (left, top), (right, bottom), (0, 255, 0), 2)
        cv2.putText(image, f"{label}: {confidence:.2f}", (left, top+20), 0, 1, (0, 0, 255), 2, 16)

    cv2.imwrite("workspace/python-ort.jpg", image)
session = onnxruntime.InferenceSession("workspace/yolov5s.onnx", providers=["CPUExecutionProvider"])建立一个InferenceSession,塞进去的是onnx的路径,实际运算的后端选用的是CPU
也可以选用cuda等等
    image = cv2.imread("workspace/car.jpg")
    image_input, M, IM = preprocess(image)
之后就是预处理
    pred = session.run(["output"], {"images": image_input})[0]
    boxes = post_process(pred, IM)
session.run就是运行的inference过程
输入第一个是output的name,决定了哪几个节点作为输出,就将这个名字传递给他
第二个是input的dict,这个意思就是如果有好多个输入,那应该是将名字与输入进行一一对应,比如"input1 ":input1 , "input2":input2....
那么在这里output就是一个输出的list,然后我们取第0项
就是这个样子。


预处理:
def preprocess(image, input_w=640, input_h=640):
    scale = min(input_h / image.shape[0], input_w / image.shape[1])
    ox = (-scale * image.shape[1] + input_w + scale  - 1) * 0.5
    oy = (-scale * image.shape[0] + input_h + scale  - 1) * 0.5
    M = np.array([
        [scale, 0, ox],
        [0, scale, oy]
    ], dtype=np.float32)
    IM = cv2.invertAffineTransform(M)

    image_prep = cv2.warpAffine(image, M, (input_w, input_h), flags=cv2.INTER_LINEAR, borderMode=cv2.BORDER_CONSTANT, borderValue=(114, 114, 114))
    image_prep = (image_prep[..., ::-1] / 255.0).astype(np.float32)
    image_prep = image_prep.transpose(2, 0, 1)[None]
    return image_prep, M, IM
文章来源地址https://www.toymoban.com/news/detail-611686.html
后处理:
def nms(boxes, threshold=0.5):

    keep = []
    remove_flags = [False] * len(boxes)
    for i in range(len(boxes)):

        if remove_flags[i]:
            continue

        ib = boxes[i]
        keep.append(ib)
        for j in range(len(boxes)):
            if remove_flags[j]:
                continue

            jb = boxes[j]

            # class mismatch or image_id mismatch
            if ib[6] != jb[6] or ib[5] != jb[5]:
                continue

            cleft,  ctop    = max(ib[:2], jb[:2])
            #例子:
            #将 ib 的前两个元素 [2, 3] 与 jb 的前两个元素 [4, 1] 进行比较,并取其中较大的值。所以结果是 [4, 3]。
            cright, cbottom = min(ib[2:4], jb[2:4])
            cross = max(0, cright - cleft) * max(0, cbottom - ctop)
            union = max(0, ib[2] - ib[0]) * max(0, ib[3] - ib[1]) + max(0, jb[2] - jb[0]) * max(0, jb[3] - jb[1]) - cross
            iou = cross / union
            if iou >= threshold:
                remove_flags[j] = True
    return keep

def post_process(pred, IM, threshold=0.25):

    # b, n, 85
    boxes = []
    for image_id, box_id in zip(*np.where(pred[..., 4] >= threshold)):
        item = pred[image_id, box_id]
        cx, cy, w, h, objness = item[:5]
        label = item[5:].argmax()
        confidence = item[5 + label] * objness
        if confidence < threshold:
            continue

        boxes.append([cx - w * 0.5, cy - h * 0.5, cx + w * 0.5, cy + h * 0.5, confidence, image_id, label])

    boxes = np.array(boxes)
    lr = boxes[:, [0, 2]]
    tb = boxes[:, [1, 3]]
    boxes[:, [0, 2]] = lr * IM[0, 0] + IM[0, 2]
    boxes[:, [1, 3]] = tb * IM[1, 1] + IM[1, 2]

    # left, top, right, bottom, confidence, image_id, label
    boxes = sorted(boxes.tolist(), key=lambda x:x[4], reverse=True)
    return nms(boxes)
我们可以发现,真正的onnxruntime只有两行,一个onnxruntime.InferenceSession,一个run就结束了。其余的都是和之前一样的,这是非常好用便捷的,所以如果有模型需要作测试,是非常推荐用onnxruntime的
CPP接口推理过程:
Inference:
在main函数中只有一个inference
int main(){
    inference();
    return 0;
}
所以我们直接来到inference的解读中
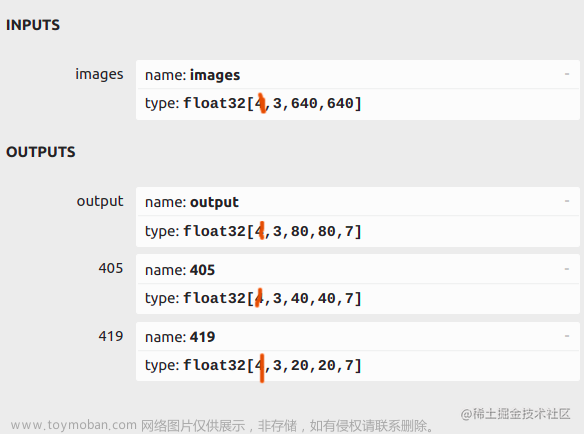
 auto engine_data = load_file("yolov5s.onnx");
//读onnx文件
    Ort::Env env(ORT_LOGGING_LEVEL_INFO, "onnx");
//设置打印的日志级别
    Ort::SessionOptions session_options;
//定义sessionoptions 类似于python中的    session =     onnxruntime.InferenceSession("workspace/yolov5s.onnx", providers=["CPUExecutionProvider"])

    auto mem = Ort::MemoryInfo::CreateCpu(OrtArenaAllocator, OrtMemTypeDefault);
//设置MemoryInfo
    session_options.SetIntraOpNumThreads(1);
    session_options.SetGraphOptimizationLevel(GraphOptimizationLevel::ORT_ENABLE_EXTENDED);
//启动一些扩展
Ort::Session session(env, "yolov5s.onnx", session_options); //创建session,将选项传进去 auto output_dims = session.GetOutputTypeInfo(0).GetTensorTypeAndShapeInfo().GetShape(); //获取output的shape const char *input_names[] = {"images"}, *output_names[] = {"output"};int input_batch = 1; int input_channel = 3; int input_height = 640; int input_width = 640; int64_t input_shape[] = {input_batch, input_channel, input_height, input_width}; int input_numel = input_batch * input_channel * input_height * input_width; float* input_data_host = new float[input_numel]; auto input_tensor = Ort::Value::CreateTensor(mem, input_data_host, input_numel, input_shape, 4); //创建一个Tensor,引用input_data_host中的数据
预处理:
    ///
    // letter box
    auto image = cv::imread("car.jpg");
    float scale_x = input_width / (float)image.cols;
    float scale_y = input_height / (float)image.rows;
    float scale = std::min(scale_x, scale_y);
    float i2d[6], d2i[6];
    i2d[0] = scale;  i2d[1] = 0;  i2d[2] = (-scale * image.cols + input_width + scale  - 1) * 0.5;
    i2d[3] = 0;  i2d[4] = scale;  i2d[5] = (-scale * image.rows + input_height + scale - 1) * 0.5;

    cv::Mat m2x3_i2d(2, 3, CV_32F, i2d);
    cv::Mat m2x3_d2i(2, 3, CV_32F, d2i);
    cv::invertAffineTransform(m2x3_i2d, m2x3_d2i);

    cv::Mat input_image(input_height, input_width, CV_8UC3);
    cv::warpAffine(image, input_image, m2x3_i2d, input_image.size(), cv::INTER_LINEAR, cv::BORDER_CONSTANT, cv::Scalar::all(114));
    cv::imwrite("input-image.jpg", input_image);

    int image_area = input_image.cols * input_image.rows;
    unsigned char* pimage = input_image.data;
    float* phost_b = input_data_host + image_area * 0;
    float* phost_g = input_data_host + image_area * 1;
    float* phost_r = input_data_host + image_area * 2;
    for(int i = 0; i < image_area; ++i, pimage += 3){
        // 注意这里的顺序rgb调换了
        *phost_r++ = pimage[0] / 255.0f;
        *phost_g++ = pimage[1] / 255.0f;
        *phost_b++ = pimage[2] / 255.0f;
    }
    ///
制作输出矩阵并运行:
    // 3x3输入,对应3x3输出
    int output_numbox = output_dims[1];
    int output_numprob = output_dims[2];
    int num_classes = output_numprob - 5;
    int output_numel = input_batch * output_numbox * output_numprob;
    float* output_data_host = new float[output_numel];
    int64_t output_shape[] = {input_batch, output_numbox, output_numprob};
    auto output_tensor = Ort::Value::CreateTensor(mem, output_data_host, output_numel, output_shape, 3);

    Ort::RunOptions options;
    session.Run(options,
        (const char* const*)input_names, &input_tensor, 1,
        (const char* const*)output_names, &output_tensor, 1
    );
//指定输入输出的name,tensor和个数,传入tensor进行推理
后处理:
 // decode box
    vector<vector<float>> bboxes;
    float confidence_threshold = 0.25;
    float nms_threshold = 0.5;
    for(int i = 0; i < output_numbox; ++i){
        float* ptr = output_data_host + i * output_numprob;
        float objness = ptr[4];
        if(objness < confidence_threshold)
            continue;

        float* pclass = ptr + 5;
        int label     = std::max_element(pclass, pclass + num_classes) - pclass;
        float prob    = pclass[label];
        float confidence = prob * objness;
        if(confidence < confidence_threshold)
            continue;

        float cx     = ptr[0];
        float cy     = ptr[1];
        float width  = ptr[2];
        float height = ptr[3];
        float left   = cx - width * 0.5;
        float top    = cy - height * 0.5;
        float right  = cx + width * 0.5;
        float bottom = cy + height * 0.5;
        float image_base_left   = d2i[0] * left   + d2i[2];
        float image_base_right  = d2i[0] * right  + d2i[2];
        float image_base_top    = d2i[0] * top    + d2i[5];
        float image_base_bottom = d2i[0] * bottom + d2i[5];
        bboxes.push_back({image_base_left, image_base_top, image_base_right, image_base_bottom, (float)label, confidence});
    }
    printf("decoded bboxes.size = %d\n", bboxes.size());

    // nms
    std::sort(bboxes.begin(), bboxes.end(), [](vector<float>& a, vector<float>& b){return a[5] > b[5];});
    std::vector<bool> remove_flags(bboxes.size());
    std::vector<vector<float>> box_result;
    box_result.reserve(bboxes.size());

    auto iou = [](const vector<float>& a, const vector<float>& b){
        float cross_left   = std::max(a[0], b[0]);
        float cross_top    = std::max(a[1], b[1]);
        float cross_right  = std::min(a[2], b[2]);
        float cross_bottom = std::min(a[3], b[3]);

        float cross_area = std::max(0.0f, cross_right - cross_left) * std::max(0.0f, cross_bottom - cross_top);
        float union_area = std::max(0.0f, a[2] - a[0]) * std::max(0.0f, a[3] - a[1])
                         + std::max(0.0f, b[2] - b[0]) * std::max(0.0f, b[3] - b[1]) - cross_area;
        if(cross_area == 0 || union_area == 0) return 0.0f;
        return cross_area / union_area;
    };

    for(int i = 0; i < bboxes.size(); ++i){
        if(remove_flags[i]) continue;

        auto& ibox = bboxes[i];
        box_result.emplace_back(ibox);
        for(int j = i + 1; j < bboxes.size(); ++j){
            if(remove_flags[j]) continue;

            auto& jbox = bboxes[j];
            if(ibox[4] == jbox[4]){
                // class matched
                if(iou(ibox, jbox) >= nms_threshold)
                    remove_flags[j] = true;
            }
        }
    }
    printf("box_result.size = %d\n", box_result.size());

    for(int i = 0; i < box_result.size(); ++i){
        auto& ibox = box_result[i];
        float left = ibox[0];
        float top = ibox[1];
        float right = ibox[2];
        float bottom = ibox[3];
        int class_label = ibox[4];
        float confidence = ibox[5];
        cv::Scalar color;
        tie(color[0], color[1], color[2]) = random_color(class_label);
        cv::rectangle(image, cv::Point(left, top), cv::Point(right, bottom), color, 3);

        auto name      = cocolabels[class_label];
        auto caption   = cv::format("%s %.2f", name, confidence);
        int text_width = cv::getTextSize(caption, 0, 1, 2, nullptr).width + 10;
        cv::rectangle(image, cv::Point(left-3, top-33), cv::Point(left + text_width, top), color, -1);
        cv::putText(image, caption, cv::Point(left, top-5), 0, 1, cv::Scalar::all(0), 2, 16);
    }
    cv::imwrite("image-draw.jpg", image);

    delete[] input_data_host;
    delete[] output_data_host;
}
小结:
可以看到,这个与我们之前yolov5后处理没什么太大的区别,关键只在于对于output_tensor和output作关联,input_tensor和input作关联。文章来源:https://www.toymoban.com/news/detail-611686.html
到了这里,关于TRT4-trt-integrate - 3 使用onnxruntime进行onnx的模型推理过程的文章就介绍完了。如果您还想了解更多内容,请在右上角搜索TOY模板网以前的文章或继续浏览下面的相关文章,希望大家以后多多支持TOY模板网!


![[segment-anything]使用onnxruntime部署sam模型,速度提高30倍!](https://imgs.yssmx.com/Uploads/2024/02/461140-1.jpeg)


