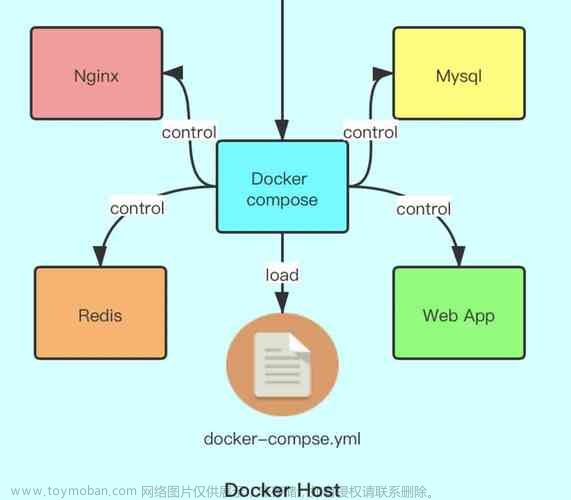
一、docker-compose方式
在docker-compose中加入healthcheck
healthcheck 支持下列选项:
test:健康检查命令,例如 ["CMD", "curl", "-f", "http://localhost/actuator/health"]
interval:健康检查的间隔,默认为 30 秒,单位(h/m/s);
timeout:健康检查命令运行超时时间,如果超过这个时间,本次健康检查就被视为失败,默认 30 秒,单位(h/m/s);
retries:当连续失败指定次数后,则将容器状态视为 unhealthy,默认 3 次。
start-period:应用的启动的初始化时间,在启动过程中的健康检查失效不会计入,默认 0 秒; (从17.05)引入
说明:在此期间的探测失败将不计入最大重试次数。但是,如果健康检查在启动期间成功,则认为容器已启动,所有连续的失败都将计入最大重试次数。

和 CMD, ENTRYPOINT 一样,HEALTHCHECK 只可以出现一次,如果写了多个,只有最后一个生效。
在 HEALTHCHECK [选项] CMD 后面的命令,格式和 ENTRYPOINT 一样,分为 shell 格式,和 exec 格式。命令的返回值决定了该次健康检查的成功与否:
-
0:成功; -
1:失败; -
2:保留值,不要使用
容器启动之后,初始状态会为 starting (启动中)。Docker Engine会等待 interval 时间,开始执行健康检查命令,并周期性执行。如果单次检查返回值非0或者运行需要比指定 timeout 时间还长,则本次检查被认为失败。如果健康检查连续失败超过了 retries 重试次数,状态就会变为 unhealthy (不健康)。
注:
- 一旦有一次健康检查成功,Docker会将容器置回
healthy(健康)状态 - 当容器的健康状态发生变化时,Docker Engine会发出一个
health_status事件。
    healthcheck:
      test: ["CMD","curl","-f","http://localhost:28025/v1/health/check"]
      # 每次间隔30秒检查一次
      interval: 30s
      # 每次检查的超时时间
      timeout: 10s
      # 最多重试检查次数
      retries: 3

   # redis检查示例
   healthcheck:
      test: ["CMD", "redis-cli", "ping"]
      interval: 1s
      timeout: 3s
      retries: 30

   # postgresql检查
   healthcheck:
      test: ["CMD", "pg_isready"]
      interval: 1s
      timeout: 3s
      retries: 30
   # mysql检查
   healthcheck:
      test: ["CMD", "mysql" ,"-h", "mysql", "-P", "3306", "-u", "root", "-e", "SELECT 1", "cache"]
      interval: 1s
      timeout: 3s
      retries: 30
version: '3'
services:
  mysql:
    hostname: mysql
    image: 10.10.3.5/cta/mysql_base:01
    container_name: mysql
    volumes:
      - ./mysql/mysql.cnf:/etc/mysql/conf.d/mysql.cnf
      - ./mysql/mysqld.cnf:/etc/mysql/mysql.conf.d/mysqld.cnf
      - ./mysql/init:/docker-entrypoint-initdb.d/
      #- ./mysql/data:/var/lib/mysql
    # 给容器赋予root权限
    privileged: true
    network_mode: "host"
    environment:
      - MYSQL_ROOT_PASSWORD=123
      - TZ=Asia/Shanghai
      - LANG=en_US.UTF-8
    # 健康检查
    healthcheck:
    # mysqladmin -uroot -p123  ping -h127.0.0.1
      test: [ "CMD", "mysqladmin" ,"ping", "-h", "localhost" ]
#      test: [ "CMD", "mysqladmin","-u","root","-p","123" ,"ping", "-h", "127.0.0.1" ]
      timeout: 45s
      interval: 10s
      retries: 10


  nginx:
    hostname: nginx
    image: nginx:1.20.2
    volumes:
      - ./nginx/nginx.conf:/etc/nginx/nginx.conf
      - ./nginx/platform.conf:/etc/nginx/conf.d/platform.conf
      - ./nginx/svrshell:/root/svrshell
      - ./nginx/aiviewer:/root/aiviewer
# 增加cta
      - ./nginx/dwcta:/root/dwcta
# 增加input挂载
      - /data1/inputdata:/data1/inputdata
    container_name: nginx
    privileged: true
    network_mode: "host"
    environment:
      - TZ=Asia/Shanghai
      - LANG=en_US.UTF-8


  zk:
# zookeeper  修改了zoo.cfg的data和datalog路径 /opt/zk1/zookeeper-3.4.10
    hostname: zk
    image: 10.10.3.5/cta/zookeeper:3.4.10
    healthcheck:
#      test: ["CMD-SHELL", "curl -sS 127.0.0.1:2181 || exit 1"]
      test: ["CMD-SHELL", "echo 'ruok' | curl -s telnet://localhost:2181 || exit 1"]
      interval: 1m30s
      timeout: 10s
      retries: 3
      start_period: 40s
    depends_on:
      mysql:
        # mysql健康检查通过后,才能启动zk服务
        condition: service_healthy
        # condition: service_started
    volumes:
      - ./zk/zoo.cfg:/conf/zoo.cfg
#      - /opt/zk1/zookeeper-3.4.10/data:/data
#      - /opt/zk1/zookeeper-3.4.10/datalog:/datalog
    container_name: zk
    privileged: true
    network_mode: "host"
 #   ports:
 #     - 2181:2181

  es_python:
    hostname: es_python
    image: es_python:1.1
    volumes:
      - /data1/es_data:/usr/share/elasticsearch/data
    container_name: es_python
    privileged: true
    network_mode: "host"
    environment:
      - TZ=Asia/Shanghai
      - LANG=en_US.UTF-8

# 应用
  aiserverconfig:
# 20882 11383
    hostname: aiserverconfig
    image: 10.10.3.5/cta/aiserverconfig-cta_1215_20220112_002:latest
    healthcheck:
      test: ["CMD-SHELL", "curl -sS 127.0.0.1:11383 || exit 1"]
      interval: 1m30s
      timeout: 10s
      retries: 3
      start_period: 40s
    depends_on:
      mysql:
        condition: service_healthy
      zk:
        condition: service_healthy
    volumes:
      - /etc/sign.conf:/etc/sign.conf
      - /data1/container-root/aiserverconfig/log:/root/aiserverconfig/log
# 增加input挂载
      - /data1/inputdata:/data1/inputdata
    container_name: aiserverconfig
    privileged: true
    network_mode: "host"

  aiserver:
# 20880 11381
    hostname: aiserver
    image: 10.10.3.5/cta/aiserver-cta_1215_20220112_002:latest
    healthcheck:
      test: ["CMD-SHELL", "curl -sS 127.0.0.1:11381/aiserver/ai/v1/echo || exit 1"]
      interval: 1m30s
      timeout: 10s
      retries: 3
      start_period: 40s
    depends_on:
      mysql:
        condition: service_healthy
      zk:
        condition: service_healthy
      aiserverconfig:
        condition: service_healthy
    volumes:
      - /etc/sign.conf:/etc/sign.conf
      - /data1/container-root/aiserver/log:/root/aiserver/log
# 增加input挂载
      - /data1/inputdata:/data1/inputdata
    container_name: aiserver
    privileged: true
    network_mode: "host"

  pacsserver:
# 20881 22222 11380
    hostname: pacsserver
    image: 10.10.3.5/cta/pacsserver-cta_1215_20220112_002:latest
    healthcheck:
      test: ["CMD-SHELL", "curl -sS 127.0.0.1:11384/pacs/v2/dicom/echo || exit 1"]
      interval: 1m30s
      timeout: 10s
      retries: 3
      start_period: 40s
    depends_on:
      mysql:
        condition: service_healthy
      zk:
        condition: service_healthy
      aiserverconfig:
        condition: service_healthy
      aiserver:
        condition: service_healthy
    volumes:
      - /etc/sign.conf:/etc/sign.conf
      - /data1/container-root/pacsserver/log:/root/pacsserver/log
# 增加input挂载
      - /data1/inputdata:/data1/inputdata
    container_name: pacsserver
    privileged: true
    network_mode: "host"

  platform:
# 11380 11345
    hostname: platform
    image: 10.10.3.5/cta/platform-cta_1215_20220112_002:latest
    healthcheck:
      test: ["CMD-SHELL", "curl -sS 127.0.0.1:11380/echo || exit 1"]
      interval: 1m30s
      timeout: 10s
      retries: 3
      start_period: 40s
    depends_on:
      mysql:
        condition: service_healthy
      zk:
        condition: service_healthy
      aiserverconfig:
        condition: service_healthy
      aiserver:
        condition: service_healthy
    volumes:
      - /etc/sign.conf:/etc/sign.conf
      - /data1/container-root/platform/log:/root/platform/log
# 增加input挂载
      - /data1/inputdata:/data1/inputdata
    container_name: platform
    privileged: true
    network_mode: "host"

  ocrsvr:
# 28800
    hostname: ocrsvr
    image: 10.10.3.5/cta/ocrsvr-cta_1215_20220112_002:latest
    depends_on:
      mysql:
        condition: service_healthy
      zk:
        condition: service_healthy
      aiserverconfig:
        condition: service_healthy
      aiserver:
        condition: service_healthy
    volumes:
      - /etc/sign.conf:/etc/sign.conf
      - /data1/container-root/ocrsvr/log:/root/ocrsvr/log
# 增加input挂载
      - /data1/inputdata:/data1/inputdata
    container_name: ocrsvr
    privileged: true
    network_mode: "host"

  lung:
# 20880 11381
    hostname: lung
    image: 10.10.3.5/cta/lung-cta_1215_20220112_002:latest
    depends_on:
      mysql:
        condition: service_healthy
      zk:
        condition: service_healthy
      aiserverconfig:
        condition: service_healthy
      aiserver:
        condition: service_healthy
    volumes:
      - /etc/sign.conf:/etc/sign.conf
      - /data1/container-root/lung/log:/root/lung/log
# 增加input挂载
      - /data1/inputdata:/data1/inputdata
      - /tmp/.X11-unix:/tmp/.X11-unix
    container_name: lung
    privileged: true
    network_mode: "host"
    environment:
      - NVIDIA_DRIVER_CAPABILITIES=all
      - DISPLAY
      - XAUTHORITY
    deploy:
      resources:
        reservations:
          devices:
            - driver: nvidia
              count: all
              capabilities: [gpu]
二、Dockerfile方式
假设我们有个镜像是个最简单的 Web 服务,我们希望增加健康检查来判断其 Web 服务是否在正常工作,我们可以用 curl 来帮助判断,其 Dockerfile 的 HEALTHCHECK 可以这么写:
Dockerfile
FROM elasticsearch:5.5

HEALTHCHECK --interval=5s --timeout=2s --retries=12 \
  CMD curl --silent --fail localhost:9200/_cluster/health || exit 1
docker build -t test/elasticsearch:5.5 .

docker run --rm -d \
    --name=elasticsearch \
    test/elasticsearch:5.5
我们可以通过 docker ps,来发现过了几秒之后,Elasticsearch容器从 starting 状态进入了 healthy 状态
#!/bin/bash
# 检测tomcat端口 细心的小伙伴可以在awk把最后一个:后面的端口取出来 会更准确
netstat -luntp |awk '{print $4}'  |grep 8080
if [ $? == 0 ]
then
    echo $?
    exit 0
else
    echo $?
    exit 1
fi
FROM registry.cn-shanghai.aliyuncs.com/yjk-datag/tomcat:v1
MAINTAINER YJK Enterprise Container Images <min@hz-health.cn>
ENV LANG C.UTF-8
ENV PATH /usr/bin:$PATH
RUN    mv /srv/tomcat/tomcat8/  /srv/tomcat/tomcat-haozhuo-video
ADD ROOT.war  /srv/tomcat/tomcat-haozhuo-video/webapps/
ADD health_check.sh  /opt/
EXPOSE 8080 20920
HEALTHCHECK --start-period=60s  --interval=60s --timeout=5s --retries=3 CMD /bin/bash /opt/health_check.sh
# 依赖基础镜像centos7版jdk1.8


FROM openjdk:8
# 标签
LABEL maintainer="2022-12-23"
# 传输文件,将search里面的内容考入/opt/search/中
#COPY search /usr/CommandCenter/gis/search
#添加search.tar.gz压缩文件到/opt目录下,并同时完成解压,完成后的目录为opt/search/xxxx
ADD fps.tar.gz /usr/CommandCenter/vcs
# 给启动脚本授可执行权限
RUN chmod +x /usr/fps/bin/docker_startup.sh
RUN chmod +x /usr/fps/bin/get-nacos-status.sh
# 安装curl
RUN apk update && apk add curl && apk add busybox-extras
# 工作目录
WORKDIR /usr/CommandCenter
# 启动startup.sh
CMD ["/bin/sh","-c","/usr/bin/docker_startup.sh"]
#CMD ["/bin/sh","-c","ps&&tail -f /dev/null"]
三、docker run方式
另外一种方法是在 docker run 命令中,直接指明healthcheck相关策略
$ docker run --rm -d \
    --name=elasticsearch \
    --health-cmd="curl --silent --fail localhost:9200/_cluster/health || exit 1" \
    --health-interval=5s \
    --health-retries=12 \
    --health-timeout=2s \
    elasticsearch:5.5
四、查看检查日志
为了帮助排障,健康检查命令的输出(包括 stdout 以及 stderr)都会被存储于健康状态里,可以用 docker inspect 来查看。我们可以通过如下命令,来获取过去5个容器的健康检查结果
docker inspect --format='{{json .State.Health}}' 容器名

docker inspect --format='{{json .State.Health}}' commandcenter.public.configcenter
或者
docker inspect 容器名 | jq ".[].State.Health"
日志示例文章来源:https://www.toymoban.com/news/detail-613022.html
{
  "Status": "healthy",
  "FailingStreak": 0,
  "Log": [
    {
      "Start": "2017-08-19T09:12:53.393598805Z",
      "End": "2017-08-19T09:12:53.452931792Z",
      "ExitCode": 0,
      "Output": "..."
    },
    ...
}
由于应用的开发者会更加了解应用的SLA,一般建议在Dockerfile中声明相应的健康检查策略,这样可以方便镜像的使用。对于应用的部署和运维人员,可以通过命令行参数和REST API针对部署场景对健康检查策略按需进行调整。文章来源地址https://www.toymoban.com/news/detail-613022.html
到了这里,关于docker中设置容器健康检查的文章就介绍完了。如果您还想了解更多内容,请在右上角搜索TOY模板网以前的文章或继续浏览下面的相关文章,希望大家以后多多支持TOY模板网!


