1、需求描述
实现一个车辆定位签到功能,获取当前车辆的实时定位,当车辆到达签到点1公里范围内时,可以进行签到,当大于1公里时,禁止签到。同时用户还可以手动刷新定位。


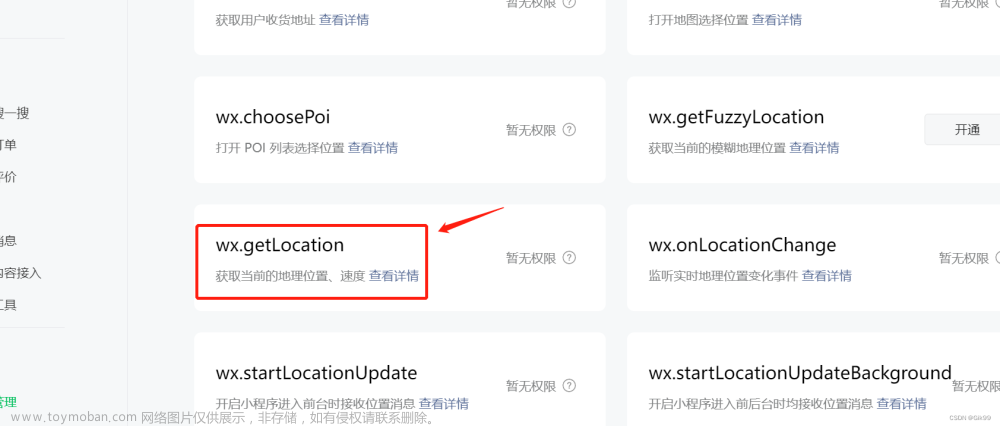
2、wx.getLocation弊端
在小程序中,我们使用wx.getLocation api来获取经纬度,但是该api存在一个弊端,就是频繁调用会增加电量损耗,30秒内调用getLocation,仅第一次有效,剩余返回fail。

wx.getLocation({
    type: 'wgs84',
    success (res) {
        console.log(res.latitude, res.longitude)
    }
})
3、解决方法
若需要实时的来监听车辆定位,那么则不采取wx.getLocation,需要使用wx.onLocationChange,具体的流程图如下所示:
 文章来源:https://www.toymoban.com/news/detail-613827.html
4、核心代码
<template>
    <view class="container">
        <view class="map-box">
            <map id="myMap" :scale="14" :latitude="myLat" :longitude="myLon" :markers="markers" :circles="circles"></map>
            <view class="local-icon" @click="handleRefresh"></view>
        </view>
        <view class="btn-box">
            <view class="submit" v-if="distance <= radius" @click="handleArrive">请先到达签到范围,后确认签到</view>
            <view class="submit2" v-else @click="handleSign">确认签到</view>
        </view>
    </view>
</template>
<script>
    import { host } from '../../config/config.js'
    export default {
        name: 'sign',
        data() {
            return {
                centerLon: 0,   // 中心经度
                centerLat: 0,   // 中心纬度
                circles: [],    // 中心签到圈
                radius: 0,      // 签到半径
                myLon: 0,       // 当前定位经度
                myLat:0,        // 当前定位纬度
                markers: [],    // 当前定位标记点
                distance: 99999,// 车辆到签到中心点距离
            }
        },
        methods: {
            // 获取中心点坐标, 获取签到圈
            getCoordinate() {
                uni.request({
                    url: host + '/api/getCoordinate',
                    method: 'GET',
                    header:{
                        'Content-Type' : 'application/json',
                        token : uni.getStorageSync("TOKEN")
                    },
                    data: {},
                    success: res => {
                        if(res.data.code === "0") {
                            this.centerLon = res.data.data.longitude;
                            this.centerLat = res.data.data.latitude;
                            this.radius = res.data.data.radius;
                            this.circles = [{
                                longitude: this.centerLon,
                                latitude: this.centerLat,
                                fillColor: "rgba(255,42,65,0.08)",
                                color: "#FF0000",
                                radius: this.radius,
                                strokeWidth: 1
                            }]
                        }
                    },
                    fail: () => {},
                    complete: () => {}
                });
            },
             async authorization() {
                try {
                    await this.getWxLocation();
                } catch (error) {
                    uni.showModal({
                        title: '温馨提示',
                        content: '获取权限失败,需要获取您的地理位置才能为您提供更好的服务!是否授权获取地理位置?',
                        success: (res) => {
                            if (res.confirm) {
                                this.handleOpenSettng();
                            }
                        }
                    });
                    return;
                }
            },
            // 获取定位
            getWxLocation() {
                uni.showLoading({
                    title: '定位中...'
                });
                return new Promise((resolve, reject) => {
                    console.log("定位中...");
                    // 开启定位追踪
                    wx.startLocationUpdate({
                        success: (res) => {
                            console.log("开启定位追踪", res);
                            wx.onLocationChange(this.handleLocationChange);
                            resolve();
                        },
                        fail: (err) => {
                            console.log('获取当前位置失败', err);
                            uni.hideLoading();
                            reject();
                        }
                    })
                })
            },
            // 用户授权定位
            handleOpenSettng() {
                console.log("获取用户授权");
                wx.openSetting({
                    success: (res) => {
                        if (res.authSetting["scope.userLocation"]) {   // 用户同意授权
                            console.log("用户同意授权");
                            this.authorization();
                        }
                    }
                })
            },
            // 关闭定位追踪
            stopLocation() {
                wx.offLocationChange(this.handleLocationChange);
                return new Promise((resolve, reject) => {
                    wx.stopLocationUpdate({
                        success: (res) => {
                            console.log("关闭定位追踪", res);
                            resolve();
                        },
                        fail: (err) => {
                            reject();
                        },
                    });
                })
            },
            // 刷新定位
            async handleRefresh() {
                await this.stopLocation();
                this.authorization();
            },
            // 监听到定位变化, 绘制定位点
            handleLocationChange(res) {
                console.log('定位改变, 绘制定位点:', res);
                this.myLon = res.longitude;
                this.myLat = res.latitude;
                this.markers = [{
                    id: 1,
                    longitude: this.myLon,
                    latitude: this.myLat,
                    iconPath: "../../static/img/record/point.png",
                    width: 25,
                    height: 25
                }]
                this.distance = this.getDistance();
                uni.hideLoading();
            },
            // 获取当前位置距离签到点的距离
            getDistance() {
                let red1 = this.myLat * Math.PI / 180.0;
                let red2 = this.centerLat * Math.PI / 180.0;
                let a = red1 - red2;
                let b = this.myLon * Math.PI / 180.0 - this.centerLon * Math.PI / 180.0;
                let R = 6378137;
                let distance = R * 2 * Math.asin(Math.sqrt(Math.pow(Math.sin(a / 2), 2) + Math.cos(red1) * Math.cos(red2) * Math.pow(Math.sin(b / 2), 2)));
                return distance.toFixed(2) * 1;
            }
        },
        onLoad(option) {
            this.getCoordinate();
            this.authorization();
        },
        onUnload() {
            this.stopLocation();
        }
    }
</script>
<style lang="less" scoped>
</style>
5、补充
2022 年 7 月 14 日后,微信小程序对wx.onLocationChange API的使用场景做了限制,很多的场景都不允许再使用wx.onLocationChange方法,后续我补充发布了一篇使用wx.getLocation的签到方法,大家可以看看,见链接 uni-app 小程序获取实时定位和车辆签到(wx.getLocation方法)文章来源地址https://www.toymoban.com/news/detail-613827.html
到了这里,关于uni-app 小程序获取实时定位和车辆签到(wx.onLocationChange方法)的文章就介绍完了。如果您还想了解更多内容,请在右上角搜索TOY模板网以前的文章或继续浏览下面的相关文章,希望大家以后多多支持TOY模板网!


