目录
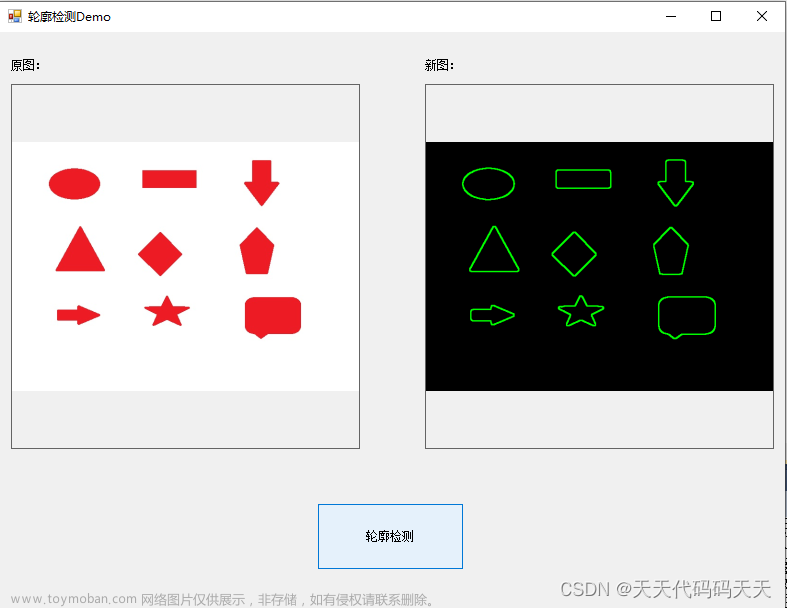
效果
代码
下载
效果

代码
using System;
using System.Collections.Generic;
using System.ComponentModel;
using System.Data;
using System.Drawing;
using System.Linq;
using System.Text;
using System.Windows.Forms;
using OpenCvSharp;
using OpenCvSharp.Extensions;
namespace OpenCvSharp_图像校正
{
public partial class Form1 : Form
{
public Form1()
{
InitializeComponent();
}
string img = "test.png";
private void Form1_Load(object sender, EventArgs e)
{
pictureBox1.Image = new Bitmap(img);
}
private void button1_Click(object sender, EventArgs e)
{
Mat src = new Mat(img);
//转化为灰度图
//Cv2.CvtColor(src, src, ColorConversionCodes.RGB2GRAY);
InputArray kernel = Cv2.GetStructuringElement(MorphShapes.Rect, new OpenCvSharp.Size(3, 3));
Cv2.MorphologyEx(src, src, MorphTypes.Close, kernel, new OpenCvSharp.Point(-1, -1), 3);
//Cv2.ImShow("MorphologyEx", src);
/*
ksize,高斯内核大小,ksize.width和ksize.height必须是正奇数,两者可以不相同,值越大越模糊
sigmaX,Y轴方向的标准差,值越大越模糊
sigmaY,X轴方向的标准差,值越大越模糊
*/
Cv2.GaussianBlur(src, src, new OpenCvSharp.Size(11, 11), 2, 2);
//Cv2.ImShow("GaussianBlur", src);
//Canny边缘检测
Mat canny_Image = new Mat();
Cv2.Canny(src, canny_Image, 10, 30, 3, false);
OpenCvSharp.Point[][] contours;
HierarchyIndex[] hierarchly;
/*
findContours找到轮廓
第一个参数:单通道图像矩阵,可以是灰度图,但更常用的是二值图像,一般是经过Canny、拉普拉斯等边缘检测算子处理过的二值图像;
第二个参数:contours
第三个参数:hierarchy
第四个参数:轮廓的检索模式
取值一:CV_RETR_EXTERNAL 只检测最外围轮廓,包含在外围轮廓内的内围轮廓被忽略
取值二:CV_RETR_LIST 检测所有的轮廓,包括内围、外围轮廓,但是检测到的轮廓不建立等级关系,彼此之间独立,没有等级关系,这就意味着这个检索模式下不存在父轮廓或内嵌轮廓,所以hierarchy向量内所有元素的第3、第4个分量都会被置为-1,具体下文会讲到
取值三:CV_RETR_CCOMP 检测所有的轮廓,但所有轮廓只建立两个等级关系,外围为顶层,若外围内的内围轮廓还包含了其他的轮廓信息,则内围内的所有轮廓均归属于顶层
取值四:CV_RETR_TREE 检测所有轮廓,所有轮廓建立一个等级树结构。外层轮廓包含内层轮廓,内层轮廓还可以继续包含内嵌轮廓。
第五个参数:轮廓的近似方法
取值一:CV_CHAIN_APPROX_NONE 保存物体边界上所有连续的轮廓点到contours向量内
取值二:CV_CHAIN_APPROX_SIMPLE 仅保存轮廓的拐点信息,把所有轮廓拐点处的点保存入contours向量内,拐点与拐点之间直线段上的信息点不予保留
取值三和四:CV_CHAIN_APPROX_TC89_L1,CV_CHAIN_APPROX_TC89_KCOS使用teh-Chinl chain 近似算法
第六个参数:Point偏移量,所有的轮廓信息相对于原始图像对应点的偏移量,相当于在每一个检测出的轮廓点上加上该偏移量,且Point可以是负值。不填为默认不偏移Point()
*/
Cv2.FindContours(canny_Image, out contours, out hierarchly,
RetrievalModes.External,
ContourApproximationModes.ApproxSimple,
new OpenCvSharp.Point(0, 0));
if (contours.Length == 0)
{
MessageBox.Show("边缘检测失败");
return;
}
Random rnd = new Random();
Scalar color;
color = new Scalar(0, 255, 0);
for (int i = 0; i < contours.Length; i++)
{
color = new Scalar(rnd.Next(0, 255), rnd.Next(0, 255), rnd.Next(0, 255));
Cv2.DrawContours(src, contours, i, color, 2, LineTypes.Link4);
}
//Cv2.ImShow("contours", src);
//求出面积最大的轮廓
double max_area = 0.0;
double currentArea = 0.0;
OpenCvSharp.Point[] max_contour = null;
for (int i = 0; i < contours.Length; i++)
{
currentArea = Cv2.ContourArea(contours[i]);
if (currentArea > max_area)
{
max_area = currentArea;
max_contour = contours[i];
}
}
//多边形拟合凸包的四个顶点
OpenCvSharp.Point[] hull = Cv2.ConvexHull(max_contour);
double epsilon = 0.02 * Cv2.ArcLength(max_contour, true);
OpenCvSharp.Point[] approx = Cv2.ApproxPolyDP(hull, epsilon, true);
if (approx.Length != 4)
{
MessageBox.Show("拟合凸包的四个顶点失败");
return;
}
Scalar scalar2 = new Scalar(0, 255, 255);
Cv2.Line(src, approx[0], approx[1], scalar2, 1, LineTypes.Link4);
Cv2.Line(src, approx[1], approx[2], scalar2, 1, LineTypes.Link4);
Cv2.Line(src, approx[2], approx[3], scalar2, 1, LineTypes.Link4);
Cv2.Line(src, approx[3], approx[0], scalar2, 1, LineTypes.Link4);
//排序
Array.Sort(approx, (cs1, cs2) =>
{
if (cs1 != null && cs1 != null)
{
if (cs1.Y > cs2.Y)
return 1;
else if (cs1.Y == cs2.Y)
{
if (cs1.X < cs2.X)
return 1;
else return -1;
}
else
return -1;
}
return 0;
});
//算法找出的角点
OpenCvSharp.Point2f[] srcPt = new OpenCvSharp.Point2f[4];
srcPt[0] = approx[0];
srcPt[1] = approx[1];
srcPt[2] = approx[3];
srcPt[3] = approx[2];
//最小外接矩形
RotatedRect rect = Cv2.MinAreaRect(srcPt);
Rect box = rect.BoundingRect();
OpenCvSharp.Point2f[] dstPt = new OpenCvSharp.Point2f[4];
dstPt[0].X = box.X;
dstPt[0].Y = box.Y;
dstPt[1].X = box.X + box.Width;
dstPt[1].Y = box.Y;
dstPt[2].X = box.X + box.Width;
dstPt[2].Y = box.Y + box.Height;
dstPt[3].X = box.X;
dstPt[3].Y = box.Y + box.Height;
Mat src2 = new Mat(img);
Mat final = new Mat();
Mat warpmatrix = Cv2.GetPerspectiveTransform(srcPt, dstPt);//获得变换矩阵
Cv2.WarpPerspective(src2, final, warpmatrix, src.Size());//投射变换,将结果赋给final
Bitmap temp = BitmapConverter.ToBitmap(final);
pictureBox2.Image = temp;
DrawLine(srcPt, dstPt);
//Application.DoEvents();
//System.Threading.Thread.Sleep(1000);
//pictureBox2.Image = CutImage(temp, (int)p2f[0].X, (int)p2f[0].Y, (int)p2f[2].X, (int)p2f[2].Y);
}
void DrawLine(OpenCvSharp.Point2f[] srcPt, OpenCvSharp.Point2f[] dstPt)
{
Bitmap bmp = new Bitmap(img);
Graphics g = Graphics.FromImage(bmp);
Pen pen = new Pen(Color.Red, 3);
Pen pen2 = new Pen(Color.Blue, 3);
g.DrawLine(pen, srcPt[0].X, srcPt[0].Y, srcPt[1].X, srcPt[1].Y);
g.DrawLine(pen, srcPt[1].X, srcPt[1].Y, srcPt[2].X, srcPt[2].Y);
g.DrawLine(pen, srcPt[2].X, srcPt[2].Y, srcPt[3].X, srcPt[3].Y);
g.DrawLine(pen, srcPt[3].X, srcPt[3].Y, srcPt[0].X, srcPt[0].Y);
g.DrawLine(pen2, dstPt[0].X, dstPt[0].Y, dstPt[1].X, dstPt[1].Y);
g.DrawLine(pen2, dstPt[1].X, dstPt[1].Y, dstPt[2].X, dstPt[2].Y);
g.DrawLine(pen2, dstPt[2].X, dstPt[2].Y, dstPt[3].X, dstPt[3].Y);
g.DrawLine(pen2, dstPt[3].X, dstPt[3].Y, dstPt[0].X, dstPt[0].Y);
pictureBox1.Image = bmp;
}
/// <summary>
/// 剪裁图片
/// </summary>
/// <param name="src">原图片</param>
/// <param name="left">左坐标</param>
/// <param name="top">顶部坐标</param>
/// <param name="right">右坐标</param>
/// <param name="bottom">底部坐标</param>
/// <returns>剪裁后的图片</returns>
public Image CutImage(Image src, int left, int top, int right, int bottom)
{
Bitmap srcBitmap = new Bitmap(src);
int width = right - left;
int height = bottom - top;
Bitmap destBitmap = new Bitmap(width, height);
using (Graphics g = Graphics.FromImage(destBitmap))
{
g.Clear(Color.Transparent);
//设置画布的描绘质量
g.CompositingQuality = System.Drawing.Drawing2D.CompositingQuality.HighQuality;
g.SmoothingMode = System.Drawing.Drawing2D.SmoothingMode.HighQuality;
g.InterpolationMode = System.Drawing.Drawing2D.InterpolationMode.HighQualityBicubic;
g.DrawImage(srcBitmap, new Rectangle(0, 0, width, height), left, top, width, height, GraphicsUnit.Pixel);
}
return destBitmap;
}
}
}
下载
源码下载文章来源:https://www.toymoban.com/news/detail-614828.html
文章来源地址https://www.toymoban.com/news/detail-614828.html
到了这里,关于C# OpenCvSharp 图像校正的文章就介绍完了。如果您还想了解更多内容,请在右上角搜索TOY模板网以前的文章或继续浏览下面的相关文章,希望大家以后多多支持TOY模板网!