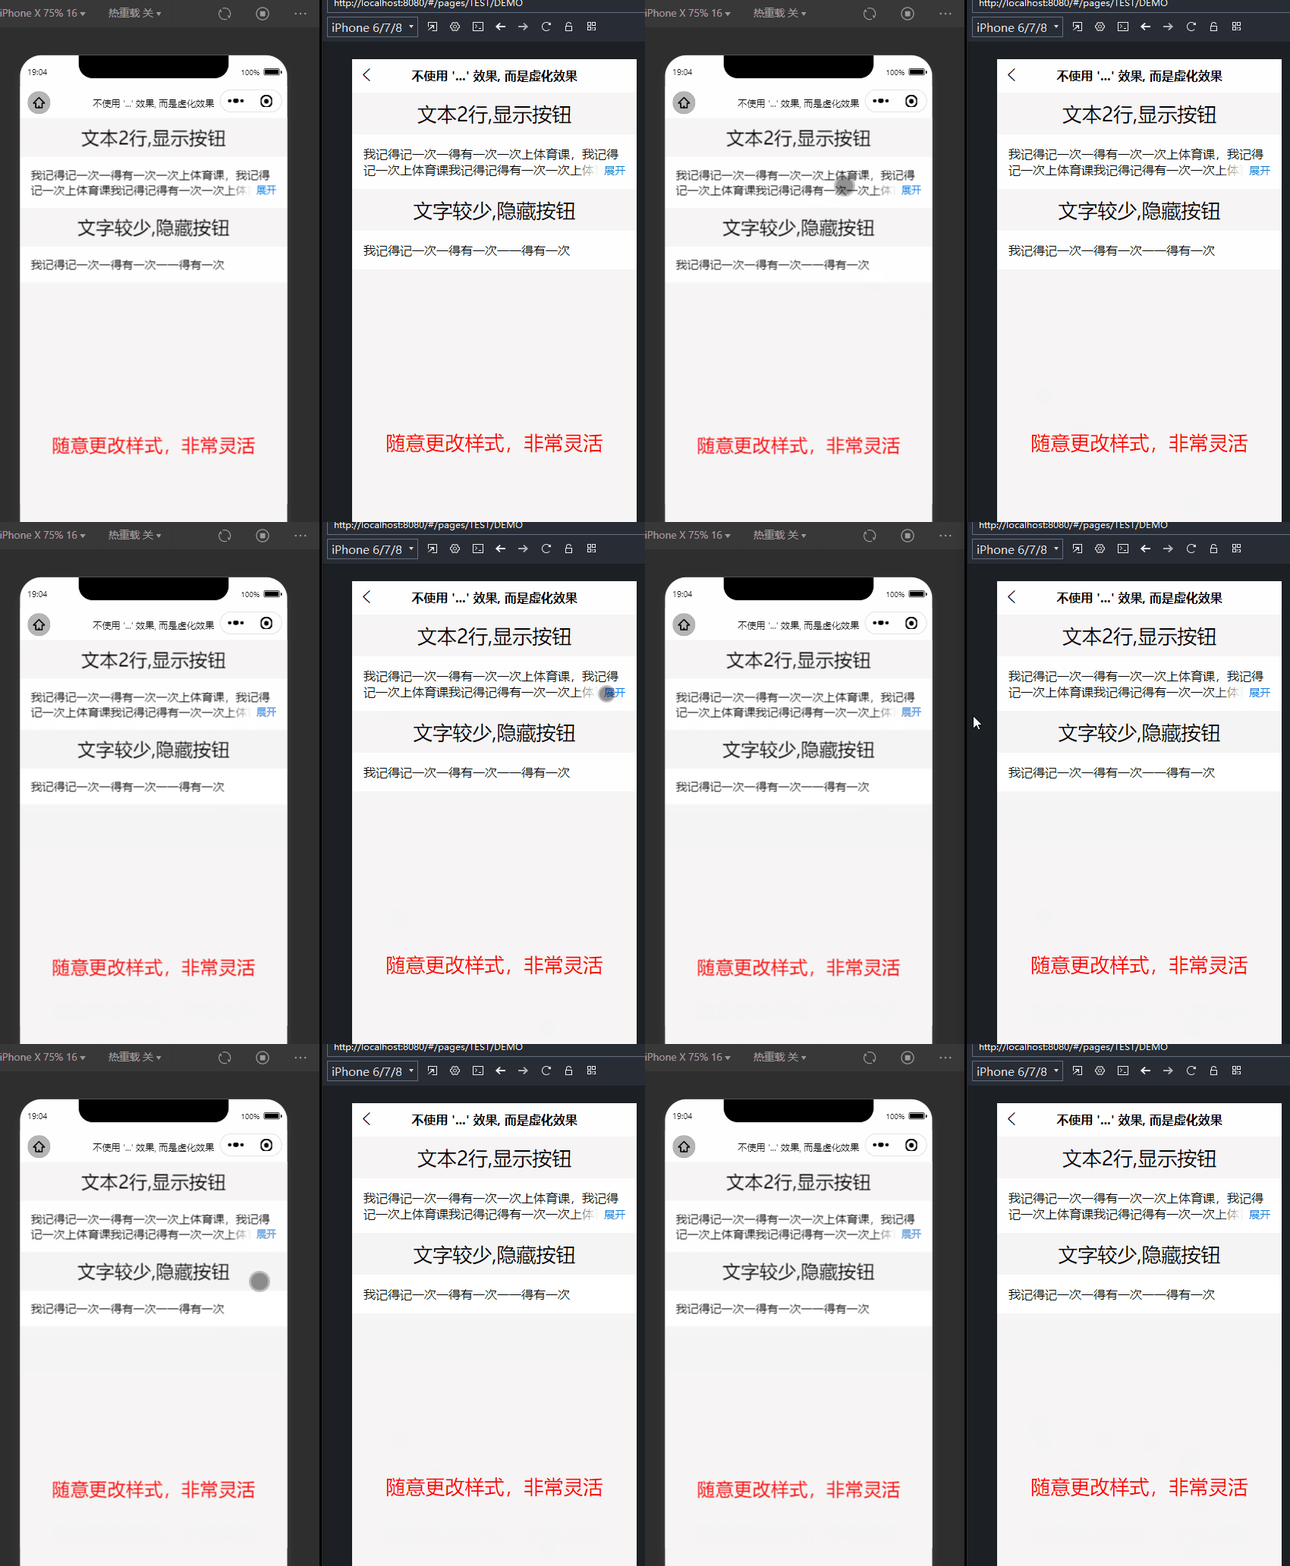
呦!大家好,好久没有更新博客了,最近实现了一个一直想自己完成的一个东西,就是文本的展开收起组件,以前项目需要用到,自己实现一个又太繁琐,所以那个时候都是用的别人的轮子,现在自己尝试了一下,居然实现了,所以在这里向各位分享一下。(郑重声明,实现肯定有很多种方法,下面的只是我自己原创的方法,不喜勿喷)代码其实很简单,夸张一点说,我感觉应该是目前能找到的最简单的实现方式了,注释也很详细,具体的实现效果也还是不错的,现在在下面贴一下代码:
npm包的链接在这里:text-clamp-for-vue3 - npm (npmjs.com)
展示:

文章来源地址https://www.toymoban.com/news/detail-615792.html
TextClamp.vue
<script setup lang="ts">
import { addListener, removeListener } from 'resize-detector'
import { ref, onMounted, onUnmounted } from 'vue'
import $ from 'jquery'
const props = withDefaults(defineProps<{
    text: string; // 传入的文本,必传项
    buttonType?: 'oneLine' | 'tight'; // 展开收起按钮分为:1. oneLine:自身占据单行 2. tight:和文字紧密相邻
    maxLines?: number; // 设置的显示的行数
    isExpanded?: boolean; // 展开的状态,true:展开,false:收起
}>(), {
    buttonType: 'oneLine',
    isExpanded: false,
    maxLines: 3
})
const textClampRef = ref<HTMLElement | null>(null) // 最外层div的ref
const textRef = ref<HTMLElement | null>(null) // 该组件放文本内容的ref
const toggleButtonRef = ref<HTMLElement | null>(null)
const expanded = ref(props.isExpanded) //本地的expanded状态,先获取一遍属性中的isExpanded状态,然后才能用toggle方法进行修改
const offset = ref(0) // 这个是文本的截取位置,初始从0开始截取
// 这个是按钮为单行的模式下的折叠文本的css
const clampClass = ref({
    'display': '-webkit-box',
    '-webkit-box-orient': 'vertical',
    '-webkit-line-clamp': `${props.maxLines}`,// 这里可以根据给定的行数设置具体的clamp行数,这也是我要将css封装成一个对象的目的
    'overflow': 'hidden',
    'text-overflow': 'ellipsis'
})
/**
 * 将文本截取标志offset往右移动一个单位,同时截取文本并赋值
 */
function moveOffsetRight() {
    offset.value = offset.value + 1
    textRef.value && (textRef.value.textContent = props.text.slice(0, offset.value) + '...')
}
/**
 * 将文本截取标志offset往左移动一个单位,同时截取文本并赋值
 */
function moveOffsetLeft() {
    offset.value = offset.value - 1
    textRef.value && (textRef.value.textContent = props.text.slice(0, offset.value) + '...')
}
/**
 * 获取一下展开收起按钮的宽度以及文本容器的宽度
 */
function getButtonWidth() {
    // 按钮
    const buttonElement = $('#textRefSpan').next()[0]
    // 文本容器
    const textContainer = textClampRef.value as HTMLElement
    // 按钮的宽
    const buttonWidth = buttonElement.clientWidth
    // 按钮容器的宽
    const textContainerWidth = textContainer?.clientWidth
    // return出去给其他方法用
    return { buttonWidth, textContainerWidth }
}
/**
 * 获取文本矩形的个数,rects的length反映真实的文本行数
 */
function getRects() {
    const rects = textRef.value?.getClientRects() as DOMRectList
    let rectsLength: number = 0;
    if (rects) {
        rectsLength = rects?.length
    }
    return { rects, rectsLength }
}
/**
 * 收紧文本
 * ?实现思路:比较按钮宽度加最后一个矩形框的宽度是否会大于文本容器宽度,若大于,递归调用自身,即调用moveOffsetLeft(),进一步缩紧文本,否则直接return
 */
function tightText() {
    let { rects } = getRects()
    const { buttonWidth, textContainerWidth } = getButtonWidth()
    moveOffsetLeft()
    if (rects[rects.length - 1].width + buttonWidth > textContainerWidth) {
        tightText();
    } else {
        return
    }

}
/**
 * 截取文本
 * @param clampTag 一个用来判断需要进行截取的标志,只有clampTag的值为'canClamp'的时候,才可以调用clampText(),这样做是因为在文本展开的情况下,调整浏览器的宽度会引起截取文本的操作,这样展开的文本又会变成截取的,同时按钮的文本却还是停留在Collapse的情况,为了避免这种情况,才加的这个tag
 */
function clampText(clampTag?: string) {
    // 当文本是未展开且clampTag的值为canClamp时才可以进行截取文本的操作。如果你不知道为什么要这么做,可以试试将下面一行的if判断去掉,然后将文本展开,随即调整浏览器宽度试试,你应该就明白了
    if (!expanded.value || clampTag == 'canClamp') {
        // 首先进行一次截取,首次截取时是slice(0,0),因为offset的初始值为0
        textRef.value && (textRef.value.textContent = props.text.slice(0, offset.value) + '...')
        // 进行一个无限循环来大致寻找出文本的最终位置的大致位置
        while (true) {
            let { rects, rectsLength } = getRects()
            const { buttonWidth, textContainerWidth } = getButtonWidth()
            // 当给定的maxLines会比所得的矩形个数(即真实行数)大的话,就往右移动进行截取
            if (props.maxLines > rectsLength) {
                moveOffsetRight();
            } else if (props.maxLines < rectsLength) {
                moveOffsetLeft(); // 否则向左移动进行截取
            } else {
                // 若给定行数和真实行数相等时,这个时候就要比较最后一个矩形的width加上按钮的width会不会超过文本容器的width了
                // 当下面的if成立时,需要往右移动进行截取,因为这个else是给定行数和真实行数相等的情况,若不这么做,可能第三行就截取了几个字符就不能继续进行截取了
                if (rects[rects.length - 1].width + buttonWidth <= textContainerWidth) {
                    moveOffsetRight();
                    continue; // 往右截取之后,需要continue再执行一次循环,若还是这个if的情况,继续向右截取
                } else {
                    // 这种情况就可能是最后一个矩形的width加上按钮的width超过了文本容器的width了,这个时候就要进行收紧文本,保证按钮会紧贴着文本
                    tightText()
                }
                // 最后记得要退出无限循环
                break;
            }
        }

    }
}
/**
 * 初始处理一下文本
 */
function init() {
    // 当按钮是tight时,先将未经截取的文本内容赋值给textRef,因为只有这样才能得到真实的文本行数;若按钮是oneLine时,将显示maxLines那么多行的含省略号的样式加上即可
    props.buttonType == 'tight' ? (textRef.value && (textRef.value.textContent = props.text)) : $('#textRefSpan').css(clampClass.value)
    // 获取当前文本有多少行
    const rects = textRef.value?.getClientRects()
    if (rects) {
        // 当给定的maxLines的行数要比真正文本的行数还要小或者刚好相等时,此时需要进行文本的截取
        if (props.maxLines <= rects.length) {
            clampText('canClamp')
        } else {
            // 此时maxLines大于或者等于真正的文本行数,此时无需截取,之前将所有文本显示出来就好
            /**
             * !顺带一提,当按钮类型为oneLine时,是直接执行的这个else,因为本函数的开头在按钮为oneLine时为TextRefSpan设置了style,这会导致getClientRects只能取到一个矩形,即使用了css省略后的矩形,此时直接将textRef的内容设置为原文即可,css会自动省略,显示给定的行数
              */
            textRef.value && (textRef.value.textContent = props.text)
        }
    }
}

/**
 * 切换展开收起的方法
 */
function toggle() {
    // 当按钮的类型是单行类型时
    if (props.buttonType == 'oneLine') {
        // 当前是折叠状态时,一点就变成展开状态
        if ($('#textRefSpan').attr('style') !== undefined) {
            $('#textRefSpan').removeAttr('style')
        } else {
            // 当前是展开状态,一点变成折叠状态
            $('#textRefSpan').css(clampClass.value)
        }
        expanded.value = !expanded.value
    } else {
        // 当按钮的类型是tight类型时
        // 若当前是未展开的情况,那么点击toggle,就要显示出所有的文本
        if (!expanded.value) {
            // 判断,若当前(即点击toggle之前)是收起的状态,那么需要将文本展开,显示未截取的原文本
            // 此时要将监听去掉,不然在mounted中的监听会让文本又变成省略的状态
            props.buttonType == 'tight' && removeListener(textClampRef.value as HTMLElement)
            textRef.value && (textRef.value.textContent = props.text)
        } else {
            // 若当前已经是展开了的状态了,那么需要对文本进行截取,调用截取方法
            clampText('canClamp')
        }
        // 切换一下展开收起的状态
        expanded.value = !expanded.value
        // 然后别忘记将监听加上
        props.buttonType == 'tight' && addListener(textClampRef.value as HTMLElement, () => {
            clampText()
        })
    }
}
onMounted(() => {
    init()
    // 当按钮的类型是tight时才启动这个监听器
    if (textClampRef.value && props.buttonType == 'tight') {
        addListener(textClampRef.value as HTMLElement, () => {
            clampText()
        })
    }
})
onUnmounted(() => {
    // 卸载的时候取消对textClampRef的监听
    if (textClampRef.value && props.buttonType == 'tight') {
        removeListener(textClampRef.value as HTMLElement)
    }
}
)
</script>

<template>
    <div ref="textClampRef">
        <span ref="textRef" id="textRefSpan"></span>
        <slot ref="toggleButtonRef" name="textExpandButton" :toggle="toggle" :buttonType="buttonType"
            :isExpanded="expanded"></slot>
    </div>
</template>
<style scoped></style>
调用方法看:App.vue
<script setup lang="ts">
import Card from "./components/Card.vue";
import { ref, computed, onMounted } from "vue";
let str =
  "The ETH upgrade upgrade timeline has never been clear. The end of December last year, as well as June and August this year, are all hazy dates. This time,the core developers have provided a clear date, market confidence has increased, and the voice is loud, and Ethereum has been impacted. There aretwo voices on Ethereum 2.0 in the market, with hundreds of billions ofdollars at stake. The first is to be pessimistic, thinking that theintroduction of 2.0 with cheap gas fees and large processing capacity willallow more projects to settle in Ethereum, and that the expansion of ETH'sdemand would raise the price of ETH.The second option is to remain solidlybearish.Following 2.0, a large number of ETHs were freed, and mass sellingand homogenization rivalry became more intense.";
</script>

<template>
  <Card>
    <template #banner>
      <img src="./assets/image3.png" />
    </template>
    <template #description>
      <TextClamp :text="str" :buttonType="'tight'" :maxLines="4">
        <template #textExpandButton="props">
          <div v-if="props.buttonType == 'oneLine'" :style="{
            textAlign: 'left',
            cursor: 'pointer',
            display: 'flex',
            justifyContent: 'flex-end'
          }">
            <button @click="props.toggle">
              {{ props.isExpanded ? "Collapse" : "Expand" }}
            </button>
          </div>
          <button @click="props.toggle" v-else>
            {{ props.isExpanded ? "Collapse" : "Expand" }}
          </button>
        </template>
      </TextClamp>
    </template>
  </Card>
</template>

<style scoped>
.logo {
  height: 6em;
  padding: 1.5em;
  will-change: filter;
}

.logo:hover {
  filter: drop-shadow(0 0 2em #646cffaa);
}

.logo.vue:hover {
  filter: drop-shadow(0 0 2em #42b883aa);
}
</style>
大家可以自己下载下来跑一下看看:
源码的链接在这里https://github.com/KBKUN024/TextClamp-for-Vue3.0如果大家有更好的实现,或者对代码的有什么改进的话,非常欢迎提PR,如果对你有用,麻烦你给我一个star吧哈哈。
2023.07.31日更新:
已将TextClamp.vue进一步优化,在按钮类型为tight时,截取更加完美,不会出现按钮为单行的情况
2023.08.11日更新:
一周前已经将代码中的jQuery去除了,换成了纯js,代码缩小到21kb文章来源:https://www.toymoban.com/news/detail-615792.html
到了这里,关于TextClamp for Vue3.0(Vue3.0的文本展开收起组件)的文章就介绍完了。如果您还想了解更多内容,请在右上角搜索TOY模板网以前的文章或继续浏览下面的相关文章,希望大家以后多多支持TOY模板网!


