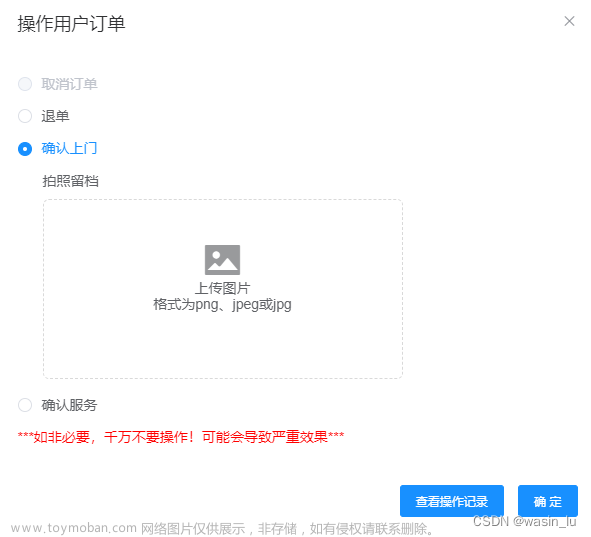
一、显示界面部分:
 <el-upload
          ref="upload"
          action=""
          :auto-upload="false"       //禁止自动上传
          :file-list="fileList"    //上传的文件列表
          :limit="limit"  // 最大允许上传个数
          :class="{hide:hideUpload}"   //上传按钮
          :on-change="beforeAvatarUpload"  // 文件状态改变时的方法
          :on-exceed="masterFileMax"  //文件超出个数限制时的方法
          :on-preview="handlePictureCardPreview"  //点击文件列表中已上传的文件时的方法
          :on-remove="handleRemove"   //文件列表移除文件时的方法
          list-type="picture-card"  //文件列表的类型
          multiple  //	是否支持多选文件
        >
          <i class="el-icon-plus"></i>
          <div slot="tip" class="form-tips" style="margin-top: 10px" >
            <el-tag  type="warning">最多上传5张,最大上传大小2MB</el-tag>
          </div>
        </el-upload>
        <el-dialog
        	:visible.sync="dialogVisibles"
        	append-to-body
        	class="dialog1"
        	width="40%">
          <img :src="dialogImageUrl" alt="" class="ims">
        </el-dialog>
二、data部分:
  data() {
    return {
      dialogImageUrl: '',   //浏览图片的路径
      fileList: [],    //图片列表
      imgs: [],
      limit: 5,  //上传图片的数量
      dialogVisibles: false,  //控制浏览图片的对话框显示隐藏
      hideUpload: false,   // 判断是否隐藏上传按钮
      isAdd: true,   //判断对应的操作
  },
三、methods部分:
//上传图片,添加到图片列表
 beforeAvatarUpload(file, fileList) {
      const isLt2M = file.size / 1024 / 1024 < 2
      if (!isLt2M) {
        this.$message.error('上传头像图片大小不能超过 2MB!')
        return
      }
      //图片转为base64位
      let _this = this
      const reader = new FileReader()
      reader.readAsDataURL(file.raw)
      reader.onload = function(e) {
        undefined
        _this.imgs.push(this.result)
      }
      //添加
      this.construction.images = this.imgs
      //编辑
      this.construction.addImages = this.imgs
      //达到限制上传图片,隐藏上传按钮
      this.hideUpload = fileList.length >= this.limit;
    },
    //删除图片,更新图片列表
    handleRemove(file, fileList) {
      //达到限制上传图片,隐藏上传按钮
      this.hideUpload = fileList.length >= this.limit;
      //isAdd用于判断是否对应的操作  true:添加   false:编辑
      if (this.isAdd) {
        const reader = new FileReader()
        reader.readAsDataURL(file.raw)
        let _this = this
        reader.onload = function(e) {
          undefined
          for (const i in _this.construction.images) {
            if (_this.construction.images[i] === this.result) {
              _this.construction.images.splice(i, 1)
            }
          }
        }
      } else {
        if (file.raw) {
          const reader = new FileReader()
          reader.readAsDataURL(file.raw)
          let _this = this
          reader.onload = function(e) {
            undefined
            for (const j in _this.construction.addImages) {
              if (_this.construction.addImages[j] === this.result) {
                _this.construction.addImages.splice(j, 1)
              }
            }
          }
        } else {
          //回显图片,执行删除并添加到图片列表(后端服务器接受的图片列表中)
          this.construction.delImages.push(file.url)
        }
      }

    },
    //图片浏览
    handlePictureCardPreview(file) {
      this.dialogImageUrl = file.url
      this.dialogVisibles = true
    },
    //限制多少张图片
    masterFileMax(files, fileList) {
      this.$message.warning(`请最多上传 ${this.limit} 个文件。`)
    },
持续更新中文章来源地址https://www.toymoban.com/news/detail-616204.html
文章来源:https://www.toymoban.com/news/detail-616204.html
到了这里,关于vue使用element-ui上传多张图片、回显,编辑、删除、上传数量以及上传按钮的隐藏的文章就介绍完了。如果您还想了解更多内容,请在右上角搜索TOY模板网以前的文章或继续浏览下面的相关文章,希望大家以后多多支持TOY模板网!


