国产大模型ChatGLM-6B微调+部署入门-使用Pycharm实战
1.ChatGLM模型介绍
ChatGLM-6B 是一个开源的、支持中英双语的对话语言模型,基于 General Language Model (GLM) 架构,具有 62 亿参数。结合模型量化技术,用户可以在消费级的显卡上进行本地部署(INT4 量化级别下最低只需 6GB 显存)。
ChatGLM-6B 使用了和 ChatGPT 相似的技术,针对中文问答和对话进行了优化。经过约 1T 标识符的中英双语训练,辅以监督微调、反馈自助、人类反馈强化学习等技术的加持,62 亿参数的 ChatGLM-6B 已经能生成相当符合人类偏好的回答。详细信息请参考: 链接.
2. 大模型参数微调
因为大模型参数比较多,不论是重新预训练还是微调,相应的硬件成本和人工成本也比较高,为了解决这一问题,网上主要涌现了基于Lora 和 基于 P-Tuning v2 的高效参数微调方法,两者的原理如下:
-
P-Tuning v2:相当于在模型每层的embedding层和Self-Attention部分拼接可训练的参数,在微调时只更新这部分参数为主

上图中黄色部分即为每层新增的可训练参数 -
LoRA:相当于对原始全量参数矩阵做低秩分解,在微调时整体参数不动,只更新新增的参数,然后再训练完成之后,将其和原始全量参数合并,从而达到微调的目的

途中橙色的梯形为新增参数,在训练完之后,会和原始模型参数作合并形成h
在这个过程中参数优化两从dd下降到 2r*d,这部分涉及到举证的低秩分解,感兴趣的同学可以去学习一下相关的矩阵论知识;
那么这两种微调方法有哪些异同点呢: -
相同点:都是固定原始大模型参数不动,通过新增可训练参数微调然后与原始模型参数共同作用,从而起到微调大模型参数的效果
-
异同点:新增加参数的方式不同,其次LoRA的方式不会增加推理时间,因为参数在推理时,整体的还是d*d,对于这里感兴趣的同学可以了解这篇 文章.
3. P-Tuning 微调实战ChatGLM-6B模型
3.1 chatglm-6b训练环境构建
官网微调链接,其中给的微调环境配置如下:
protobuf
transformers==4.27.1
cpm_kernels
torch>=1.10
gradio
mdtex2html
sentencepiece
accelerate
但是在实际搭建环境的过程中要考虑到自己的硬件设备,主要GPU驱动这块。我的硬件设备信息如下:
- 系统: Windows 10
- GPU算力:3060 12G
- CPU型号:16核 32G
因为主要是显卡驱动这块需要适配,所以我把我的驱动信息附图显示
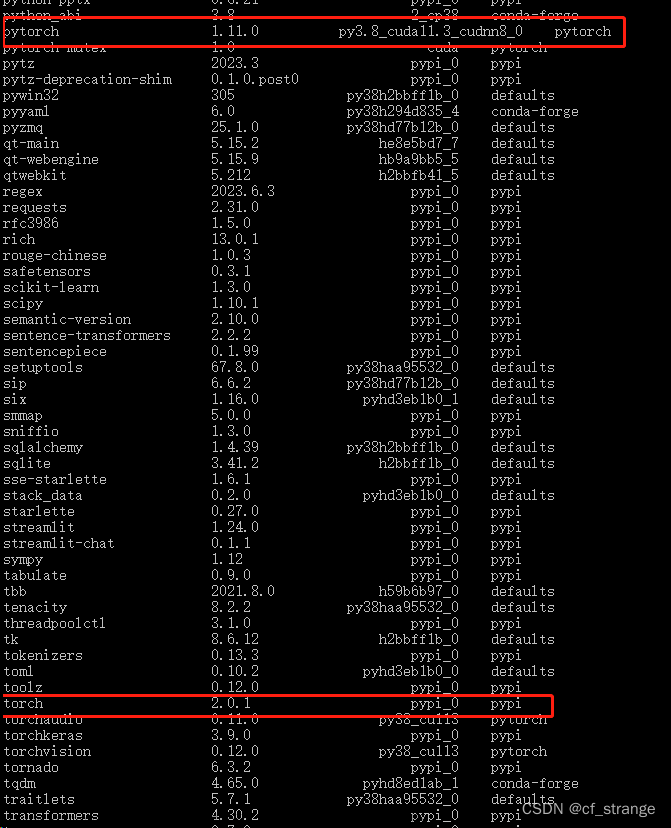
显卡驱动为512.29,CUDA版本为11.6,因此在配torch环境时需要适配,我的anaconda环境版本安装如下:
Package                       Version
----------------------------- ------------
aiofiles                      22.1.0
aiohttp                       3.8.4
aiosignal                     1.3.1
aiosqlite                     0.18.0
altair                        4.2.2
anaconda-client               1.11.1
anaconda-navigator            2.4.0
anaconda-project              0.11.1
anyio                         3.5.0
argon2-cffi                   21.3.0
argon2-cffi-bindings          21.2.0
asttokens                     2.0.5
async-timeout                 4.0.2
attrs                         22.1.0
Babel                         2.11.0
backcall                      0.2.0
backports.functools-lru-cache 1.6.4
backports.tempfile            1.0
backports.weakref             1.0.post1
beautifulsoup4                4.12.2
bleach                        4.1.0
boltons                       23.0.0
brotlipy                      0.7.0
certifi                       2023.5.7
cffi                          1.15.1
chardet                       4.0.0
charset-normalizer            2.0.4
click                         8.0.4
clyent                        1.2.2
colorama                      0.4.6
coloredlogs                   15.0.1
comm                          0.1.2
conda                         23.5.2
conda-build                   3.23.3
conda-content-trust           0.1.3
conda-pack                    0.6.0
conda-package-handling        2.0.2
conda_package_streaming       0.7.0
conda-repo-cli                1.0.41
conda-token                   0.4.0
conda-verify                  3.4.2
cpm-kernels                   1.0.11
cryptography                  39.0.1
datasets                      2.11.0
debugpy                       1.5.1
decorator                     5.1.1
defusedxml                    0.7.1
dill                          0.3.6
entrypoints                   0.4
executing                     0.8.3
fastapi                       0.95.0
fastjsonschema                2.16.2
ffmpy                         0.3.0
filelock                      3.9.0
flatbuffers                   23.5.26
frozenlist                    1.3.3
fsspec                        2023.6.0
fst-pso                       1.8.1
future                        0.18.3
FuzzyTM                       2.0.5
glob2                         0.7
gradio                        3.24.1
gradio_client                 0.0.8
h11                           0.14.0
httpcore                      0.16.3
httpx                         0.23.3
huggingface-hub               0.16.4
humanfriendly                 10.0
icetk                         0.0.4
idna                          3.4
ipykernel                     6.19.2
ipython                       8.12.0
ipython-genutils              0.2.0
ipywidgets                    8.0.4
jedi                          0.18.1
jieba                         0.42.1
Jinja2                        3.1.2
joblib                        1.3.1
json5                         0.9.6
jsonpatch                     1.32
jsonpointer                   2.1
jsonschema                    4.17.3
jupyter                       1.0.0
jupyter_client                8.1.0
jupyter-console               6.6.3
jupyter_core                  5.3.0
jupyter-events                0.6.3
jupyter_server                2.5.0
jupyter_server_fileid         0.9.0
jupyter_server_terminals      0.4.4
jupyter_server_ydoc           0.8.0
jupyter-ydoc                  0.2.4
jupyterlab                    3.6.3
jupyterlab-pygments           0.1.2
jupyterlab_server             2.22.0
jupyterlab-widgets            3.0.5
latex2mathml                  3.75.2
libarchive-c                  2.9
linkify-it-py                 2.0.0
loguru                        0.7.0
lxml                          4.9.2
markdown-it-py                2.2.0
MarkupSafe                    2.1.1
matplotlib-inline             0.1.6
mdit-py-plugins               0.3.3
mdtex2html                    1.2.0
mdurl                         0.1.2
menuinst                      1.4.19
miniful                       0.0.6
mistune                       0.8.4
mpmath                        1.3.0
multidict                     6.0.4
multiprocess                  0.70.14
navigator-updater             0.4.0
nbclassic                     0.5.5
nbclient                      0.5.13
nbconvert                     6.5.4
nbformat                      5.7.0
nest-asyncio                  1.5.6
nltk                          3.8.1
notebook                      6.5.4
notebook_shim                 0.2.2
numpy                         1.25.1
onnx                          1.14.0
onnxruntime-gpu               1.14.1
openai                        0.27.4
orjson                        3.8.10
packaging                     23.0
pandas                        2.0.3
pandocfilters                 1.5.0
parso                         0.8.3
pathlib                       1.0.1
pickleshare                   0.7.5
Pillow                        9.4.0
pip                           23.1.2
pkginfo                       1.9.6
platformdirs                  2.5.2
pluggy                        1.0.0
ply                           3.11
prometheus-client             0.14.1
prompt-toolkit                3.0.36
protobuf                      4.23.4
psutil                        5.9.0
pure-eval                     0.2.2
pyarrow                       11.0.0
pycosat                       0.6.4
pycparser                     2.21
pydantic                      1.10.7
pydub                         0.25.1
pyFUME                        0.2.25
Pygments                      2.15.1
PyJWT                         2.4.0
pyOpenSSL                     23.0.0
PyQt5                         5.15.7
PyQt5-sip                     12.11.0
pyreadline3                   3.4.1
pyrsistent                    0.18.0
PySocks                       1.7.1
python-dateutil               2.8.2
python-json-logger            2.0.7
python-multipart              0.0.6
pytz                          2022.7
pywin32                       305.1
pywinpty                      2.0.10
PyYAML                        6.0
pyzmq                         25.1.0
qtconsole                     5.4.2
QtPy                          2.2.0
regex                         2023.6.3
requests                      2.29.0
responses                     0.18.0
rfc3339-validator             0.1.4
rfc3986                       1.5.0
rfc3986-validator             0.1.1
rouge-chinese                 1.0.3
ruamel.yaml                   0.17.21
ruamel.yaml.clib              0.2.6
ruamel-yaml-conda             0.17.21
safetensors                   0.3.1
semantic-version              2.10.0
Send2Trash                    1.8.0
sentencepiece                 0.1.97
setuptools                    65.6.3
simpful                       2.10.0
sip                           6.6.2
six                           1.16.0
sklearn                       0.0.post7
sniffio                       1.2.0
soupsieve                     2.4
stack-data                    0.2.0
starlette                     0.26.1
sympy                         1.12
terminado                     0.17.1
text2vec                      1.1.7
textvec                       3.0
tinycss2                      1.2.1
tokenizers                    0.13.3
toml                          0.10.2
tomli                         2.0.1
toolz                         0.12.0
torch                         1.13.1+cu116
torchaudio                    0.13.1+cu116
torchvision                   0.14.1+cu116
tornado                       6.2
tqdm                          4.65.0
traitlets                     5.7.1
transformers                  4.27.1
typing_extensions             4.6.3
tzdata                        2023.3
uc-micro-py                   1.0.1
ujson                         5.4.0
urllib3                       1.26.16
uvicorn                       0.21.1
wcwidth                       0.2.5
webencodings                  0.5.1
websocket-client              0.58.0
websockets                    11.0.1
wheel                         0.38.4
widgetsnbextension            4.0.5
win-inet-pton                 1.1.0
win32-setctime                1.1.0
wincertstore                  0.2
xxhash                        3.2.0
y-py                          0.5.9
yarl                          1.8.2
ypy-websocket                 0.8.2
zstandard                     0.19.0
3.2 代码构建
3.2.1 拉取数据和代码
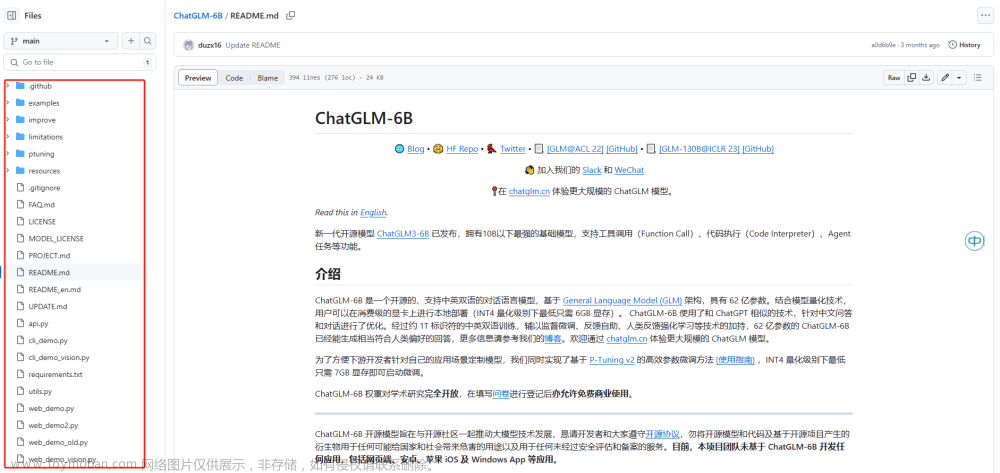
在搭建好代码运行环境后,我们需要从官方拉取代码,下载相应数据
代码拉取地址链接
数据拉取地址链接
3.2.2 使用pycharm配置参数
整个代码框架如下图所示,将数据集加压拷贝到ptuning即可
点击main.py的参数配置界面,配置初始化参数:
参数配置如下:
--do_train
--train_file
AdvertiseGen/train.json
--validation_file
AdvertiseGen/dev.json
--prompt_column
content
--response_column
summary
--overwrite_cache
--model_name_or_path
THUDM/chatglm-6b
--output_dir
output/adver_out
--overwrite_output_dir
--max_source_length
64
--max_target_length
64
--per_device_train_batch_size
1
--per_device_eval_batch_size
1
--gradient_accumulation_steps
16
--predict_with_generate
--max_steps
3000
--logging_steps
10
--save_steps
1000
--learning_rate
2e-2
--pre_seq_len
128
--quantization_bit
4
3.3 执行训练
点击运行按钮,即可看到执行日志

在微调过程中,内存占用7G左右,耗时10小时+
3.4 模型训练部署测试
经过10个小时的训练,模型已经训练完毕,相关日志如下:
接下来我们测试一下模型训练后的效果,需要对模型进行推理测试,测试代码如下:文章来源:https://www.toymoban.com/news/detail-617749.html
import os
import torch
from transformers import AutoConfig, AutoModel, AutoTokenizer

# 载入Tokenizer
tokenizer = AutoTokenizer.from_pretrained("THUDM/chatglm-6b", trust_remote_code=True)
# Fine-tuning 后的表现测试
config = AutoConfig.from_pretrained("THUDM/chatglm-6b", trust_remote_code=True, pre_seq_len=128)
model = AutoModel.from_pretrained("THUDM/chatglm-6b", config=config, trust_remote_code=True).half()
# 此处使用你的 ptuning 工作目录
prefix_state_dict = torch.load(os.path.join("E:/NLP/1.chatGLM/ChatGLM-6B-main/ptuning/output/adver_out/checkpoint-3000", "pytorch_model.bin"))
#将训练的权重与原始权重进行拼接
new_prefix_state_dict = {}
for k, v in prefix_state_dict.items():
    new_prefix_state_dict[k[len("transformer.prefix_encoder."):]] = v
model.transformer.prefix_encoder.load_state_dict(new_prefix_state_dict)

print(f"Quantized to 4 bit--12G及以下显卡必须使用量化")
model = model.quantize(4)
model = model.cuda()
model.transformer.prefix_encoder.float()
model = model.eval()

#模型测试
response, history = model.chat(tokenizer, "类型#上衣\*材质#牛仔布\*颜色#白色\*风格#简约\*图案#刺绣\*衣样式#外套\*衣款式#破洞", history=[])
response
模型测试结果如下:
推理过程显存占用情况如下:
为了对比优化后确实比之前效果好,使用原始模型进行测试推理 可以发现使用数据微调后的模型表现要优于原始模型!文章来源地址https://www.toymoban.com/news/detail-617749.html
到了这里,关于ChatGLM-6B 部署与 P-Tuning 微调实战-使用Pycharm实战的文章就介绍完了。如果您还想了解更多内容,请在右上角搜索TOY模板网以前的文章或继续浏览下面的相关文章,希望大家以后多多支持TOY模板网!


