前言
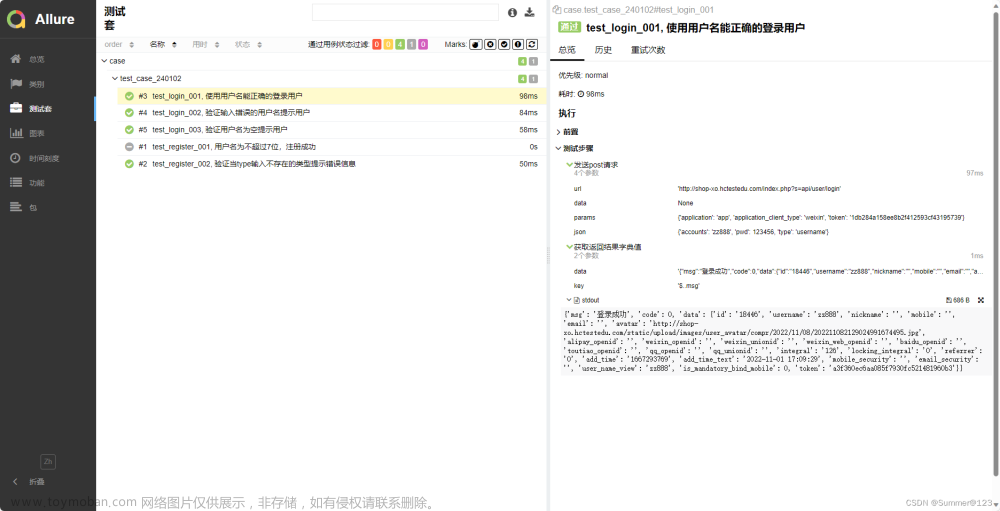
pytest只是单独的一个单元测试框架,要完成app测试自动化需要把pytest和appium进行整合,同时利用allure完成测试报告的产出。
编写常规的线性脚本具体的步骤如下:
1、设计待测试APP的自动化测试用例
2、新建app测试项目
3、配置conftest.py文件等
4、编写整体app测试用例运行文件
5、把设计好的自动化测试用例转化成脚本备注
以下示例采用计算器为示例
前置条件:下载第三方库
下载 appium-python-client
下载 pytest
下载 allure-pytest
1、设计待测试APP的自动化测试用例

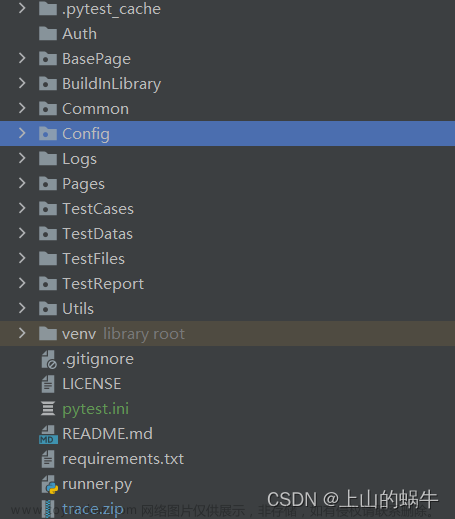
2、新建APP测试项目

3、配置文件信息
先配置外层conftest.py文件
import pytest

# 配置app的各种连接信息
@pytest.fixture(scope='session')
def android_setting():
    des = {
        'automationName': 'appium',
        'platformName': 'Android',
        'platformVersion': '6.0.1',  # 填写android虚拟机/真机的系统版本号
        'deviceName': 'MuMu',  # 填写安卓虚拟机/真机的设备名称
        'appPackage': 'com.sky.jisuanji',  # 填写被测app包名
        'appActivity': '.JisuanjizixieActivity',  # 填写被测app的入口
        'udid': '127.0.0.1:7555',  # 填写通过命令行 adb devices 查看到的udid
        'noReset': True,  # 是否重置APP
        'noSign': True,  # 是否不签名
        'unicodeKeyboard': True,  # 是否支持中文输入
        'resetKeyboard': True,  # 是否支持重置键盘
        'newCommandTimeout': 30  # 30秒没发送新命令就断开连接
    }
    return des
再配置用例层的conftest.py文件
import time
import pytest
from appium import webdriver

driver = None
# 启动安卓系统中的计算器app
@pytest.fixture()
def start_app(android_setting):
    global driver
    driver = webdriver.Remote('http://127.0.0.1:4723/wd/hub',android_setting)
    return driver

# 关闭安卓系统中的计算器app
@pytest.fixture()
def close_app():
    yield driver
    time.sleep(2)
    driver.close_app()
配置pytest.ini文件进行分组设置

4、编写run_all_cases.py测试执行入口文件
import os
import pytest

# 当前路径(使用 abspath 方法可通过dos窗口执行)
current_path = os.path.dirname(os.path.abspath(__file__))
# json报告路径
json_report_path = os.path.join(current_path,'report/json')
# html报告路径
html_report_path = os.path.join(current_path,'report/html')

# 执行pytest下的用例并生成json文件
pytest.main(['-s','-v','--alluredir=%s'%json_report_path,'--clean-alluredir'])
# 把json文件转成html报告
os.system('allure generate %s -o %s --clean'%(json_report_path,html_report_path))
5、编写测试用例
在testcases层下有两个业务子模块 test_add_sub_module 和 test_mul_div_module;
test_add_sub_module模块下test_add.py文件
代码如下:
import allure
from appium.webdriver.webdriver import By

@allure.epic('安卓计算机项目')
@allure.feature('V1.0版本')
class TestAddSub():
    @allure.story('加法运算')
    @allure.title('[case01] 验证计算机能否正常完成加法功能')
    # @pytest.mark.add_basic
    def test_cases01(self,start_app,close_app):
        with allure.step('1、启动安卓系统中的计算机app'):
            driver = start_app
        with allure.step('2、依次按下9、+、8、='):
            driver.find_element(By.XPATH,'//android.widget.Button[@resource-id="com.sky.jisuanji:id/btn9"]').click()
            driver.find_element(By.XPATH, '//android.widget.Button[@resource-id="com.sky.jisuanji:id/jia"]').click()
            driver.find_element(By.XPATH, '//android.widget.Button[@resource-id="com.sky.jisuanji:id/btn8"]').click()
            driver.find_element(By.XPATH, '//android.widget.Button[@resource-id="com.sky.jisuanji:id/denyu"]').click()
            actual_result = driver.find_element(By.XPATH, '//android.widget.EditText[@resource-id="com.sky.jisuanji:id/text"]').text
        with allure.step('3、验证实际结果是否正确'):
            # 断言 实际结果 == 17.0
            assert actual_result == '17.0'
test_add_sub_module模块下test_sub.py文件
代码如下:
import allure
from appium.webdriver.webdriver import By

@allure.epic('安卓计算机项目')
@allure.feature('V1.0版本')
class TestAddSub():
    @allure.story('减法运算')
    @allure.title('[case01] 验证计算机能否正常完成减法功能')
    def test_cases01(self,start_app,close_app):
        with allure.step('1、启动安卓系统中的计算机app'):
            driver = start_app
        with allure.step('2、依次按下6、-、2、='):
            driver.find_element(By.XPATH,'//android.widget.Button[@resource-id="com.sky.jisuanji:id/btn6"]').click()
            driver.find_element(By.XPATH, '//android.widget.Button[@resource-id="com.sky.jisuanji:id/jian"]').click()
            driver.find_element(By.XPATH, '//android.widget.Button[@resource-id="com.sky.jisuanji:id/btn2"]').click()
            driver.find_element(By.XPATH, '//android.widget.Button[@resource-id="com.sky.jisuanji:id/denyu"]').click()
            actual_result = driver.find_element(By.XPATH, '//android.widget.EditText[@resource-id="com.sky.jisuanji:id/text"]').text
        with allure.step('3、验证实际结果是否正确'):
            # 断言 实际结果 == 4.0
            assert actual_result == '4.0'
test_mul_div_module模块下test_mul.py文件
代码如下:
import allure
from appium.webdriver.webdriver import By

@allure.epic('安卓计算机项目')
@allure.feature('V1.0版本')
class TestAddSub():
    @allure.story('乘法运算')
    @allure.title('[case01] 验证计算机能否正常完成乘法功能')
    def test_cases01(self,start_app,close_app):
        with allure.step('1、启动安卓系统中的计算机app'):
            driver = start_app
        with allure.step('2、依次按下3、*、4、='):
            driver.find_element(By.XPATH,'//android.widget.Button[@resource-id="com.sky.jisuanji:id/btn3"]').click()
            driver.find_element(By.XPATH, '//android.widget.Button[@resource-id="com.sky.jisuanji:id/chen"]').click()
            driver.find_element(By.XPATH, '//android.widget.Button[@resource-id="com.sky.jisuanji:id/btn4"]').click()
            driver.find_element(By.XPATH, '//android.widget.Button[@resource-id="com.sky.jisuanji:id/denyu"]').click()
            actual_result = driver.find_element(By.XPATH, '//android.widget.EditText[@resource-id="com.sky.jisuanji:id/text"]').text
        with allure.step('3、验证实际结果是否正确'):
            # 断言 实际结果 == 12.0
            assert actual_result == '12.0'
test_mul_div_module模块下test_div.py文件
代码如下:
import allure
from appium.webdriver.webdriver import By

@allure.epic('安卓计算机项目')
@allure.feature('V1.0版本')
class TestAddSub():
    @allure.story('除法运算')
    @allure.title('[case01] 验证计算机能否正常完成除法功能')
    def test_cases01(self,start_app,close_app):
        with allure.step('1、启动安卓系统中的计算机app'):
            driver = start_app
        with allure.step('2、依次按下8、*、4、='):
            driver.find_element(By.XPATH,'//android.widget.Button[@resource-id="com.sky.jisuanji:id/btn8"]').click()
            driver.find_element(By.XPATH, '//android.widget.Button[@resource-id="com.sky.jisuanji:id/chu"]').click()
            driver.find_element(By.XPATH, '//android.widget.Button[@resource-id="com.sky.jisuanji:id/btn4"]').click()
            driver.find_element(By.XPATH, '//android.widget.Button[@resource-id="com.sky.jisuanji:id/denyu"]').click()
            actual_result = driver.find_element(By.XPATH, '//android.widget.EditText[@resource-id="com.sky.jisuanji:id/text"]').text
        with allure.step('3、验证实际结果是否正确'):
            # 断言 实际结果 == 2.0
            assert actual_result == '2.0'
6、运行结果生成测试报告

| 下面是我整理的2023年最全的软件测试工程师学习知识架构体系图 |
一、Python编程入门到精通

二、接口自动化项目实战

三、Web自动化项目实战

四、App自动化项目实战

五、一线大厂简历

六、测试开发DevOps体系

七、常用自动化测试工具

八、JMeter性能测试

九、总结(尾部小惊喜)
梦想是风帆,奋斗是航船,只有不断追逐才能抵达成功的彼岸。踏浪前行,勇往直前,拼尽全力,终将扬起胜利的风帆。坚信自己,勇敢闯荡,你必能驶向辉煌,书写属于自己的壮丽篇章。
人生犹如攀登高峰之路,越是陡峭的山势,越显我们的勇气。跨越困难,超越自我,拼搏奋斗铸就辉煌。不忘初心,砥砺前行,坚定信念,你必能征服一切,创造属于自己的辉煌人生。文章来源:https://www.toymoban.com/news/detail-619497.html
命运的舞台属于勇敢者,每一次努力都是改变的契机。放飞心灵,砥砺前行,只有奋斗才能创造无限可能。相信自己的力量,坚持不懈,你将开启一段辉煌的征程,书写属于自己的壮丽传奇。文章来源地址https://www.toymoban.com/news/detail-619497.html
到了这里,关于APP自动化测试-Python+Appium+Pytest+Allure框架实战封装(详细)的文章就介绍完了。如果您还想了解更多内容,请在右上角搜索TOY模板网以前的文章或继续浏览下面的相关文章,希望大家以后多多支持TOY模板网!


