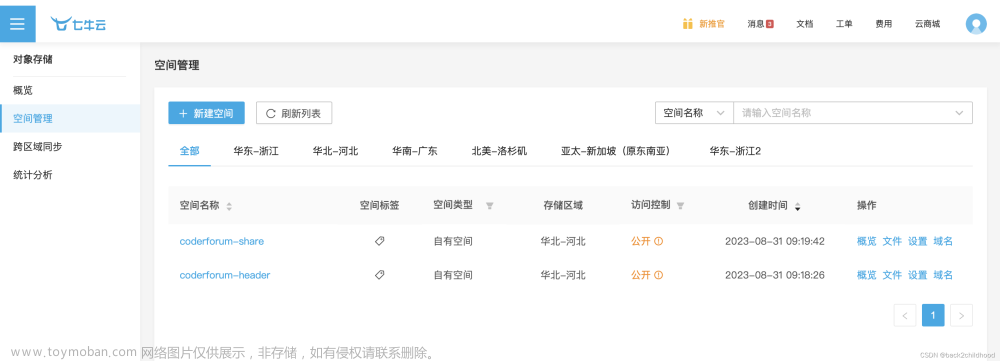
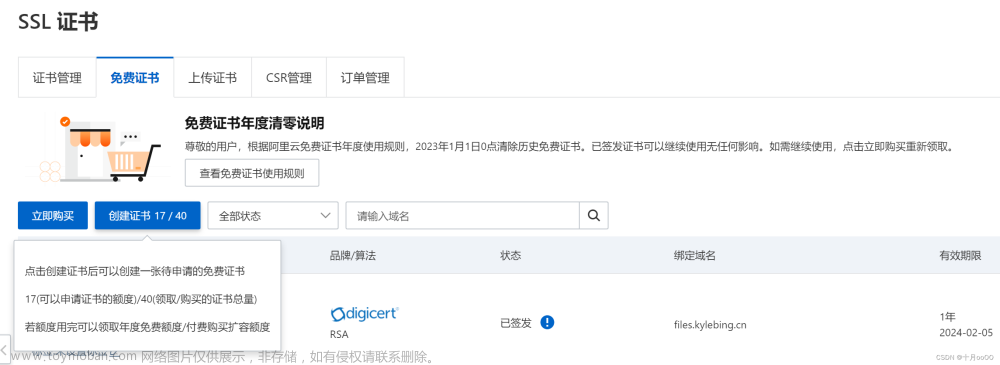
说明:存在部分步骤省略的情况,请根据具体文档进行操作
下载相关sdk
composer require qiniu/php-sdk

composer require aliyuncs/oss-sdk-php
composer require alibabacloud/sts-20150401

composer require qcloud/cos-sdk-v5
composer require qcloud_sts/qcloud-sts-sdk

# 如果不需要,请移除,示例:
# composer remove qcloud_sts/qcloud-sts-sdk
use Qiniu\Auth;
use AlibabaCloud\SDK\Sts\V20150401\Sts;
use Darabonba\OpenApi\Models\Config;
use AlibabaCloud\SDK\Sts\V20150401\Models\AssumeRoleRequest;
use AlibabaCloud\Tea\Utils\Utils\RuntimeOptions;

require_once 'vendor/autoload.php'; // 请根据实际情况引入

class oss
{
    public function qiniuPolicy()
    {
        $domain = ''; // 访问oss文件的域名
        $bucket = ''; // 空间名称
        $accessKey = '';
        $secretKey = '';
        $endpoint = ''; // 上传文件的地址,例如:https://up-z2.qiniup.com
        $prefix = ''; // 指定bucket目录前缀
        $dir = $prefix . '/' . date('Ymd') . '/'; // 按日期上传到指定目录

        $expire = time() + 3600;
        $policyArr = [
            'scope' => $bucket,
            'deadline' => $expire,
            'fsizeMin' => 1,
            'fsizeLimit' => 10 * 1024 * 1024,
        ];

        $auth = new Auth($accessKey, $secretKey);
        $token = $auth->uploadToken($bucket, null, 3600, $policyArr);
        if (empty($token)) {
            return [];
        }

        return [
            'endpoint' => $endpoint,
            'host' => $domain,
            'accessId' => '',
            'policy' => '',
            'signature' => '',
            'token' => $token,
            'expire' => $expire,
            'keyTime' => '',
            'algorithm' => '',
            'dir' => $dir,
        ];
    }

    public function aliPolicy()
    {
        // https://help.aliyun.com/zh/oss/use-cases/obtain-signature-information-from-the-server-and-upload-data-to-oss

        $domain = ''; // 访问oss文件的域名
        $bucket = ''; // 空间名称
        $accessKey = '';
        $secretKey = '';
        $endpoint = ''; // 上传文件的地址,例如:https://{bucket名称}.oss-cn-shenzhen.aliyuncs.com
        $prefix = ''; // 指定bucket目录前缀
        $dir = $prefix . '/' . date('Ymd') . '/'; // 按日期上传到指定目录

        // https://help.aliyun.com/zh/oss/developer-reference/postobject#section-d5z-1ww-wdb
        $expire = time() + 3600;
        $policyArr = [
            'expiration' => date('Y-m-d\TH:i:s.000\Z', $expire),
            'conditions' => [
                ['bucket' => $bucket],
                ['content-length-range', 1, 10 * 1024 * 1024],
            ]
        ];
        $policy = base64_encode(json_encode($policyArr));

        // https://help.aliyun.com/zh/oss/developer-reference/postobject#section-wny-mww-wdb
        $signature = base64_encode(hash_hmac('sha1', $policy, $secretKey, true));

        return [
            'endpoint' => $endpoint,
            'host' => $domain,
            'accessId' => $accessKey,
            'policy' => $policy,
            'signature' => $signature,
            'token' => '',
            'expire' => $expire,
            'keyTime' => '',
            'algorithm' => '',
            'dir' => $dir,
        ];
    }

    public function aliSts()
    {
        // https://help.aliyun.com/zh/oss/developer-reference/authorize-access-2

        try {
            // 填写步骤1创建的RAM用户AccessKey。
            $config = new Config([
                "accessKeyId" => "【填写】",
                "accessKeySecret" => "【填写】"
            ]);
            //
            $config->endpoint = "【填写】"; // sts.cn-hangzhou.aliyuncs.com
            $client =  new Sts($config);

            $assumeRoleRequest = new AssumeRoleRequest([
                // roleArn填写步骤2获取的角色ARN,例如acs:ram::175708322470****:role/ramtest。
                "roleArn" => "【填写】",
                // roleSessionName用于自定义角色会话名称,用来区分不同的令牌,例如填写为sessiontest。
                "roleSessionName" => "【填写】",
                // durationSeconds用于设置临时访问凭证有效时间单位为秒,最小值为900,最大值以当前角色设定的最大会话时间为准。本示例指定有效时间为3000秒。
                "durationSeconds" => 3000,
                // policy填写自定义权限策略,用于进一步限制STS临时访问凭证的权限。如果不指定Policy,则返回的STS临时访问凭证默认拥有指定角色的所有权限。
                // 临时访问凭证最后获得的权限是步骤4设置的角色权限和该Policy设置权限的交集。
                // "policy" => ""
            ]);
            $runtime = new RuntimeOptions([]);
            $result = $client->assumeRoleWithOptions($assumeRoleRequest, $runtime);
            //printf("AccessKeyId:" . $result->body->credentials->accessKeyId. PHP_EOL);
            //printf("AccessKeySecret:".$result->body->credentials->accessKeySecret.PHP_EOL);
            //printf("Expiration:".$result->body->credentials->expiration.PHP_EOL);
            //printf("SecurityToken:".$result->body->credentials->securityToken.PHP_EOL);
        }catch (Exception $e){
            // printf($e->getMessage() . PHP_EOL);
            return [];
        }

        return $result;
    }

    public function qcloudPolicy()
    {
        // https://cloud.tencent.com/document/product/436/14690

        $domain = ''; // 访问oss文件的域名
        $bucket = ''; // 空间名称
        $accessKey = '';
        $secretKey = '';
        $endpoint = ''; // 上传文件的地址,例如:https://{bucket名称}.cos.ap-guangzhou.myqcloud.com
        $prefix = ''; // 指定bucket目录前缀
        $dir = $prefix . '/' . date('Ymd') . '/'; // 按日期上传到指定目录

        $algorithm = 'sha1';

        $startTime = time();
        $endTime = time() + 3600;
        $expiration = date('Y-m-d\TH:i:s.000\Z', $endTime);
        $keyTime = implode(';', [$startTime, $endTime]);

        $policyArr = [
            'expiration' => $expiration,
            'conditions' => [
                ['acl' => 'default'],
                ['bucket' => $bucket],
                ['q-sign-algorithm' => $algorithm],
                ['q-ak' => $secretId],
                ['q-sign-time' => $keyTime]
            ]
        ];
        $policy = base64_encode(json_encode($policyArr));

        $signKey = hash_hmac($algorithm, $keyTime, $secretKey);
        $stringToSign = sha1(json_encode($policyArr));
        $signature = hash_hmac($algorithm, $stringToSign, $signKey);

        return [
            'endpoint' => $endpoint,
            'host' => $domain,
            'accessId' => $secretId,
            'policy' => $policy,
            'signature' => $signature,
            'token' => '',
            'expire' => $endTime,
            'keyTime' => $keyTime,
            'algorithm' => $algorithm,
            'dir' => $dir,
        ];
    }

    public function qcloudSts()
    {
        // https://cloud.tencent.com/document/product/436/14048
        // https://github.com/tencentyun/qcloud-cos-sts-sdk/blob/master/php/demo/sts_test.php

        $domain = config('oss.qcloud_domain');
        $bucket = config('oss.qcloud_bucket');
        $secretId = config('oss.qcloud_access_key');
        $secretKey = config('oss.qcloud_secret_key');
        $endpoint = config('oss.qcloud_endpoint');
        $prefix = config('oss.qcloud_bucket_key_prefix');
        $dir = $prefix . '/' . date('Ymd') . '/';
        $region = 'ap-guangzhou';

        $sts = new \QCloud\COSSTS\Sts();
        $config = array(
            'url' => 'https://sts.tencentcloudapi.com/', // url和domain保持一致
            'domain' => 'sts.tencentcloudapi.com', // 域名,非必须,默认为 sts.tencentcloudapi.com
            'proxy' => '',
            'secretId' => $secretId, // 固定密钥,若为明文密钥,请直接以'xxx'形式填入,不要填写到getenv()函数中
            'secretKey' => $secretKey, // 固定密钥,若为明文密钥,请直接以'xxx'形式填入,不要填写到getenv()函数中
            'bucket' => $bucket, // 换成你的 bucket
            'region' => $region, // 换成 bucket 所在园区
            'durationSeconds' => 3600, // 密钥有效期
            'allowPrefix' => ['*'], // 这里改成允许的路径前缀,可以根据自己网站的用户登录态判断允许上传的具体路径,例子: a.jpg 或者 a/* 或者 * (使用通配符*存在重大安全风险, 请谨慎评估使用)
            // 密钥的权限列表。简单上传和分片需要以下的权限,其他权限列表请看 https://cloud.tencent.com/document/product/436/31923
            'allowActions' => array(
                // 简单上传
                'name/cos:PutObject',
                'name/cos:PostObject',
                // 分片上传
                'name/cos:InitiateMultipartUpload',
                'name/cos:ListMultipartUploads',
                'name/cos:ListParts',
                'name/cos:UploadPart',
                'name/cos:CompleteMultipartUpload'
            ),
            // 临时密钥生效条件,关于condition的详细设置规则和COS支持的condition类型可以参考 https://cloud.tencent.com/document/product/436/71306
            'condition' => []
        );

        // 获取临时密钥,计算签名
        $tempKeys = $sts->getTempKeys($config);
        return $tempKeys ?: [];

/**
数据如下:
{
  "expiredTime": 1691169303,
  "expiration": "2023-08-04T17:15:03Z",
  "credentials": {
    "sessionToken": "",
    "tmpSecretId": "",
    "tmpSecretKey": ""
  },
  "requestId": "6b274db5-a86b-4e27-a0e9-50f8ae1832f4",
  "startTime": 1691165703
}
*/
    }
}
表单提交到七牛云
<!DOCTYPE html>
<html lang="en">
<head>
    <meta charset="UTF-8">
    <title>七牛云oss upload</title>
</head>
<body>
<form method="post" action="{来自于$data里面的endpoint}" enctype="multipart/form-data">
    <input type="hidden" name="key" id="key" value="">
    <input type="hidden" name="token" id="token" value="">
    <input type="hidden" name="crc32" />
    <input type="hidden" name="accept" />
    <input type="file" name="file" id="file" onchange="change(this)" />
    <input type="submit" value="上传文件" id="submit"/>
</form>
<script>
    // 实例化oss类,获取数据
    // $oss = new oss();
    // $data = $oss->qiniuPolicy();

    let eleKey = document.getElementById('key');
    let eleToken = document.getElementById('token');
    eleToken.value = ''; // 来自$data里面的token

    function change(obj) {
        let uploadDir = ''; // 来自$data里面的dir
        let fname = uploadDir + obj.files[0]['name'];
        console.log(fname);
        eleKey.value = fname;
    }
</script>
</body>
</html>
表单提交到阿里云
<!DOCTYPE html>
<html lang="en">
<head>
    <meta charset="UTF-8">
    <title>阿里云oss upload</title>
</head>
<body>
<form method="post" action="{来自于$data里面的endpoint}" enctype="multipart/form-data">
    <input type="hidden" name="key" id="key" value="">
    <input type="hidden" name="OSSAccessKeyId" id="accessKey" value="">
    <input type="hidden" name="policy" id="policy" value="">
    <input type="hidden" name="signature" id="signature" value="">
    <input name="file" type="file" id="file" onchange="change(this)" />
    <input type="submit" value="上传文件" id="submit"/>
</form>
<script>
    // 实例化oss类,获取数据
    // $oss = new oss();
    // $data = $oss->aliPolicy();

    let eleKey = document.getElementById('key');
    let eleAccessKey= document.getElementById('accessKey');
    let elePolicy = document.getElementById('policy');
    let eleSignature = document.getElementById('signature');
    eleAccessKey.value = ''; // 来自$data里面的accessId
    elePolicy.value = ''; // 来自$data里面的policy
    eleSignature.value = ''; // 来自$data里面的signature

    function change(obj) {
        let uploadDir = ''; // 来自$data里面的dir
        let fname = uploadDir + obj.files[0]['name'];
        console.log(fname);
        eleKey.value = fname;
    }
</script>
</body>
</html>
表单提交到阿里云(sts)
说明:需要修改acl权限,不然无法上传文件
<!DOCTYPE html>
<html lang="en">
<head>
    <meta charset="UTF-8" />
    <title>阿里云oss upload</title>
</head>
<body>
<input id="file" type="file" />
<button id="upload">上传</button>
<script src="https://gosspublic.alicdn.com/aliyun-oss-sdk-6.16.0.min.js"></script>
<script>
    // yourRegion填写Bucket所在地域。以华东1(杭州)为例,yourRegion填写为oss-cn-hangzhou。
    let region = '';

    // 填写Bucket名称。
    let bucket = '';

    // 从STS服务获取的临时访问密钥(AccessKey ID和AccessKey Secret)。
    // 从STS服务获取的安全令牌(SecurityToken)。
    let stsData = {
        AccessKeyId:"",
        AccessKeySecret:"",
        Expiration:"",
        SecurityToken:""
    };

    const client = new OSS({
        // yourRegion填写Bucket所在地域。以华东1(杭州)为例,yourRegion填写为oss-cn-hangzhou。
        region: region,
        // 从STS服务获取的临时访问密钥(AccessKey ID和AccessKey Secret)。
        accessKeyId: stsData.AccessKeyId,
        accessKeySecret: stsData.AccessKeySecret,
        // 从STS服务获取的安全令牌(SecurityToken)。
        stsToken: stsData.SecurityToken,
        // 填写Bucket名称。
        bucket: bucket
    });

    // 从输入框获取file对象,例如<input type="file" id="file" />。
    let data;
    // 创建并填写Blob数据。
    //const data = new Blob(['Hello OSS']);
    // 创建并填写OSS Buffer内容。
    //const data = new OSS.Buffer(['Hello OSS']);

    const upload = document.getElementById("upload");

    async function putObject (data) {
        try {
            // 填写Object完整路径。Object完整路径中不能包含Bucket名称。
            // 您可以通过自定义文件名(例如exampleobject.txt)或文件完整路径(例如exampledir/exampleobject.txt)的形式实现将数据上传到当前Bucket或Bucket中的指定目录。
            // data对象可以自定义为file对象、Blob数据或者OSS Buffer。
            const result = await client.put(
                "1.png",
                data
            );
            console.log(result);
        } catch (e) {
            console.log(e);
        }
    }

    upload.addEventListener("click", () => {
        const data = file.files[0];
        putObject(data);
    });
</script>
</body>
</html>
表单提交到腾讯云
<!DOCTYPE html>
<html lang="en">
<head>
    <meta charset="UTF-8">
    <title>腾讯云oss upload</title>
</head>
<body>
<form method="post" action="{来自于$data里面的endpoint}" enctype="multipart/form-data">
    <input type="hidden" name="key" id="key" value="">
    <input type="hidden" name="acl" id="acl" value="default">
    <input type="hidden" name="policy" id="policy" value="">
    <input type="hidden" name="q-sign-algorithm" id="algorithm" value="">
    <input type="hidden" name="q-ak" id="ak" value="">
    <input type="hidden" name="q-key-time" id="keyTime" value="">
    <input type="hidden" name="q-signature" id="signature" value="">
    <input type="file" name="file" id="file" onchange="change(this)" />
    <input type="submit" value="上传文件" id="submit"/>
</form>
<script>
    // 实例化oss类,获取数据
    // $oss = new oss();
    // $data = $oss->qcloudPolicy();

    let eleKey = document.getElementById('key');
    let elePolicy = document.getElementById('policy');
    let eleAlgorithm = document.getElementById('algorithm');
    let eleAK = document.getElementById('ak');
    let eleKeyTime = document.getElementById('keyTime');
    let eleSignature = document.getElementById('signature');
    elePolicy.value = ''; // 来自$data里面的policy
    eleAlgorithm.value = ''; // 来自$data里面的algorithm
    eleAK.value = ''; // 来自$data里面的accessId
    eleKeyTime.value = ''; // 来自$data里面的keyTime
    eleSignature.value = ''; // 来自$data里面的signature

    function change(obj) {
        let uploadDir = ''; // 来自$data里面的dir
        let fname = uploadDir + obj.files[0]['name'];
        console.log(fname);
        eleKey.value = fname;
    }
</script>
</body>
</html>
表单提交到腾讯云(sts)
<!DOCTYPE html>
<html lang="en">
<head>
    <meta charset="UTF-8">
    <title>腾讯云oss upload</title>
</head>
<body>

<input type="file" name="file" id="file"/>
<input type="submit" value="上传文件" id="submit"/>

<!-- 下载https://github.com/tencentyun/cos-js-sdk-v5/blob/master/dist/cos-js-sdk-v5.min.js,并引入cos-js-sdk-v5.min.js -->
<script src="./cos-js-sdk-v5.min.js"></script>

<!-- 详见:https://cloud.tencent.com/document/product/436/11459 -->
<script>
    var cos = new COS({
        // getAuthorization 必选参数
        getAuthorization: function (options, callback) {
            // 异步获取临时密钥
            // 服务端 JS 和 PHP 例子:https://github.com/tencentyun/cos-js-sdk-v5/blob/master/server/
            // 服务端其他语言参考 COS STS SDK :https://github.com/tencentyun/qcloud-cos-sts-sdk
            // STS 详细文档指引看:https://cloud.tencent.com/document/product/436/14048

            // 实例化oss类,获取数据
            // $oss = new oss();
            // $data = $oss->qcloudSts();
            // 服务端响应的数据,示例:
            let data = {
                "expiredTime": 1691382256,
                "expiration": "2023-08-07T04:24:16Z",
                "credentials": {
                    "sessionToken": "",
                    "tmpSecretId": "",
                    "tmpSecretKey": ""
                },
                "requestId": "",
                "startTime": 1691378656
            };

            callback({
                TmpSecretId: data.credentials.tmpSecretId,
                TmpSecretKey: data.credentials.tmpSecretKey,
                SecurityToken: data.credentials.sessionToken,
                // 建议返回服务器时间作为签名的开始时间,避免用户浏览器本地时间偏差过大导致签名错误
                StartTime: data.startTime, // 时间戳,单位秒,如:1580000000
                ExpiredTime: data.expiredTime, // 时间戳,单位秒,如:1580000000
            });

        }
    });

    function handleFileInUploading(file) {
        cos.uploadFile({
            Bucket: '【填写】', /* 填写自己的 bucket,必须字段 */
            Region: '【填写】',     /* 存储桶所在地域,必须字段 */
            Key: file.name,              /* 存储在桶里的对象键(例如:1.jpg,a/b/test.txt,图片.jpg)支持中文,必须字段 */
            Body: file, // 上传文件对象
            SliceSize: 1024 * 1024 * 10,     /* 触发分块上传的阈值,超过5MB使用分块上传,小于5MB使用简单上传。可自行设置,非必须 */
            onProgress: function (progressData) {
                console.log(JSON.stringify(progressData));
            }
        }, function (err, data) {
            if (err) {
                console.log('上传失败', err);
            } else {
                console.log('上传成功');
            }
        });
    }

    /* 选择文件 */
    document.getElementById('submit').onclick = function (e) {
        var file = document.getElementById('file').files[0];
        if (!file) {
            document.getElementById('msg').innerText = '未选择上传文件';
            return;
        }
        handleFileInUploading(file);
    };
</script>
</body>
</html>
参考:
上传策略_使用指南_对象存储 - 七牛开发者中心
上传凭证_使用指南_对象存储 - 七牛开发者中心
如何进行服务端签名直传_对象存储-阿里云帮助中心
如何使用STS以及签名URL临时授权访问OSS资源(PHP)_对象存储-阿里云帮助中心
对象存储 Web 端直传实践-最佳实践-文档中心-腾讯云
对象存储 POST Object-API 文档-文档中心-腾讯云
对象存储 临时密钥生成及使用指引-最佳实践-文档中心-腾讯云文章来源:https://www.toymoban.com/news/detail-628267.html
对象存储 快速入门-SDK 文档-文档中心-腾讯云文章来源地址https://www.toymoban.com/news/detail-628267.html
到了这里,关于使用七牛云、阿里云、腾讯云的对象存储上传文件的文章就介绍完了。如果您还想了解更多内容,请在右上角搜索TOY模板网以前的文章或继续浏览下面的相关文章,希望大家以后多多支持TOY模板网!


